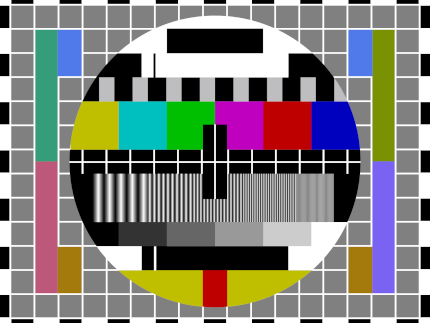
If you get error SDL_GetDesktopDisplayMode_REAL on Macbook M1 CSGO launch, then next instructions is for you.
1. Add launch options in Steam for CSGO:
-w 1440 -h 900 -fullscreen
2. Launch CSGO via Steam
3. Press Ignore or Always Ignore on SDL_GetDesktopDisplayMode_REAL error window
4. Enjoy!
Category Archives: Tutorials
Here comes the sun lalala
Turing Bombe
In 1936, the scientist Alan Turing in his publication “On Computable Numbers, With An Application to Entscheidungsproblem”describes the use of a universal computing machine that could put an end to the problem of decidability in mathematics. As a result, he comes to the conclusion that such a machine would be nothing could solve correctly, if the result of her work would be inverted and looped on itself.It turns out that * ideal * antivirus cannot be created, * ideal * tile layer too, a program that suggests ideal phrases for your crash, etc. Paradox, sir!
However, this universal computing machine can be used to implement any algorithm, which was used by British intelligence, hiring Turing and allowing to create a “Bombe” machine for decrypting German messages during the Second World War.
The following is an example of OOP modeling a single-tape calculator in Dart, based on the original document.
The Turing machine consists of a tape divided into sections, each section contains a symbol, symbols can be read or written. Film class example:
class MapInfiniteTape implements InfiniteTape {
final _map = Map<int, String>();
String read({required int at}) {
return _map[at] ?? "";
}
void write({required String symbol, required int at}) {
_map[at] = symbol;
}
}
There is also a “scanning square”, it can move along the film, read or write information, in modern language – a magnetic head. Magnetic head class example:
class TapeHead {
int _index = 0;
InfiniteTape _infiniteTape;
TapeHead(this._infiniteTape) {}
String next() {
_index += 1;
move(to: _index);
final output = read();
return output;
}
String previous() {
_index -= 1;
move(to: _index);
final output = read();
return output;
}
void move({required int to}) {
this._index = to;
}
String read() {
return _infiniteTape.read(at: this._index);
}
void write(String symbol) {
_infiniteTape.write(symbol: symbol, at: this._index);
}
int index() {
return _index;
}
}
The machine contains “m-configurations” by which it can decide what to do next. In modern parlance, states and state handlers. State handler example:
class FiniteStateControl {
FiniteStateControlDelegate? delegate = null;
void handle({required String symbol}) {
if (symbol == OPCODE_PRINT) {
final argument = delegate?.nextSymbol();
print(argument);
}
else if (symbol == OPCODE_GENERATE_RANDOM_NUMBER_FROM_ZERO_TO_AND_WRITE_AFTER) {
final to = int.tryParse(delegate!.nextSymbol())!;
final value = new Random().nextInt(to);
delegate!.nextSymbol();
delegate!.write(value.toString());
}
else if (symbol == OPCODE_INPUT_TO_NEXT) {
final input = stdin.readLineSync()!;
delegate?.nextSymbol();
delegate?.write(input);
}
else if (symbol == OPCODE_COPY_FROM_TO) {
final currentIndex = delegate!.index();
и т.д.
After that, you need to create “configurations”, in modern language these are operation codes (opcodes), their handlers. Example opcodes:
const OPCODE_STOP = "stop";
const OPCODE_PRINT = "print";
const OPCODE_INCREMENT_NEXT = "increment next";
const OPCODE_DECREMENT_NEXT = "decrement next";
const OPCODE_IF_PREVIOUS_NOT_EQUAL = "if previous not equal";
const OPCODE_MOVE_TO_INDEX = "move to index";
const OPCODE_COPY_FROM_TO = "copy from index to index";
const OPCODE_INPUT_TO_NEXT = "input to next";
const OPCODE_GENERATE_RANDOM_NUMBER_FROM_ZERO_TO_AND_WRITE_AFTER = "generate random number from zero to next and write after";
Don’t forget to create an opcode and a breakpoint handler, otherwise you won’t be able to prove or not prove (sic!) The resolution problem.
Now, using the “mediator” pattern, we connect all the classes in the Turing Machine class, create an instance of the class, record the programs through the tape recorder, load the cassette and you can use it!
For me personally, the question remained interesting, what was primary – the creation of a universal calculator or the proof of the “Entscheidungsproblem” as a result of which, as a by-product, a calculator appeared.
Cassettes
For the sake of entertainment, I recorded several cassette programs for my version of the car.
Hello World
print
hello world
stop
Считаем до 16-ти
increment next
0
if previous not equal
16
copy from index to index
1
8
print
?
move to index
0
else
copy from index to index
1
16
print
?
print
Finished!
stop
The most interesting challenge was writing Quine a program that prints its source code for a single tape machine. For the first 8 hours it seemed to me that this problem could not be solved with such a small number of opcodes, but after only 16 hours it turned out that I was wrong.
Implementation and examples of cassettes, sources below.
Links
https://gitlab.com/demensdeum/turing-machine
References
https://www.astro.puc.cl/~rparra/tools/PAPERS/turing_1936.pdf
https://kpolyakov.spb.ru/prog/turing.htm
https://www.youtube.com/watch?v=dNRDvLACg5Q
https://www.youtube.com/watch?v=jP3ceURvIYc
https://www.youtube.com/watch?v=9QCJj5QzETI
https://www.youtube.com/watch?v=HeQX2HjkcNo&t=0s
Writing stuff in Assembly for Sega Genesis #5
In this post I will describe the process of reading the joystick, changing the position of the sprite, horizontal flip, the Sega Genesis emulator and potentially the console itself.
Reading of clicks, processing of “events” of the shogi joystick is carried out according to the following scheme:
- Request a combination of bits of pressed buttons
- Reading the bits of pressed buttons
- Processing at the level of game logic
To move the skeleton sprite, we need to store the variables of the current position.
RAM
The variables of the game logic are stored in RAM, so far people have not come up with anything better. Let’s declare the addresses of the variables, change the rendering code:
skeletonXpos = $FF0000
skeletonYpos = $FF0002
frameCounter = $FF0004
skeletonHorizontalFlip = $FF0006
move.w #$0100,skeletonXpos
move.w #$0100,skeletonYpos
move.w #$0001,skeletonHorizontalFlip
FillSpriteTable:
move.l #$70000003,vdp_control_port
move.w skeletonYpos,vdp_data_port
move.w #$0F00,vdp_data_port
move.w skeletonHorizontalFlip,vdp_data_port
move.w skeletonXpos,vdp_data_port
As you can see, the address available for work starts with 0xFF0000, and ends at 0xFFFFFF, in total we have 64 KB of memory available. Skeleton positions are declared at skeletonXpos, skeletonYpos, horizontal flip at skeletonHorizontalFlip.
Joypad
By analogy with VDP, work with joypads occurs through two ports separately – the control port and the data port, for the first it is 0xA10009 and 0xA10003 so-but. When working with a joypad, there is one interesting feature – first you need to request a combination of buttons for polling, and then, after waiting for the update via the bus, read the necessary clicks. For the C / B buttons and the cross, this is 0x40, an example is below:
ReadJoypad:
move.b #$40,joypad_one_control_port; C/B/Dpad
nop ; bus sync
nop ; bus sync
move.b joypad_one_data_port,d2
rts
In register d2, the state of the buttons pressed, or not pressed, in general, what was requested through the date port, will remain. After that, go to the Motorola 68000 register viewer of your favorite emulator, see what the d2 register is, depending on the keystrokes. In a smart way, you can find out in the manual, but we do not believe a word. Further processing of pressed buttons in register d2
HandleJoypad:
cmp #$FFFFFF7B,d2; handle left
beq MoveLeft
cmp #$FFFFFF77,d2; handle right
beq MoveRight
cmp #$FFFFFF7E,d2; handle up
beq MoveUp
cmp #$FFFFFF7D,d2; handle down
beq MoveDown
rts
Of course, you need to check individual bits, not whole words, but for now it will do. Now the simplest thing is left – to write handlers for all events of movement in 4 directions. To do this, we change the variables in RAM, and start the repainting procedure.
Example for moving left + changing horizontal flip:
MoveLeft:
move.w skeletonXpos,d0
sub.w #1,d0
move.w d0,skeletonXpos
move.w #$0801,skeletonHorizontalFlip
jmp FillSpriteTable
After adding all the handlers and assemblies, you will see how the skeleton moves and rotates around the screen, but too fast, faster than Sonic the hedgehog itself.
Not so fast!
To slow down the speed of the game loop, there are several techniques, I chose the simplest and not affecting work with external ports – counting a digit through a register until it becomes zero.
An example of a slowing loop and a game loop:
StartWaitFrame:
move.w #512,frameCounter
WaitFrame:
move.w frameCounter,d0
sub.w #1,d0
move.w d0,frameCounter
dbra d0,WaitFrame
GameLoop:
jsr ReadJoypad
jsr HandleJoypad
jmp GameLoop
After that, the skeleton runs slower, which is required. As far as I know, the most common variant of “slowing down” is counting the vertical sync flag, you can count how many times the screen has been rendered, thus binding to a specific fps.
Links
https://gitlab.com/demensdeum/segagenesissamples/-/blob/main/8Joypad/vasm/main.asm
References
https://www.chibiakumas.com/68000/platform2.php
https://huguesjohnson.com/programming/genesis/tiles-sprites/
Writing stuff in Assembly for Sega Genesis #4
In this post I will describe how to draw sprites using the Sega Genesis VDP emulator.
The process for rendering sprites is very similar to rendering tiles:
- Loading colors into CRAM
- Upload parts of 8×8 sprites to VRAM
- Filling the Sprite Table in VRAM
For example, let’s take a skeleton sprite with a sword 32×32 pixels
Skeleton Guy [Animated] by Disthorn
CRAM
Let’s use ImaGenesis to convert it to CRAM colors and VRAM patterns for assembler. After that we get two files in asm format, then we rewrite the colors to the word size, and the tiles must be put in the correct order for rendering.
Interesting information: you can switch the VDP auto-increment through register 0xF to word size, this will remove the address increment from the CRAM color fill code.
VRAM
The shogi manula has the correct tile order for large sprites, but we’re smarter, so we’ll take the indexes from the blog ChibiAkumas , let’s start counting from index 0:
0 4 8 12
1 5 9 13
2 6 10 14
3 7 11 15
Why is everyone upside down? And what do you want, because the prefix is Japanese! It could have been from right to left!
Let’s manually change the order in the sprite asm file:
Sprite:
dc.l $11111111 ; Tile #0
dc.l $11111111
dc.l $11111111
dc.l $11111111
dc.l $11111111
dc.l $11111111
dc.l $11111111
dc.l $11111111
dc.l $11111111 ; Tile #4
dc.l $11111111
dc.l $11111111
dc.l $11111111
dc.l $11111111
dc.l $11111111
dc.l $11111111
dc.l $11111111
dc.l $11111111 ; Tile #8
dc.l $11111111
dc.l $11111111
dc.l $11111111
dc.l $11111111
dc.l $11111122
dc.l $11111122
dc.l $11111166
dc.l $11111166 ; Tile #12
dc.l $11111166
dc.l $11111166
и т.д.
Load the sprite like regular tiles / patterns:
SpriteVRAM:
lea Sprite,a0
move.l #$40200000,vdp_control_port; write to VRAM command
move.w #128,d0 ; (16*8 rows of sprite) counter
SpriteVRAMLoop:
move.l (a0)+,vdp_data_port;
dbra d0,SpriteVRAMLoop
To draw the sprite, it remains to fill the Sprite Table
Sprite Table
The sprite table is filled in VRAM, the address of its location is put in the VDP register 0x05, the address is again tricky, you can see it in the manual, an example for the F000 address:
dc.b $78 ; 0x05: Sprite table at VRAM 0xF000 (bits 0-6 = bits 9-15)
Ok, now let’s write our sprite to the table. To do this, you need to fill in the data “structure” consisting of four words. You can find a binary description of the structure in the manual. Personally, I made it easier, the sprite sheet can be edited manually in the Exodus emulator.
The structure parameters are obvious from the name, for example XPos, YPos – coordinates, Tiles – starting tile number for drawing, HSize, VSize – sprite sizes by adding 8×8 parts, HFlip, VFlip – hardware horizontal and vertical sprite rotations.
It is very important to remember that sprites can be off-screen, this is the correct behavior. unloading off-screen sprites from memory is quite a resource-intensive task.
After filling in the data in the emulator, they need to be copied from VRAM at 0xF000, Exodus also supports this feature.
By analogy with drawing tiles, first we turn to the VDP control port to start recording at 0xF000, then write the structure to the data port.
Let me remind you that the description of VRAM addressing can be read in the manual, or in the blog Nameless Algorithm .
In short, VDP addressing works like this:
[..DC BA98 7654 3210 …. …. …. ..FE]
Where hex is the position of the bit in the desired address. The first two bits are the type of the requested command, for example 01 – write to VRAM. Then for the address 0XF000 it turns out:
0111 0000 0000 0000 0000 0000 0000 0011 (70000003)
As a result, we get the code:
SpriteTable:
move.l #$70000003,vdp_control_port
move.w #$0100,vdp_data_port
move.w #$0F00,vdp_data_port
move.w #$0001,vdp_data_port
move.w #$0100,vdp_data_port
After that, the skeleton sprite will be displayed at coordinates 256, 256. Cool yes?
Links
https://gitlab.com/demensdeum/segagenesissamples/-/tree/main/7Sprite/vasm
https://opengameart.org/content/skeleton-guy-animated
References
https://namelessalgorithm.com/genesis/blog/vdp/
https://www.chibiakumas.com/68000/platform3.php#LessonP27
https://plutiedev.com/sprites
Writing stuff in Assembly for Sega Genesis #3
In this post I will describe how to display an image from tiles on the Sega Genesis emulator using assembler.
The splash picture of Demens Deum in Exodus emulator will look like this:
The process of outputting a PNG image using tiles is done in steps:
- Reducing the image to fit the Sega screen
- Convert PNG to assembler data-code, with division into colors and tiles
- Loading the color picker into CRAM
- Loading tiles / patterns into VRAM
- Loading tile indices at Plane A / B addresses in VRAM
You can reduce the image to fit Sega’s screen using your favorite graphics editor, for example Blender.
Convert PNG
To convert images, you can use the ImaGenesis tool, to work under wine you need Visual Basic 6 libraries, they can be installed using winetricks (winetricks vb6run), or RICHTX32.OCX can be downloaded from the Internet and put into the application folder for correct operation. < / p>
In ImaGenesis, you need to select a 4-bit chroma, export colors and tiles in two assembly files. Next, in the file with colors, you need to put each color in a word (2 bytes), for this you use the dc.w opcode.
For example CRAM splash screen:
Colors:
dc.w $0000
dc.w $0000
dc.w $0222
dc.w $000A
dc.w $0226
dc.w $000C
dc.w $0220
dc.w $08AA
dc.w $0446
dc.w $0EEE
dc.w $0244
dc.w $0668
dc.w $0688
dc.w $08AC
dc.w $0200
dc.w $0000
Leave the tile file as it is, it already contains the correct format for loading. An example of a part of a tile file:
Tiles:
dc.l $11111111 ; Tile #0
dc.l $11111111
dc.l $11111111
dc.l $11111111
dc.l $11111111
dc.l $11111111
dc.l $11111111
dc.l $11111111
dc.l $11111111 ; Tile #1
dc.l $11111111
dc.l $11111111
dc.l $11111111
dc.l $11111111
dc.l $11111111
dc.l $11111111
dc.l $11111111
As you can see from the example above, the tiles are an 8×8 grid of CRAM color palette indices.
Colors in CRAM
Loading into CRAM is performed by setting the color load command at a specific CRAM address to the vdp control port. The command format is described in the Sega Genesis Software Manual (1989), I just add that it is enough to add to the address 0x20000 to go to the next color.
Next, you need to load the color into the data port (vdp data); The easiest way to understand loading is with the example below:
VDPCRAMFillLoop:
lea Colors,a0 ; pointer to Colors label
move.l #15,d7; colors counter
VDPCRAMFillLoopStep:
move.l d0,vdp_control_port ;
move.w (a0)+,d1;
move.w d1,(vdp_data_port);
add.l #$20000,d0 ; increment CRAM address
dbra d7,VDPCRAMFillLoopStep
Tiles in VRAM
Next comes the loading of tiles / patterns into VRAM. To do this, select an address in VRAM, for example 0x00000000. By analogy with CRAM, we address the VDP control port with a command to write to VRAM and a starting address.
After that, you can upload longwords to VRAM, compared to CRAM, you do not need to specify an address for each longword, since there is a VRAM auto-increment mode. You can enable it using the register flag VDP 0x0F (dc.b $ 02)
TilesVRAM:
lea Tiles,a0
move.l #$40200000,vdp_control_port; write to VRAM command
move.w #6136,d0 ; (767 tiles * 8 rows) counter
TilesVRAMLoop:
move.l (a0)+,vdp_data_port;
dbra d0,TilesVRAMLoop
Tile indices in Plane A / B
Now we have to fill the screen with tiles by their index. For this, VRAM is filled at the Plane A / B address, which is put in the VDP registers (0x02, 0x04). For more information about tricky addressing, see Sega’s manual, in my example the VRAM address is 0xC000, let’s unload the indexes there.
Your picture will fill the VRAM off-screen space anyway, so after rendering the screen space, your render should stop rendering and resume when the cursor moves to a new line. There are many ways to implement this set, I used the simplest version of counting on two registers of the image width counter, the cursor position counter.
Example code:
FillBackground:
move.w #0,d0 ; column index
move.w #1,d1 ; tile index
move.l #$40000003,(vdp_control_port) ; initial drawing location
move.l #2500,d7 ; how many tiles to draw (entire screen ~2500)
imageWidth = 31
screenWidth = 64
FillBackgroundStep:
cmp.w #imageWidth,d0
ble.w FillBackgroundStepFill
FillBackgroundStep2:
cmp.w #imageWidth,d0
bgt.w FillBackgroundStepSkip
FillBackgroundStep3:
add #1,d0
cmp.w #screenWidth,d0
bge.w FillBackgroundStepNewRow
FillBackgroundStep4:
dbra d7,FillBackgroundStep ; loop to next tile
Stuck:
nop
jmp Stuck
FillBackgroundStepNewRow:
move.w #0,d0
jmp FillBackgroundStep4
FillBackgroundStepFill:
move.w d1,(vdp_data_port) ; copy the pattern to VPD
add #1,d1
jmp FillBackgroundStep2
FillBackgroundStepSkip:
move.w #0,(vdp_data_port) ; copy the pattern to VPD
jmp FillBackgroundStep3
After that, it remains only to collect rum using vasm, launching the simulator, and see the picture.
Debug
Not everything will work out right away, so I would like to recommend the following Exodus emulator tools:
- m68k processor debugger
- Changing the number of cycles of the m68k processor (for slow-mo mode in debugger)
- Viewers CRAM, VRAM, Plane A / B
- Carefully read the documentation for m68k, used opcodes (not everything is as obvious as it seems at first glance)
- See examples of code / game disassembly on github
- Implement processor execution sabrutines, process them
Pointers to processor execution sabrutines are put in the title of the rum, there is also a project on GitHub with an interactive runtime debugger for Sega, called genesis-debugger.
Use all available tools, nice old school coding and may Blast Processing come with you!
Links
https://gitlab.com/demensdeum/segagenesissamples/-/tree/main/6Image/vasm
http://devster.monkeeh.com/sega/imagenesis/
https://github.com/flamewing/genesis-debugger
Sources
https://www.chibiakumas.com/68000/helloworld .php # LessonH5
https://huguesjohnson.com/programming/genesis/tiles-sprites/
Writing stuff in Assembly for Sega Genesis #2
In this post I will describe how to load colors into Sega’s palette in assembler.
The final result in the Exodus emulator will look like this:
To make the process easier, find a pdf on the Internet called Genesis Software Manual (1989) , it describes the whole process in great detail, in fact, this note is a commentary on the original manual.
In order to write colors to the VDP chip of the Sega emulator, you need to do the following things:
- Disable TMSS protection system
- Write correct parameters to VDP registers
- Write the desired colors to CRAM
For the assembly, we will use vasmm68k_mot and our favorite text editor, for example echo. The assembly is carried out by the command:
vasmm68k_mot -Fbin minimal.asm -o minimal.gen
VDP Ports
The VDP chip communicates with the M68K through two ports in RAM – the control port and the data port.
Essentially:
- VDP registers can be set through the control port.
- Also, the control port is a pointer to that part of the VDP (VRAM, CRAM, VSRAM etc.) through which data is transmitted through the data port
Interesting information: Sega retained compatibility with Master System games, as indicated by MODE 4 from the developer’s manual, in it VDP switches to Master System mode.
Let’s declare ports of control and data:
vdp_control_port = $ C00004
vdp_data_port = $ C00000
Disable TMSS protection system
Protection against unlicensed games TMSS has several unlocking options, for example, it is required that the string “SEGA” be in the A1 address register before accessing the VDP.
MOVE.B A1, D0; We get the version of the hardware with the number from A1 to register D0
ANDI.B 0x0F, D0; We take the last bits by the mask so as not to break anything
BEQ.B SkipTmss; If the version is 0, most likely it is a Japanese woman or an emulator without TMSS enabled, then go to the SkipTmss sabrutina
MOVE.L "SEGA" A1; Or write the string SEGA to A1
Write correct parameters to VDP registers
Why set the correct parameters in the VDP registers at all? The idea is that VDP can do a lot, so before rendering, you need to initialize it with the necessary features, otherwise it just won’t understand what they want from it.
Each register is responsible for a specific setting / mode of operation. The Segov manual contains all the bits / flags for each of the 24 registers, a description of the registers themselves.
Let’s take ready-made parameters with comments from the bigevilcorporation blog:
VDPRegisters:
VDPReg0: dc.b $ 14; 0: H interrupt on, palettes on
VDPReg1: dc.b $ 74; 1: V interrupt on, display on, DMA on, Genesis mode on
VDPReg2: dc.b $ 30; 2: Pattern table for Scroll Plane A at VRAM $ C000
; (bits 3-5 = bits 13-15)
VDPReg3: dc.b $ 00; 3: Pattern table for Window Plane at VRAM $ 0000
; (disabled) (bits 1-5 = bits 11-15)
VDPReg4: dc.b $ 07; 4: Pattern table for Scroll Plane B at VRAM $ E000
; (bits 0-2 = bits 11-15)
VDPReg5: dc.b $ 78; 5: Sprite table at VRAM $ F000 (bits 0-6 = bits 9-15)
VDPReg6: dc.b $ 00; 6: Unused
VDPReg7: dc.b $ 00; 7: Background color - bits 0-3 = color,
; bits 4-5 = palette
VDPReg8: dc.b $ 00; 8: Unused
VDPReg9: dc.b $ 00; 9: Unused
VDPRegA: dc.b $ FF; 10: Frequency of Horiz. interrupt in Rasters
; (number of lines traveled by the beam)
VDPRegB: dc.b $ 00; 11: External interrupts off, V scroll fullscreen,
; H scroll fullscreen
VDPRegC: dc.b $ 81; 12: Shadows and highlights off, interlace off,
; H40 mode (320 x 224 screen res)
VDPRegD: dc.b $ 3F; 13: Horiz. scroll table at VRAM $ FC00 (bits 0-5)
VDPRegE: dc.b $ 00; 14: Unused
VDPRegF: dc.b $ 02; 15: Autoincrement 2 bytes
VDPReg10: dc.b $ 01; 16: Vert. scroll 32, Horiz. scroll 64
VDPReg11: dc.b $ 00; 17: Window Plane X pos 0 left
; (pos in bits 0-4, left / right in bit 7)
VDPReg12: dc.b $ 00; 18: Window Plane Y pos 0 up
; (pos in bits 0-4, up / down in bit 7)
VDPReg13: dc.b $ FF; 19: DMA length lo byte
VDPReg14: dc.b $ FF; 20: DMA length hi byte
VDPReg15: dc.b $ 00; 21: DMA source address lo byte
VDPReg16: dc.b $ 00; 22: DMA source address mid byte
VDPReg17: dc.b $ 80; 23: DMA source address hi byte,
; memory-to-VRAM mode (bits 6-7)
Ok, now let’s go to the control port and write all the flags to the VDP registers:
PrepareToFillVDPRegisters:
move.l # VDPRegisters, a0; We write the address of the parameter table in A1
move.l # $ 18, d0; Cycle counter - 24 = 18 (HEX) in D0
move.l # $ 00008000, d1; Preparing a command to write to the VDP register at index 0, according to the manual - 1000 0000 0000 0000 (BIN) = 8000 (HEX)
FillInitialStateForVDPRegistersLoop:
move.b (a0) +, d1; We write in D1 the total value of the VDP register from the parameter table, for sending to the VDP control port
move.w d1, vdp_control_port; We send the final command + value from D1 to the VDP control port
add.w # $ 0100, d1; Raise the VDP register index by 1 (binary addition +1 to the index according to Sega's manual)
dbra d0, FillInitialStateForVDPRegistersLoop; Decrease the register counter, continue the loop if necessary
The most difficult thing is to read the manual and understand in what format the data is fed to the control port, experienced developers will figure it out right away, but inexperienced ones … They will think a little and understand that the syntax for writing registers is as follows:
0B100 (5 bits – register index) (8 bits / byte – value)
0B1000001001000101 – write to the VDP register 2 (00010), the value of the flags 01000101.
Write the desired colors to CRAM
Next, we go to write two colors into the color memory CRAM (Color RAM). To do this, write to the control port a command to access the color at index 0 in CRAM and send the color to the date port. Everyone!
Example:
VDPControlPortEnableCRAMWriteAccessGreenColorAtIndex0:
move.l # $ C0000000, vdp_control_port; Access to color at index 0 in CRAM through the control port
move.w # 228, d0; Color in D0
move.w d0, vdp_data_port; Sending color to data port
After building and running in the emulator in Exodus, you should have the screen filled with color 228.
Let’s fill with another color, last byte 127.
VDPControlPortEnableCRAMWriteAccessGreenColorAtIndex127:
move.l # $ C07f0000, vdp_control_port; Access to color by byte 127 in CRAM through the control port
move.w # 69, d0; Color in D0
move.w d0, vdp_data_port; Sending color to data port
Links
https://gitlab.com/demensdeum/segagenesissamples
https://www.exodusemulator.com/
http://sun.hasenbraten.de/vasm/
https://tomeko.net/online_tools/bin_to_32bit_hex.php?lang= en
Sources
https://namelessalgorithm.com/genesis/blog/genesis/ a>
https://plutiedev.com/vdp-commands
https://huguesjohnson.com/programming/genesis/palettes/ < br />
https://www.chibiakumas.com/68000/helloworld.php# LessonH5
https: / /blog.bigevilcorporation.co.uk/2012/03/09/sega-megadrive-3-awaking-the-beast/
Writing stuff in Assembly for Sega Genesis #1
The first article dedicated to writing games for the classic Sega Genesis console in Motorola 68000 Assembler.
Let’s write the simplest endless loop for Sega. For this we need: an assembler, an emulator with a disassembler, a favorite text editor, a basic understanding of the structure of the Sega rom.
For development, I use my own Gen68KryBaby assembler/disassembler:
https://gitlab.com/demensdeum/gen68krybaby/
The tool is developed in Python 3, for assembly, a file with the extension .asm or .gen68KryBabyDisasm is supplied to the input, the output is a file with the extension .gen68KryBabyAsm.bin, which can be run in the emulator or on a real console (carefully, step away, the console may explode!)
Roms disassembling is also supported, for this you need to put a rom file to the input, without the .asm or .gen68KryBabyDisasm extensions. Opcode support will increase or decrease depending on my interest in the topic, the participation of contributors.
Structure
The Sega rom header occupies the first 512 bytes. It contains information about the game, name, supported peripherals, check sum, and other system flags. I suppose that without a title, the prefix will not even look at the rom, thinking that it is incorrect, like “what are you giving me here?”
After the header comes the Reset subroutine, from which the m68K processor starts its work. Well, it’s just a small matter – to find the opcodes, namely, the execution of nothing (!) And the transition to the subroutine at the address in memory. Googling, you can find the NOP opcode that does nothing and the JSR opcode that performs an unconditional jump to the argument address, that is, it just moves the carriage to where we ask for it, without any whims.
Putting It All Together
One of the games in the Beta version was the donor of the title for the rom, at the moment it is recorded in the form of hex data.
ROM HEADER:
00 ff 2b 52 00 00 02 00 00 00 49 90 00 00 49 90 00 00 49 90 00 ... etc.
The program code so-but is a declaration of the Reset / EntryPoint subroutine in 512 (0x200) bytes, NOP, carriage return to 0x00000200, so we get an infinite loop.
Assembly code of Subroutine Reset / EntryPoint:
SUBROUTINE_EntryPoint:
NOP
NOP
NOP
NOP
NOP
JSR 0x00000200
Complete example along with rom title:
https://gitlab.com/demensdeum/segagenesissamples/-/blob/main/1InfiniteLoop/1infiniteloop.asm
Next, assembly:
python3 gen68krybaby.py 1infiniteloop.asm
Run rom 1infiniteloop.asm.gen68KryBabyAsm.bin in debugger mode of Exodus / Gens emulator, see that m68K correctly reads NOP, and endlessly jumps to EntryPoint at 0x200 on JSR
Sonic should be showing V here, but he left for Wacken .
Links
https://gitlab.com/demensdeum/gen68krybaby/ p>
https://gitlab.com/demensdeum/segagenesissamples
https://www.exodusemulator.com/downloads/release-archive
Sources
ROM Hacking Demo – Genesis and SNES games in 480i < / p>
https://www.chibiakumas.com/68000/genesis.php
https://plutiedev.com/rom-header
https: //blog.bigevilcorporation.co.uk/2012/02/28/sega-megadrive-1-getting-started/
https : //opensource.apple.com/source/cctools/cctools-836/as/m68k-opcode.h.auto.html
How I didn’t hit the guy on the pole or the story of amazing ingenuity
In this post I will write about the importance of architectural decisions in development, application support, in a team development environment.
Self-Operating Napkin – Rube Goldberg
During my youth, I worked on an app for ordering a taxi. In the program, you could choose a pickup point, a drop point, calculate the cost of the trip, the type of tariff, and, in fact, order a taxi. I got the application at the last stage of the pre-launch, after adding several fixes, the application was released in the AppStore. Already at that stage, the whole team understood that it was implemented very poorly, design patterns were not used, all components of the system were tightly connected, in general, it could be written into one large continuous class (God object), nothing would have changed, so how classes mixed their boundaries of responsibility and, in their mass, overlapped each other in a dead cohesion. Later, the management decided to write the application from scratch, using the correct architecture, which was done and the final product was implemented by several dozen B2B clients.
However, I will describe a curious incident from past architecture, from which I sometimes wake up in a cold sweat in the middle of the night, or suddenly remember in the middle of the day and start laughing hysterically. The thing is that I could not hit the guy on the pole the first time, and this brought down most of the application, but first things first.
It was an ordinary working day, one of the customers received a task to slightly modify the application design – it is banal to move a few pixels up the icon in the center of the screen on the pickup address selection screen. Well, having professionally evaluated the task in 10 minutes, I raised the icon 20 pixels up, suspecting nothing at all, I decided to check the taxi order.
What? Does the app no longer show the order button? How did it happen?
I could not believe my eyes, after raising the icon by 20 pixels, the application stopped showing the continue ordering button. Rolling back the change, I saw the button again. Something was wrong here. After spending 20 minutes in the debugger, I got a little tired of unwinding spaghetti from calls to overlapping classes, but I found that * moving the picture really changes the logic of the application *
It was all about the icon in the center – the man on the pole, when he moved the map, he jumped to animate the camera movement, this animation was followed by the disappearance of the button below. Apparently the program thought that the man shifted by 20 pixels was in a jump, so, according to internal logic, it hid the confirmation button.
How can this happen? Does * the state * of the screen depend not on the pattern of the state machine, but on the * representation * of the guy’s position on the pole?
Everything turned out to be so, every time the map was drawn, the application * visually pick * in the middle of the screen and checked what was there, if there was a man on a pole, then this means that the animation of the map shift was over and the button had to be shown. In the case when the man is not there, it means that the map is shifting, and the button must be hidden.
In the example above, everything is fine, firstly, this is an example of the Goldberg Machine (abstruse machines), secondly, an example of the developer’s unwillingness to somehow interact with other developers in the team (try to figure it out without me), thirdly, you can list all the problems by SOLID, patterns (code smell), MVC violation, and more.
Try not to do this, develop in all possible directions, help your colleagues in their work. Happy new year everyone)
Links
https://en.wikipedia.org/wiki/Rube_Goldberg_machine
https://en.wikipedia.org/wiki/SOLID
https://refactoring.guru/refactoring/smells
https://en.wikipedia.org/wiki/Model-view-controller
https://refactoring.guru/design-patterns/state