Author: demensdeum

  • Porting Surreal Engine C++ to WebAssembly

    In this post I will describe how I ported the Surreal Engine game engine to WebAssembly.
    https://demensdeum.com/demos/SurrealEngine/”
    Surreal Engine – a game engine that implements most of the functionality of the Unreal Engine 1, famous games on this engine – Unreal Tournament 99, Unreal, Deus Ex, Undying. It refers to classic engines that worked primarily in a single-threaded execution environment.
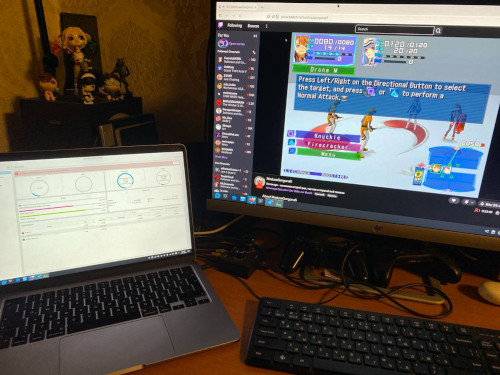
    I originally had the idea of ​​taking on a project that I couldn’t complete in any reasonable time frame, thus showing my Twitch followers that there are projects that even I can’t do. During my first stream, I suddenly realized that the task of porting Surreal Engine C++ to WebAssembly using Emscripten was feasible.

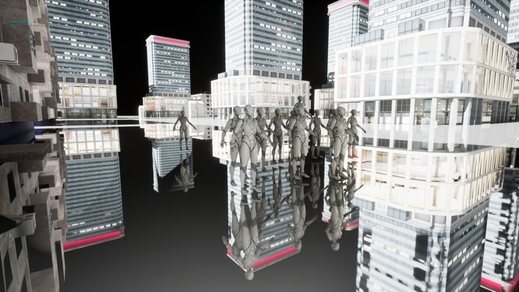
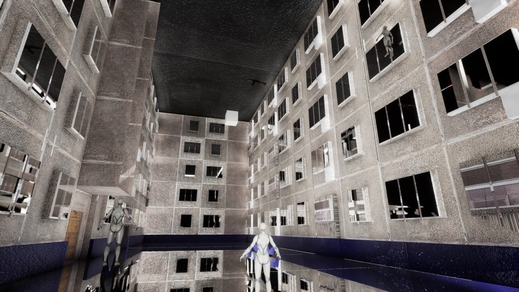
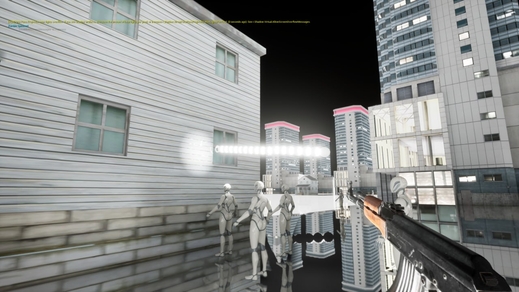
    A month later, I can demonstrate my fork and engine assembly on WebAssembly:
    https://demensdeum.com/demos/SurrealEngine/
    Control, as in the original, is carried out using the keyboard arrows. Next, I plan to adapt it for mobile control (tachi), adding correct lighting and other graphic features of the Unreal Tournament 99 render.

    Where to start?

    The first thing I want to say is that any project can be ported from C++ to WebAssembly using Emscripten, the only question is how complete the functionality will be. Choose a project whose library ports are already available for Emscripten; in the case of Surreal Engine, you are very lucky, because the engine uses the SDL 2, OpenAL – libraries. they are both ported to Emscripten. However, Vulkan is used as a graphics API, which is currently not available for HTML5, work is underway to implement WebGPU, but it is also in the draft stage, and it is also unknown how simple the further port from Vulkan to WebGPU will be, after it is fully standardized. Therefore, I had to write my own basic OpenGL-ES / WebGL renderer for Surreal Engine.

    Building the project

    Build system in Surreal Engine – CMake, which also simplifies porting, because Emscripten provides its native builders – emcmake, emmake.
    The Surreal Engine port was based on the code of my latest game in WebGL/OpenGL ES and C++ called Death-Mask, because of this the development was much simpler, I had all the necessary build flags with me and code examples.
    One of the most important points in CMakeLists.txt is the build flags for Emscripten, below is an example from the project file:

    set(CMAKE_CXX_FLAGS "-s MIN_WEBGL_VERSION=2 
    -s MAX_WEBGL_VERSION=2 
    -s EXCEPTION_DEBUG 
    -fexceptions 
    --preload-file UnrealTournament/ 
    --preload-file SurrealEngine.pk3 
    --bind 
    --use-preload-plugins 
    -Wall 
    -Wextra 
    -Werror=return-type 
    -s USE_SDL=2 
    -s ASSERTIONS=1 
    -w 
    -g4 
    -s DISABLE_EXCEPTION_CATCHING=0 
    -O3 
    --no-heap-copy 
    -s ALLOW_MEMORY_GROWTH=1 
    -s EXIT_RUNTIME=1")
    

    The build script itself:

    clear
    emmake make -j 16
    cp SurrealEngine.data /srv/http/SurrealEngine/SurrealEngine.data
    cp SurrealEngine.js /srv/http/SurrealEngine/SurrealEngine.js
    cp SurrealEngine.wasm /srv/http/SurrealEngine/SurrealEngine.wasm
    cp ../buildScripts/Emscripten/index.html /srv/http/SurrealEngine/index.html
    

    Next, let’s prepare index.html, which includes the project file system preloader. To upload to the web, I used Unreal Tournament Demo version 338. As you can see from the CMake file, the unpacked game folder was added to the build directory and linked as a preload-file for Emscripten.

    Main code changes

    Then we had to change the game loop of the game, you can’t run an endless loop, this leads to the browser freezing, instead you need to use emscripten_set_main_loop, I wrote about this feature in my 2017 note “Porting SDL C++ games to HTML5 (Emscripten)
    We change the code for exiting the while loop to if, then we display the main class of the game engine, which contains the game loop, in the global scope, and write a global function that will call the game loop step from the global object:

    #if __EMSCRIPTEN__
    #include <emscripten.h>
    Engine *EMSCRIPTEN_GLOBAL_GAME_ENGINE = nullptr;
    void emscripten_game_loop_step() {
    	EMSCRIPTEN_GLOBAL_GAME_ENGINE->Run();
    }
    #endif
    

    After this, you need to make sure that there are no background threads in the application; if there are, then get ready to rewrite them for single-threaded execution, or use the phtread library in Emscripten.
    The background thread in Surreal Engine is used to play music, data comes from the main engine thread about the current track, the need to play music, or its absence, then the background thread receives a new state via a mutex and starts playing new music, or pauses. The background thread is also used to buffer music during playback.
    My attempts to build Surreal Engine for Emscripten with pthread were unsuccessful, because the SDL2 and OpenAL ports were built without pthread support, and I didn’t want to rebuild them for the sake of music. Therefore, I transferred the functionality of the background music stream to single-threaded execution using a loop. By removing pthread calls from the C++ code, I moved the buffering and music playback to the main thread, so that there would be no delays, I increased the buffer by a few seconds.
    Next, I will describe specific implementations of graphics and sound.

    Vulkan is not supported!

    Yes, Vulkan is not supported in HTML5, although all the marketing brochures present cross-platform and broad platform support as the main advantage of Vulkan. For this reason, I had to write my own basic graphics renderer for a simplified OpenGL type – ES, it is used on mobile devices, sometimes it does not contain the fashionable features of modern OpenGL, but it ports very well to WebGL, which is exactly what Emscripten implements. Writing basic tile rendering, bsp rendering, for the simplest GUI display, and rendering models + maps was completed in two weeks. This was perhaps the most difficult part of the project. There is still a lot of work ahead to implement the full functionality of Surreal Engine rendering, so any help from readers is welcome in the form of code and pull requests.

    OpenAL supported!

    The big luck is that Surreal Engine uses OpenAL for audio output. Having written a simple hello world in OpenAL and assembled it in WebAssembly using Emscripten, it became clear to me how simple everything was, and I set off to port the sound.
    After several hours of debugging, it became obvious that the OpenAL implementation of Emscripten has several bugs, for example, when initializing reading the number of mono channels, the method returned an infinite number, and after trying to initialize a vector of infinite size, C++ crashes with the exception vector::length_error.
    We managed to get around this by hardcoding the number of mono channels to 2048:

    		alcGetIntegerv(alDevice, ALC_MONO_SOURCES, 1, &monoSources);
    		alcGetIntegerv(alDevice, ALC_STEREO_SOURCES, 1, &stereoSources);
    
    #if __EMSCRIPTEN__
    		monoSources = 2048; // for some reason Emscripten's OpenAL gives infinite monoSources count, bug?
    #endif


    Is there a network?

    Surreal Engine does not currently support online play, play with bots is supported, but we need someone to write AI for these bots. Theoretically, you can implement a network game on WebAssembly/Emscripten using Websockets.

    Conclusion

    In conclusion, I would like to say that the porting of Surreal Engine turned out to be quite smooth due to the use of libraries for which there are Emscripten ports, as well as my past experience in implementing a game in C++ for WebAssembly on Emscripten. Below are links to sources of knowledge and repositories on the topic.
    M-M-M-MONSTER KILL!
    Also, if you want to help the project, preferably with WebGL/OpenGL ES rendering code, then write to me in Telegram:
    https://t.me/demenscave

    Links

    https://demensdeum.com/demos/SurrealEngine/

    https://github.com/demensdeum/SurrealEngine-Emscripten

    https://github.com/dpjudas/SurrealEngine

  • Port forwarding between clients via Chisel: a stripped-down tunnel without L3

    When two devices are behind NAT or strict firewalls and cannot “see” each other directly, a VPN seems to be the standard solution. But a full-fledged L3 tunnel (like WireGuard or OpenVPN) is often redundant: it requires root rights, setting up virtual interfaces, and can conflict with existing routes.

    In such cases, it is convenient to use Chisel – a TCP/UDP tunnel that runs on top of HTTP and uses WebSockets for data transfer. In this note I will show how to “forward” a port from one client to another through an intermediate server.

    How does it work?

    Imagine the situation: you have Client A (for example, your home server), Client B (your work laptop) and a VPS with a public IP address. Clients A and B can access the VPS, but not each other.

    The forwarding scheme will look like this:
    1. Client A connects to the VPS and opens a “reverse” port on the server. Now everything that comes to port X of the server goes to port Y of Client A.
    2. Client B connects to the VPS and forwards port Z from its local machine to port X of the server.
    3. As a result, Client B accesses localhost:Z and ends up on Client A:Y.

    This approach is one of the solutions in cases where communication with a VPS does not implement an L3 layer or there is no ability to configure routing between clients. We work exclusively at the application and port level.

    Step 1: Start the server

    On your VPS, just run Chisel in server mode. The --reverse flag is required to allow clients to open ports on the server side.

    chisel server --port 8080 --reverse
    

    Step 2: Connecting Client A (Source)

    Let’s say Client A wants to open access to his local web server on port 3000. He connects to the VPS and says: “reserve port 2000 on the server and forward it to me to 3000.”

    chisel client vps-ip:8080 R:2000:127.0.0.1:3000
    

    Now port 2000 on the VPS (on the loopback interface) leads to Client A.

    Step 3: Connecting Client B (Consumer)

    Now Client B wants to access this resource. It connects to the same VPS and forwards its local port 8080 to port 2000 of the server.

    chisel client vps-ip:8080 8080:127.0.0.1:2000
    

    Ready! Now, when you open http://localhost:8080 on Client B, you will see the service running on Client A.

    Safety and nuances

    Chisel supports authentication via the --auth flag, which is highly recommended when working through public servers. You can also use TLS certificates to encrypt traffic.

    The main advantage of this approach is that there is no need for TUN/TAP devices and complex routing tables. This is a stripped-down tunnel that does exactly one thing: binds ports via a WebSocket connection. This even works through corporate proxies if you configure Chisel to work through port 443.

    Output

    Chisel is a utility for specific network tasks. When you need to forward ports between isolated nodes without setting up a full-fledged VPN, a combination of forward and reverse tunnels through a relay server turns out to be a completely viable solution.

    Links

    https://github.com/jpillora/chisel

  • Why can’t I fix the bug?

    You spend hours working on the code, going through hypotheses, adjusting the conditions, but the bug is still reproduced. Sound familiar? This state of frustration is often called “ghost hunting.” The program seems to live its own life, ignoring your corrections.

    One of the most common – and most annoying – reasons for this situation is looking for an error in completely the wrong place in the application.

    The trap of “false symptoms”

    When we see an error, our attention is drawn to the place where it “shot”. But in complex systems, where a bug occurs (crash or incorrect value) is only the end of a long chain of events. When you try to fix the ending, you are fighting the symptoms, not the disease.

    This is where the flowchart concept comes in.

    How it works in reality

    Of course, it is not necessary to directly draw (draw) a flowchart on paper every time, but it is important to have it in your head or at hand as an architectural guide. A flowchart allows you to visualize the operation of an application as a tree of outcomes.

    Without understanding this structure, the developer is often groping in the dark. Imagine the situation: you edit the logic in one condition branch, while the application (due to a certain set of parameters) goes to a completely different branch that you didn’t even think about.

    Result: You spend hours on a “perfect” code fix in one part of the algorithm, which, of course, does nothing to fix the problem in another part of the algorithm where it actually fails.


    Algorithm for defeating a bug

    To stop beating on a closed door, you need to change your approach to diagnosis:

    • Find the state in the outcome tree:Before writing code, you need to determine exactly the path that the application has taken. At what point did logic take a wrong turn? What specific state (State) led to the problem?
    • Reproduction is 80% of success: This is usually done by testers and automated tests. If the bug is “floating”, development is involved in the process to jointly search for conditions.
    • Use as much information as possible: Logs, OS version, device parameters, connection type (Wi-Fi/5G) and even a specific telecom operator are important for localization.

    “Photograph” of the moment of error

    Ideally, to fix it, you need to get the full state of the application at the time the bug was reproduced. Interaction logs are also critically important: they show not only the final point, but also the entire user path (what actions preceded the failure). This helps to understand how to recreate a similar state again.

    Future tip: If you encounter a complex case, add extended debug logging information to this section of code in case the situation happens again.


    The problem of “elusive” states in the era of AI

    In modern systems using LLM (Large Language Models), classical determinism (“one input, one output”) is often violated. You can pass exactly the same input data, but get a different result.

    This happens due to the non-determinism of modern production systems:

    • GPU Parallelism: GPU floating point operations are not always associative. Due to parallel execution of threads, the order in which numbers are added may change slightly, which may affect the result.
    • GPU temperature and throttling: Execution speed and load distribution may depend on the physical state of the hardware. In huge models, these microscopic differences accumulate and can lead to the selection of a different token at the output.
    • Dynamic batching: In the cloud, your request is combined with others. Different batch sizes change the mathematics of calculations in the kernels.

    Under such conditions, it becomes almost impossible to reproduce “that same state”. Only a statistical approach to testing can save you here.


    When logic fails: Memory problems

    If you are working with “unsafe” languages ​​(C or C++), the bug may occur due to Memory Corruption.

    These are the most severe cases: an error in one module can “overwrite” data in another. This leads to completely inexplicable and isolated failures that cannot be traced using normal application logic.

    How to protect yourself at the architectural level?

    To avoid such “mystical” bugs, you should use modern approaches:

    • Multithreaded programming patterns:Clear synchronization eliminates race conditions.
    • Thread-safe languages: Tools that guarantee memory safety at compile time:
      • Rust: Ownership system eliminates memory errors.
      • Swift 6 Concurrency:Strong data isolation checks.
      • Erlang: Complete process isolation through the actor model.

    Summary

    Fixing a bug is not about writing new code, but about understanding how the old one works. Remember: you could be wasting time editing a branch that management doesn’t even touch. Record the state of the system, take into account the factor of AI non-determinism and choose safe tools.

  • Why documentation is your best friend

    (and how to create solutions that continue to work after updates)

    “Apps may only use public APIs and must run on the currently shipping OS.” Apple App Review Guidelines

    If you’ve ever started working with a new framework and found yourself thinking: “Now I’ll understand everything myself, reading the documentation is too long,” you’re definitely not alone. Many of us have a natural investigative instinct: try first, and only then look at the instructions. And that’s completely normal.

    However, at this stage it can be easy to get carried away and end up in a situation where the code works great, but perhaps relies on non-obvious features of the system.

    Why is it sometimes not enough to simply “figure it out on your own”?

    Frameworks, especially closed ones, are complex and multi-layered systems. They often hide internal logic and optimizations that:

    * are not described in public documentation;
    * do not guarantee that behavior will be maintained in the future;
    * may change with the release of new versions;
    * may contain features known to the developers that have not yet been fixed.

    When we act intuitively, there is a risk of building architecture on random observations rather than on documented rules. This can make the code more sensitive to updates.

    Documentation is not a limitation, but a reliable support

    Framework developers create manuals to help us. Acting within the documentation, we get:

    * stability;
    * support;
    * predictable system behavior.

    By going beyond these limits, we take on additional risks, and maintaining such code becomes more difficult.

    Experiments? Certainly. But with an understanding of boundaries.
    Curiosity is a great trait to have in a developer. Exploring and trying new things is absolutely essential. But here is a small wish:

    The most comfortable way to experiment is to rely on best practices.

    The documentation is a map that shows which paths are the most secure and supported by the creators.

    An outside perspective: expert advice

    We often learn from experienced colleagues:

    * they conduct useful courses,
    * speak at conferences,
    * write wonderful books and blogs,
    * share their unique vision.

    Many of them share truly valuable experiences. But it is worth remembering: if the author’s approaches contradict the official documentation, they may turn out to be fragile.

    Such “empirical patterns” sometimes:

    * work only on a specific version of the framework;
    * sensitive to updates;
    * may behave unpredictably in unusual situations.

    Learning from the community is great and rewarding. But any advice, even the most authoritative, should always be carefully checked with official manuals.

    A little about SOLID

    Three ideas from the SOLID principles perfectly complement this approach:

    * Open/Closed Principle: Try to extend behavior through public APIs and, if possible, not depend on hidden implementation.
    * Liskov Substitution Principle: Rely on the contract, not the specific implementation. Otherwise, changes under the hood can lead to unexpected difficulties.
    * Dependency Inversion: build dependencies on abstractions, not details.

    In practice, this means that being tied to internal, undocumented details of the framework makes the system brittle.
    Based on public interfaces and contracts, we get:

    * better isolation of code from changes in the framework;
    * ease of testing;
    * predictability and reliability of the architecture.

    What if there is a bug?

    It also happens that everything is done according to the rules, but the result does not meet expectations. Frameworks evolve and are not always perfect. In such cases:

    * Build a minimal example that reproduces the problem.
    * Ensure that only documented APIs are used.
    * Send a bug report – the development team will certainly appreciate your work and try to help.

    If the example relies on workarounds, it will be much more difficult for developers to provide support.

    How to get the most out of the framework

    *Refer to documentation.
    * Follow the guides and recommendations of the authors.
    * Experiment within the described functionality.
    * Check advice from the Internet with official sources.
    * Localize bugs while respecting framework contracts.

    Conclusion

    Frameworks are powerful tools with their own rules of the game. By forgetting about them, we risk making our code overly vulnerable. But we all want the created products to live for a long time and not require urgent corrections after each minor update.

    Manuals and documentation are excellent support that helps create truly reliable solutions.

    Sources

    https://developer.apple.com/app-store/review/guidelines/
    https://en.wikipedia.org/wiki/SOLID
    https://en.wikipedia.org/wiki/API
    https://en.wikipedia.org/wiki/RTFM

  • Building a C++ SDL application for iOS on Linux

    In this note, I will describe the procedure for building a C++ SDL application for iOS on Linux, signing an ipa archive without a paid Apple Developer subscription, and installing it on a clean device (iPad) using macOS without Jailbreak.

    First, let’s install the build toolchain for Linux:
    https://github.com/tpoechtrager/cctools-port

    The toolchain needs to be downloaded from the repository, then follow the instructions on the Godot Engine website to complete the installation:
    https://docs.godotengine.org/ru/latest/development/compiling/cross-compiling_for_ios_on_linux.html

    At the moment, you need to download Xcode dmg and copy the sdk from there to build cctools-port. This stage is easier to complete on macOS; just copy the necessary sdk files from the installed Xcode. After successful assembly, the terminal will contain the path to the cross-compiler toolchain.
    Next, you can start building the SDL application for iOS. Let’s open cmake and add the necessary changes to build the C++ code:

    SET(CMAKE_SYSTEM_NAME Darwin)
    SET(CMAKE_C_COMPILER arm-apple-darwin11-clang)
    SET(CMAKE_CXX_COMPILER arm-apple-darwin11-clang++)
    SET(CMAKE_LINKER arm-apple-darwin11-ld)


    Now you can compile using cmake and make, but do not forget to add $PATH to the cross-compiler toolchain:

    
    PATH=$PATH:~/Sources/cctools-port/usage_examples/ios_toolchain/target/bin


    For correct linking with frameworks and SDL, we write them in cmake, dependencies of the game Space Jaguar for example:

    
    target_link_libraries(
    ${FSEGT_PROJECT_NAME}
    ${FLAME_STEEL_PROJECT_ROOT_DIRECTORY}/scripts/buildScripts/ios/resources/libs/libclang_rt.ios.a
    ${FLAME_STEEL_PROJECT_ROOT_DIRECTORY}/scripts/buildScripts/ios/resources/libs/libSDL2.a
    ${FLAME_STEEL_PROJECT_ROOT_DIRECTORY}/scripts/buildScripts/ios/resources/libs/libSDL2_mixer.a
    ${FLAME_STEEL_PROJECT_ROOT_DIRECTORY}/scripts/buildScripts/ios/resources/libs/libSDL2_image.a
    "${FLAME_STEEL_PROJECT_ROOT_DIRECTORY}/scripts/buildScripts/ios/resources/libs/CoreServices.framework"
    "${FLAME_STEEL_PROJECT_ROOT_DIRECTORY}/scripts/buildScripts/ios/resources/libs/ImageIO.framework"
    "${FLAME_STEEL_PROJECT_ROOT_DIRECTORY}/scripts/buildScripts/ios/resources/libs/Metal.framework"
    "${FLAME_STEEL_PROJECT_ROOT_DIRECTORY}/scripts/buildScripts/ios/resources/libs/AVFoundation.framework"
    "${FLAME_STEEL_PROJECT_ROOT_DIRECTORY}/scripts/buildScripts/ios/resources/libs/GameController.framework"
    "${FLAME_STEEL_PROJECT_ROOT_DIRECTORY}/scripts/buildScripts/ios/resources/libs/CoreMotion.framework"
    "${FLAME_STEEL_PROJECT_ROOT_DIRECTORY}/scripts/buildScripts/ios/resources/libs/CoreGraphics.framework"
    "${FLAME_STEEL_PROJECT_ROOT_DIRECTORY}/scripts/buildScripts/ios/resources/libs/AudioToolbox.framework"
    "${FLAME_STEEL_PROJECT_ROOT_DIRECTORY}/scripts/buildScripts/ios/resources/libs/CoreAudio.framework"
    "${FLAME_STEEL_PROJECT_ROOT_DIRECTORY}/scripts/buildScripts/ios/resources/libs/QuartzCore.framework"
    "${FLAME_STEEL_PROJECT_ROOT_DIRECTORY}/scripts/buildScripts/ios/resources/libs/OpenGLES.framework"
    "${FLAME_STEEL_PROJECT_ROOT_DIRECTORY}/scripts/buildScripts/ios/resources/libs/UIKit.framework"
    "${FLAME_STEEL_PROJECT_ROOT_DIRECTORY}/scripts/buildScripts/ios/resources/libs/Foundation.framework"
    )


    In my case, the SDL, SDL_Image, SDL_mixer libraries are compiled in Xcode on macOS in advance for static linking; Frameworks copied from Xcode. Also added is the libclang_rt.ios.a library, which includes iOS-specific runtime calls, for example isOSVersionAtLeast. Included a macro for working with OpenGL ES, disabling unsupported functions in the mobile version, similar to Android.
    After solving all the build problems, you should get the assembled binary for arm. Next, let’s consider running the assembled binary on a device without Jailbreak.
    On macOS, install Xcode, register on the Apple portal, without paying for the developer program. Add an account in Xcode -> Preferences -> Accounts, create a blank application and build on a real device. During assembly, the device will be added to your free developer account. After assembly and launch, you need to build the archive; to do this, select Generic iOS Device and Product -> Archive. Once the archive is built, extract the embedded.mobileprovision and PkgInfo files from it. From the build log to the device, find the codesign line with the correct signature key, the path to the entitlements file with the extension app.xcent, copy it.
    Copy the .app folder from the archive, replace the binary in the archive with one compiled by a cross-compiler in Linux (for example, SpaceJaguar.app/SpaceJaguar), then add the necessary resources to the .app, check the integrity of the PkgInfo and embedded.mobileprovision files in the .app from the archive, copy again if necessary. We re-sign the .app using the codesign command – codesign requires an input key for sign, the path to the entitlements file (can be renamed with a .plist extension)
    After re-signing, create a Payload folder, move the folder with the .app extension there, create a zip archive with Payload in the root, rename the archive with the .ipa extension. After that, in Xcode, open the list of devices and Drag’n’Drop the new ipa to the device’s list of applications; Installation via Apple Configurator 2 does not work for this method. If the re-signing is done correctly, then the application with the new binary will be installed on an iOS device (for example, iPad) with a 7-day certificate, this is enough for the testing period.

    Sources

    https://github.com/tpoechtrager/cctools-port

    https://docs.godotengine.org/ru/latest/development/compiling/cross-compiling_for_ios_on_linux.html

    https://jonnyzzz.com/blog/2018/06/13/link-error-3/

    https://stackoverflow.com/questions/6896029/re-sign-ipa-iphone

    https://developer.apple.com/library/archive/documentation/Security/Conceptual/CodeSigningGuide/Procedures/Procedures.html

  • Build for Windows under Ubuntu MinGW CMake

    In this post I will describe the process of building libraries and applications for Windows using the MinGW32 toolchain on Ubuntu.
    Install wine, mingw:

    sudo apt-get install wine mingw-w64
    

    After this, you can already build C/C++ applications for Windows:

    # C
    i686-w64-mingw32-gcc helloWorld.c -o helloWorld32.exe      # 32-bit
    x86_64-w64-mingw32-gcc helloWorld.c -o helloWorld64.exe    # 64-bit
     
    # C++
    i686-w64-mingw32-g++ helloWorld.cc -o helloWorld32.exe     # 32-bit
    x86_64-w64-mingw32-g++ helloWorld.cc -o helloWorld64.exe   # 64-bit
    

    The collected exe can be checked using wine.
    Next, let’s look at the changes to the CMake build, the CMakeLists.txt file, adding MinGW specific things to the build file:

    if (MINGW32)
    set(CMAKE_SYSTEM_NAME Windows)
    SET(CMAKE_C_COMPILER i686-w64-mingw32-gcc)
    SET(CMAKE_CXX_COMPILER i686-w64-mingw32-g++)
    SET(CMAKE_RC_COMPILER i686-w64-mingw32-windres)
    set(CMAKE_RANLIB i686-w64-mingw32-ranlib)
    endif()
    
    // для сборки shared dll
    elseif (MINGW32)
    add_library(FlameSteelEngineGameToolkit.dll SHARED ${SOURCE_FILES})
    else()
    
    // обязательно линкуем со всеми зависимостями
    if (MINGW32)
    target_link_libraries(
                            FlameSteelEngineGameToolkit.dll 
                            -static-libgcc
                            -static-libstdc++
                            SDL2 
                            SDL2_mixer 
                            /home/demensdeum/Sources/cube-art-project-bootstrap/FlameSteelFramework/FlameSteelCore/FlameSteelCore.dll
                            /home/demensdeum/Sources/cube-art-project-bootstrap/FlameSteelFramework/FlameSteelBattleHorn/FlameSteelBattleHorn.dll
                            /home/demensdeum/Sources/cube-art-project-bootstrap/FlameSteelFramework/FlameSteelCommonTraits/FlameSteelCommonTraits.dll)
    
    set_target_properties(FlameSteelEngineGameToolkit.dll PROPERTIES
            PREFIX ""
            SUFFIX ""
            LINK_FLAGS "-Wl,--add-stdcall-alias"
            POSITION_INDEPENDENT_CODE 0 # this is to avoid MinGW warning; 
            # MinGW generates position-independent-code for DLL by default
    )
    else()
    

    We collect:

    cmake -DMINGW32=1 .
    make
    

    The output will be a dll or exe, depending on what you are collecting. For a working example, you can look at the repository of the new Cube-Art-Project and its libraries:
    https://gitlab.com/demensdeum/cube-art-project

    https://gitlab.com/demensdeum/FlameSteelEngineGameToolkitFSGL

    https://gitlab.com/demensdeum/cube-art-project-bootstrap

    Sources
    https://arrayfire.com/cross-compile-to-windows-from-linux/

  • Building macOS applications for Ubuntu OSXCross CMake

    In this post, I will describe building cross-platform C++ applications for macOS on an Ubuntu build machine using CMake and osxcross.
    First, install the osxcross toolchain:
    https://github.com/tpoechtrager/osxcross
    Installation occurs in 3 stages, downloading dependencies:

    cd tools
    ./get_dependencies.sh
    

    Download XCode.xip from the official Apple website, then download the SDK from XCode:

    ./gen_sdk_package_pbzx.sh /media/demensdeum/2CE62A79E62A4404/LinuxSupportStorage/xcode111.xip
    

    I hope you read the XCode license agreement in the last step? Next, build the toolchain with the required prefix:

    INSTALLPREFIX=/home/demensdeum/Apps/osxcross ./build.sh 
    

    Now you can use osxcross from the prefix directory of the previous step. Let’s add a new build macro for CMake and write everything necessary:

    if (OSXCROSS)
    SET(CMAKE_SYSTEM_NAME Darwin)
    SET(CMAKE_C_COMPILER o64-clang)
    SET(CMAKE_CXX_COMPILER o64-clang++)
    SET(CMAKE_C_COMPILER_AR x86_64-apple-darwin19-ar)
    SET(CMAKE_CXX_COMPILER_AR x86_64-apple-darwin19-ar)
    SET(CMAKE_LINKER x86_64-apple-darwin19-ld)
    SET(ENV{OSXCROSS_MP_INC} 1)
    endif()
    

    Dynamic linking was not successful for me, so we export the libraries statically:

    if (OSXCROSS)
    add_library(FlameSteelCore STATIC ${SOURCE_FILES})
    else()
    

    Next, you may be faced with the fact that you do not have the necessary libraries for osxcross, I encountered this when using SDL2. osxcross supports ready-made library packages – macports. For example, installing SDL2-mixer:

    osxcross-macports -v install libsdl2_mixer
    

    After this, you can start building libraries/applications as usual in the cmake-make link, do not forget to specify static linking of libraries if necessary.

    Manual assembly of libraries

    Currently, I have encountered the problem of incorrect archiving of libraries during static linking; when building the final application I receive the error:

    file was built for archive which is not the architecture being linked (x86_64)
    

    Very similar to this ticket, we managed to implement a workaround resulting in the build completing correctly. Let’s unzip the static library and build it anew using the osxcross archiver:

    ar x ../libFlameSteelCore.a
    rm ../libFlameSteelCore.a
    x86_64-apple-darwin19-ar rcs ../libFlameSteelCore.a *.o
    

    Also, one of the problems I personally consider is the lack of ability to run macOS applications directly on Ubuntu (at least with part of the functionality). Of course, there is a project darling, but the support still leaves much to be desired.

    Sources

    https://github.com/tpoechtrager/osxcross

  • Local image generation: ComfyUI and FLUX model

    Nowadays, you don’t have to rely on cloud services: you can generate high-quality images entirely on your own hardware. In this post, I will describe how to run the modern FLUX model locally on your computer using ComfyUI.

    ComfyUI uses node-based architecture. This allows you to:
    – Totally control every stage of generation.
    – Easily share ready-made “workflows”

    FLUX is a large model, so the hardware requirements are higher than SD 1.5 or SDXL:
    Video card (GPU): Nvidia RTX with 12 GB VRAM or higher (for comfortable work). If you have 8 GB or less, you will have to use the quantized versions (GGUF or NF4).
    Random access memory (RAM): minimum 16 GB (preferably 32 GB and above).
    Disk Space: Approximately 20–50 GB for models and components.

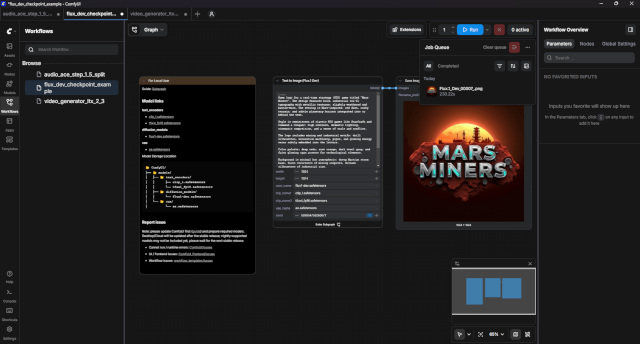
    The easiest way to start FLUX is to use a ready-made template. Just search for flux text to image in the workflows window and install.

    Write a prompt in English in the `Text to Image (Flux.1 Dev)` node, select the resolution (FLUX works well with 1024×1024 and even higher) and press RUN.

    The first generation may take time as the models will be loaded into the video card memory.

    https://github.com/comfyanonymous/ComfyUI

  • Local Vibe coding: LM Studio, VS Code and Continue

    If you had a desire to use neural networks to help write code (so-called Vibe coding), and you have a fairly powerful computer, for example with an Nvidia RTX video card, then you can deploy the entire environment absolutely free on your machine. This solves problems with paid subscriptions and allows you to safely work with projects under NDA, since your code is not sent anywhere. In this post I will describe how to assemble a local bundle of LM Studio, VS Code and the Continue extension.

    Tools for local Vibe coding

    For comfortable work we need three main components:
    LM Studio: a convenient application for downloading and running local LLMs. It takes on all the complexity of working with GGUF models and puts up a local server compatible with the OpenAI API.
    VS Code: a popular and familiar code editor.
    Continue: extension for VS Code that integrates neural networks directly into the work environment. Allows you to chat, highlight code for refactoring, and supports autocomplete.

    Hardware requirements

    Local language models are memory intensive:
    Video card (GPU): Nvidia with 8 GB VRAM or higher (for comfortable work with models with 7-8 billion parameters). Heavier models will require 16 GB of VRAM.
    Disk space: about 500 GB for storing various downloaded models.

    Configuring the link

    The setup process is quite simple and does not require complex manipulations in the terminal:
    1. Download and install LM Studio. Use the built-in search to find a lightweight model like Qwen Coder or gemma3:12b.
    2. In LM Studio, go to the Local Server tab and click Start Server. By default it will start on `http://localhost:1234/v1`.
    3. Open VS Code and install the Continue extension from the plugin store.
    4. Open the Continue configuration file and add a new model, specifying the `openai` provider and the address of your local server from LM Studio.

    You can then communicate with your local LLM directly in the Continue sidebar, ask questions about your code, and generate new components.

    Why does this work?

    As I wrote earlier, LLMs do better with flat structure and WET (Write Everything Twice) code. Local parameter models may be inferior to giants like GPT-4 when it comes to designing complex architectures, but they are more than capable of generating boilerplate code, refactoring simple functions, and rapid prototyping.

    Additionally, with local Vibe coding, your code never leaves the machine. This makes this combination ideal for corporate development and working with sensitive data.

    Output

    Local neural networks are not capable of fully replacing a programmer or designing a complex system. However, the combination of LM Studio + VS Code + Continue provides independence from cloud services and maintains privacy. This is a completely working auxiliary tool for routine tasks, if you are willing to put up with the limitations of small models and independently control the project architecture.

    Links

    https://code.visualstudio.com/
    https://lmstudio.ai/
    https://continue.dev/

    Sources

    https://youtu.be/IqqCwhG46jY
    https://www.youtube.com/watch?v=7AImkA96mE8

  • Local video generation: ComfyUI and LTX-2.3

    Previously, creating videos using neural networks was the prerogative of cloud services like Runway or Luma. Today, if you have a modern Nvidia graphics card, you can generate high-quality videos right on your computer. In this post, I will tell you how to set up local video generation using ComfyUI and the effective LTX-2.3 model.

    Tools for video generation

    For work we will need:
    ComfyUI: a powerful interface with a node-based architecture that allows you to flexibly customize the generation process.
    LTX-2.3: A modern model from Lightricks, optimized for creating smooth and detailed videos with relatively moderate video memory requirements.

    Hardware requirements

    Generating video is a much more resource-intensive process than working with images:
    Video card (GPU): Nvidia RTX with 8 GB VRAM is the minimum required for a resolution of 768×512. For comfortable operation and higher resolutions, it is highly desirable to have 16–24 GB of VRAM.
    Random access memory (RAM): minimum 32 GB. Video models and VAEs take up a lot of space when downloading.
    Disk space: about 500 GB for the model itself and related components.

    Setup and launch

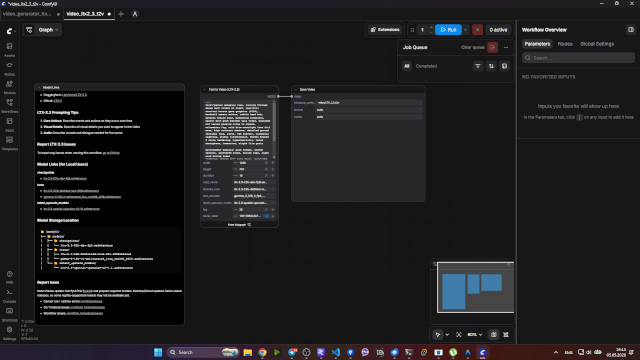
    The process of launching LTX-2.3 in ComfyUI is as follows:
    1. Update ComfyUI: The model is relatively new, so make sure you have the latest version of the interface installed.
    2. Install Workflow: The easiest way is to find a ready-made JSON template for LTX Video. The model requires specific nodes to work with video latent space.
    3. Prompt and parameters: Enter a description of the scene in English. Note that the LTX-2.3 understands motion well (eg “camera orbits around”, “fast movement”).

    Why choose LTX-2.3?

    LTX-2.3 is notable because it delivers results comparable to proprietary cloud services, but runs locally. This gives you:
    Complete privacy: your prompts and generated videos do not go to other people’s servers.
    Control: you can experiment with frame rate (FPS), resolution and prompt strength without having to pay for each attempt.

    Local video generation is still in active development, and LTX-2.3 is a great entry into the world of “home Hollywood.”

    Links

    https://github.com/comfyanonymous/ComfyUI
    https://huggingface.co/Lightricks/LTX-Video

  • Local music generation: ComfyUI and ACE-Step-1.5 model

    Nowadays, you don’t have to rely on cloud services to create content: you can generate high-quality music entirely on your own hardware. In this post, I will describe how to run the modern ACE-Step-1.5 model locally on your computer using ComfyUI.

    ComfyUI uses node-based architecture. This allows you to:
    – Totally control every stage of audio generation.
    – Easily share ready-made “workflows”.

    ACE-Step-1.5 is an advanced model for music generation that requires significant computational resources. The hardware requirements are higher than those of many simple synthesizers:
    Video card (GPU): Nvidia RTX with 8 GB VRAM or higher (12 GB+ recommended) for comfortable work at high quality.
    Random access memory (RAM): minimum 16 GB (preferably 32 GB and above).
    Processor (CPU): Modern multi-core processor with good support for AVX/CUDA computing.
    Disk Space: Approximately 20–50 GB for models and components.

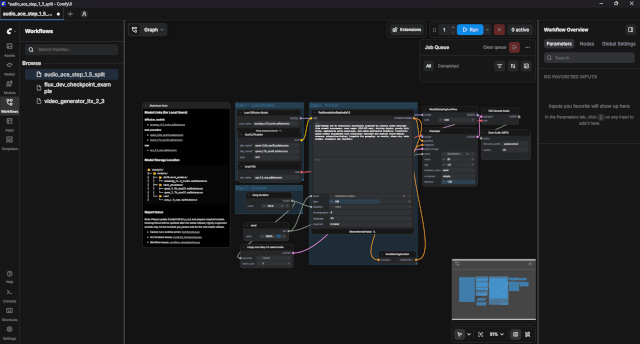
    The easiest way to run ACE-Step-1.5 is to use a ready-made audio generation template. Just search for music text to audio in the workflows window and install.

    Write a prompt describing the genre and mood (for example, “uplifting synthwave track with heavy bass”) in the `Prompt Input` node. Specify the desired duration and press RUN.
    The first generation may take time, as the models will be loaded into the video card memory and process complex acoustic patterns.

    https://github.com/comfyanonymous/ComfyUI
    https://www.youtube.com/watch?v=UAlLD5fS7-c

  • Local neural networks using ollama

    If you had a desire to launch something like ChatGPT and you have a fairly powerful computer, for example with an Nvidia RTX video card, then you can run the ollama project, which will allow you to use one of the ready-made LLM models on your local machine, absolutely free. ollama provides the ability to communicate with LLM models, in the manner of ChatGPT; also in the latest version, the ability to read images and format the output data in json format has been announced.

    I also ran the project itself on a MacBook with an Apple M2 processor, and I know that the latest models of video cards from AMD are supported.

    To install on macOS, go to the ollama website:
    https://ollama.com/download/mac

    Click “Download for macOS”, you will download an archive of the form ollama-darwin.zip, inside the archive there will be Ollama.app which needs to be copied to “Applications”. After this, launch Ollama.app, most likely the installation process will occur on the first launch. After that, in the tray you saw the ollama icon, the tray is on the top right next to the clock.

    After that, launch a regular macOS terminal, and type the command to download, install and run any ollama model. A list of available models, descriptions, and their characteristics can be seen on the ollama website:
    https://ollama.com/search

    Choose the model with the fewest parameters if it does not fit into your video card at launch.

    For example, the command to launch the llama3.1:latest model:

    ollama run llama3.1:latest
    

    Installation for Windows and Linux is generally similar, in one case there will be an ollama installer and further work with it via Powershell.
    For Linux, installation is done using a script, but I recommend using the version of your specific package manager. On Linux, ollama can also be launched via a regular bash terminal.

    Sources
    https://www.youtube.com/watch?v=Wjrdr0NU4Sk
    https://ollama.com

  • Video stabilization using ffmpeg

    If you want to stabilize videos and remove camera shake, the `ffmpeg` tool offers a powerful solution. Thanks to the built-in filters `vidstabdetect` and `vidstabtransform`, you can achieve professional results without using complex video editors.

    Preparing for work

    Before you start, make sure your `ffmpeg` supports the `vidstab` library. On Linux you can check this with the command:

    bash  
    ffmpeg -filters | grep vidstab  
    

    If the library is not installed, you can add it:

    sudo apt install ffmpeg libvidstab-dev  
    

    Installation for macOS via brew:

    brew install libvidstab
    brew install ffmpeg
    

    Now let’s move on to the process.

    Step 1: Motion Analysis

    First you need to analyze the motion of the video and create a file with stabilization parameters.

    ffmpeg -i input.mp4 -vf vidstabdetect=shakiness=10:accuracy=15 transfile=transforms.trf -f null -  
    

    Parameters:

    shakiness: Video shake level (default 5, can be increased to 10 for more complex cases).
    accuracy: Analysis accuracy (default 15).
    transfile: File name to save the motion parameters.

    Step 2: Apply Stabilization

    Now you can apply stabilization using the transformation file:

    ffmpeg -i input.mp4 -vf vidstabtransform=input=transforms.trf:zoom=5 output.mp4
    

    Parameters:

    input: Points to the file with transformation parameters (created in the first step).
    zoom: Zoom factor to remove black edges (e.g. 5 – auto zoom until artifacts are removed).

  • Turing computing machines

    I present to your attention a translation of the first pages of Alan Turing’s article “ON COMPUTABLE NUMBERS WITH AN APPLICATION TO THE PROBLEM OF RESOLUTION” from 1936. The first chapters contain a description of computers, which later became the basis for modern computing.

    The full translation of the article and explanation can be read in the book by American popularizer Charles Petzold, entitled “Reading Turing: A Journey through Turing’s Historical Article on Computability and Turing Machines” (ISBN 978-5-97060-231-7, 978-0-470-22905-7)

    Original article:
    https://www.astro.puc.cl/~rparra/tools/PAPERS/turing_1936.pdf

    ON COMPUTABLE NUMBERS WITH APPLICATION TO THE RESOLUTION PROBLEM

    A. M. TURING

    [Received May 28, 1936 – Read November 12, 1936]

    “Computable” numbers can be briefly described as real numbers whose expressions as decimal fractions are calculable in a finite number of ways. Although at first glance this article treats numbers as computable, it is almost as easy to define and explore computable functions of an integer variable, a real variable, a computable variable, computable predicates, and the like. However, the fundamental problems associated with these computable objects are the same in each case. For a detailed consideration, I chose computable numbers as a computable object because the method of considering them is the least cumbersome. I hope to soon describe the relationship of computable numbers with computable functions and so on. At the same time, research will be carried out in the field of the theory of functions of a real variable expressed in terms of computable numbers. By my definition, a real number is computable if its decimal representation can be written by a machine.

    In paragraphs 9 and 10 I give some arguments to show that computable numbers include all numbers that are naturally thought to be computable. In particular, I show that some large classes of numbers are computable. They include, for example, the real parts of all algebraic numbers, the real parts of the zeros of Bessel functions, the numbers π, e and others. However, computable numbers do not include all definable numbers, as evidenced by the following example of a definable number that is not computable.

    Although the class of computable numbers is very large and in many respects similar to the class of real numbers, it is still enumerable. In §8 I consider certain arguments that would seem to argue to the contrary. When one of these arguments is correctly applied, conclusions are drawn that, at first glance, are similar to those of Gödel*. These results have extremely important applications. In particular, as shown below (§11), the resolution problem cannot have a solution.

    In a recent article, Alonzo Church introduced the idea of ​​“effective calculability,” which is equivalent to my idea of ​​“computability” but has a completely different definition. Church also comes to similar conclusions regarding the problem of resolution. The proof of the equivalence of “computability” and “effectively calculable” is presented in the appendix to this article.

    1. Computers

    We have already said that computable numbers are those numbers whose decimal places are countable by finite means. A clearer definition is needed here. This article will make no real attempt to justify the definitions given here until we get to §9. For now, I will just note that the (logical) rationale (for this) is that human memory is, by necessity, limited.

    Let us compare a person in the process of calculating a real number with a machine that is capable of fulfilling only a finite number of conditions q1, q2, …, qR; Let’s call these conditions “m-configurations”. This (that is, so defined) machine is equipped with a “tape” (analogous to paper). This belt passing through the machine is divided into sections. Let’s call them “squares”. Each such square can contain some kind of “symbol”. At any moment, there is only one such square, say the rth one, containing the symbol that is “in this machine.” Let’s call such a square a “scanned symbol”. A “scanned character” is the only character that the machine is, so to speak, “directly aware” of. However, by changing its m-configuration, the machine can effectively remember some of the characters it has “seen” (scanned) previously. The possible behavior of the machine at any moment is determined by the m-configuration qn and the scanned symbol***. Let’s call this pair of symbols qn, “configuration”. The configuration thus designated determines the possible behavior of a given machine. In some of these configurations in which the scanned square is blank (ie, does not contain a character), the machine writes a new character on the scanned square, and in other of these configurations it erases the scanned character. This machine is also capable of moving to scan another square, but in this way it can only move to the adjacent square to the right or left. In addition to any of these operations, the m-configuration of the machine can be changed. In this case, some of the written characters will form a sequence of digits, which is the decimal part of the real number being calculated. The rest of them will be nothing more than inaccurate marks in order to “help memory”. In this case, only the above-mentioned inaccurate marks can be erased.

    I claim that the operations considered here include all those operations that are used in calculation. The rationale for this statement is easier to understand for the reader who has an understanding of machine theory. Therefore, in the next section I will continue to develop the theory in question, based on an understanding of the meaning of the terms “machine”, “tape”, “scanned”, etc.

    *Gödel “On the Formally Undecidable Sentences of the Principia Mathematics (published by Whitehead and Russell in 1910, 1912 and 1913) and Related Systems, Part I,” Journal of Mathematics. Physics, monthly bulletin in German No. 38 (for 1931, pp. 173-198.
    ** Alonzo Church, “An Undecidable Problem in Elementary Number Theory,” American J. of Math., No. 58 (1936), pp. 345-363.
    *** Alonzo Church, “A Note on the Resolution Problem,” J. of Symbolic Logic, No. 1 (1936), pp. 40-41

  • Donki Hills

    Donki Hills is a first-person horror-comedy adventure that takes players through a mysterious story that combines suspense with unexpected humor.
    The main character James goes in search of his online friend Maria, whose connection has suddenly been severed. The only evidence is a random photograph pointing to the remote village of Donki Hills in the Novosibirsk region. Driven by a desire to get to the bottom of the truth, James begins his own investigation to find out all the circumstances of Maria’s disappearance.

    The game is available on Steam:
    https://store.steampowered.com/app/3476390/Donki_Hills/

  • Masonry AR

    Masonry AR is a location-based multiplayer augmented reality (AR) game that immerses you in the world of secret societies. Explore the streets of your city, collect Masonic books of knowledge, found your own lodges and compete for influence on the real world map.

    Key features

    • Geolocation-based gameplay:move around the real world using your device’s GPS to find secret books and resources.
    • Autowalk Mode:If GPS access is limited, you can start Autowalk mode by selecting one of the world’s capitals as a starting point.
    • Lodge Creation: Establish Masonic lodges on a real map and expand the influence of your order.
    • In-game economy: Earn in-game currency (MOS), develop your territories and share referral links with friends.
    • Cross-platform: The game runs directly in web browsers on mobile devices and PCs thanks to the Flame Steel Engine 2 game engine with rendering based on Three.js.

    Play:
    https://demensdeum.com/games/masonry-ar/client/

    GitHub:
    https://github.com/zefir1990/Masonry-AR

  • Teflecher


    Teflecher is a fast, interactive, cross-platform quiz application built on top of Kotlin Multiplatform (KMP) and Compose Multiplatform. It allows users to intuitively load quizzes from local JSON files or remote URLs, answer multiple-choice questions, see instant feedback on correct answers, and track their results.

    Web:
    https://demensdeum.com/software/teflecher/

    GitHub:
    https://github.com/zefir1990/teflecher

    Also a quiz editor in the Teflecher Editor format based on Ionic + Capacitor technologies

    Web:
    https://demensdeum.com/software/teflecher-editor/

    GitHub:
    https://github.com/zefir1990/teflecher-editor

  • Ghost Contacts


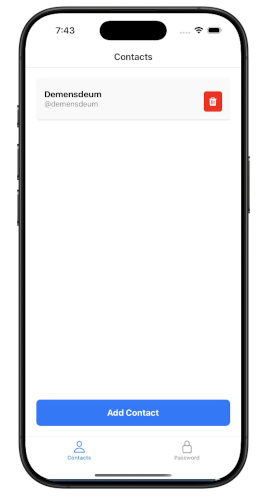
    Ghost Contacts is a simple web application designed to hide your contacts from standard system APIs and phone books. All information is stored exclusively locally in your browser and is not transferred to external servers.

    Main features

    • Hiding from system APIs:Your contacts are not synced with the standard system contacts APIs and device phone book.
    • Panic Password: A special password, when entered, the entire contact database is instantly and irrevocably deleted.
    • Import and export: Convenient transfer of contact database via CSV files for creating backup copies.

    Online application:
    https://demensdeum.com/software/ghost-contacts/

    GitHub:
    https://github.com/demensdeum/GhostContacts

  • Cube Art Project 2

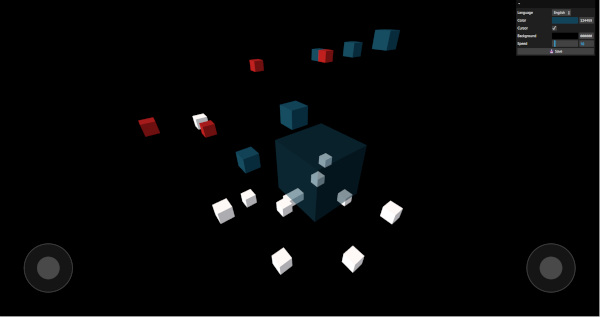
    Welcome to Cube Art Project 2 – a meditative 3D canvas where you can let your imagination run wild. Create voxel paintings, experiment with colors, and bring unique 3D models to life right in your browser.

    What is Cube Art Project 2?

    This is a creative game that turns your screen into an interactive canvas for 3D painting. Before you is a clean three-dimensional space, ready to be filled with your ideas, shapes and bright colors.

    Key features

    • 3D Drawing: A relaxing creative process focused on creating voxel art and 3D geometry.
    • Color picker: fine-tune the shades of each block using convenient RGB sliders.
    • Freedom of movement: Explore your paintings from any angle with convenient camera controls.
    • Canvas Saving: Save your work to files and return to drawing at any time, or share your work with others.

    Management

    • WASD – camera movement
    • Mouse – camera rotation and inspection
    • Interface (GUI) – color selection and adjustment

    Play:
    https://demensdeum.com/software/cube-art-project-2/

    GitHub:
    https://github.com/zefir1990/cube-art-project-2

  • Raiden Video Ripper

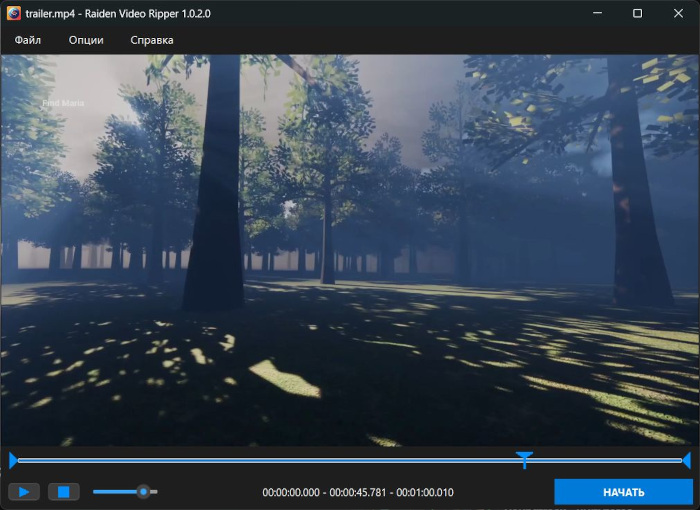
    Raiden Video Ripper is an open source project designed for video editing and format conversion. It is created using Qt 6 (Qt Creator) and allows you to edit and convert videos to MP4, GIF and WebM formats. You can also extract audio from videos and convert it to MP3 format.

    Microsoft Store:
    https://apps.microsoft.com/detail/9nvzjs98smgc

    GitHub:
    https://github.com/demensdeum/RaidenVideoRipper/releases

  • Mars Miners

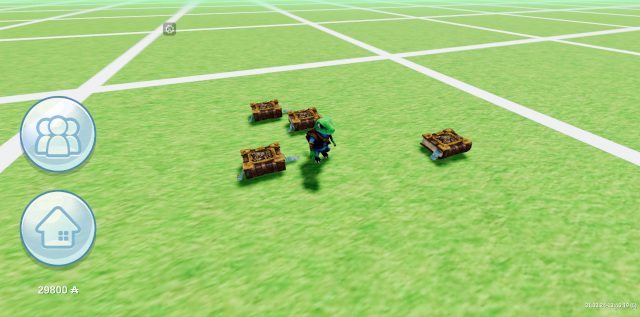
    In the harsh conditions of the red planet, every second and every sector counts. We’re excited to introduce Mars Miners, a turn-based strategy game where you fight for the survival of a colony and control of valuable Martian resources.

    What are Mars Miners?

    In Mars Miners you control a mining corporation on Mars. Your task is to build bases, capture resource sectors and coordinate the actions of autonomous mining units in the face of fierce competition with artificial intelligence or other players.

    Key features

    • Tactical strategy: plan the development of your base and the seizure of territory, calculating your opponents’ moves in advance.
    • Autonomous units: Coordinate the actions of mining robots and customize their logic for maximum efficiency.
    • Various modes: Hone your skills in single-player training grounds or compete with other colonists in multiplayer mode.
    • Advanced AI: fight for resources against smart automata that do not forgive tactical mistakes.

    Play Mars Miners

  • Flame Steel: Death Mask 2

    In the endless corridors of the industrial megastructure, flooded with cold light, a new challenge awaits you. We’re excited to introduce Flame Steel: Death Mask 2, a 3D dungeon crawler that combines classic aesthetics with modern real-time gameplay.

    What is Flame Steel: Death Mask 2?

    Imagine waking up in a procedurally generated maze where a hostile entity called “Filter” could be lurking around every turn. In Flame Steel: Death Mask 2 you take on the role of a Seeker, exploring a world built on the Flame Steel Engine 2 (with Three.js graphics rendering).

    Key features

    • Procedural Dungeons: Each attempt is unique. The server creates new maps full of secrets and dangers.
    • Terminal: For those who prefer full control, the built-in command line interface allows you to interact directly with the system: perform advanced actions, debug or send commands.
    • Combat and Survival: Fight Filters to earn Bits, then use them to open chests and improve your stats. Watch your health – survival is not guaranteed.
    • Industrial aesthetic: high-contrast visualization and sterile atmosphere of a giant megastructure.

    Technology behind the mask

    The game is created for the browser and uses:

    • Frontend: Pure JavaScript and Flame Steel Engine 2 (with Three.js graphics renderer) for smooth 3D rendering.
    • Backend: Node.js for running the server side.
    • Infrastructure: MongoDB for persistent data storage and Redis for real-time spatial indexing

    Play Flame Steel: Death Mask 2

  • Ushki Radio

    Ushki-Radio is a cross-platform radio player for online radio, made with a focus on simplicity and listening pleasure. No unnecessary functions, no overloaded interfaces – just turn it on and listen.


    https://demensdeum.com/software/ushki-radio

    The project uses the open source Radio Browser, making thousands of radio stations from all over the world available in the application. You can search for them by name, genre or popularity, add them to your favorites and quickly return to your favorite stations.

    Ushki-Radio is perfect for the role of a background radio player: it remembers the last station, allows you to control the volume and does not require complex settings. The interface is concise and understandable – everything is done so that nothing distracts from music, conversations and broadcasting.

    Technically, the project is built on React Native and Expo, so it works both in the browser and as a native application. Under the hood, expo-av is used to play audio, and user settings are stored locally. There is support for several languages, including Russian and English.

    Ushki-Radio is a good example of what a modern Internet radio player can be: open, lightweight, expandable and focused primarily on the listener. The project is distributed under the MIT license and is perfect for both personal use and as a basis for your own experiments with audio applications.

    GitHub:
    https://github.com/demensdeum/Ushki-Radio

    Google Play:
    https://play.google.com/store/apps/details?id=com.demensdeum.ushkiradio

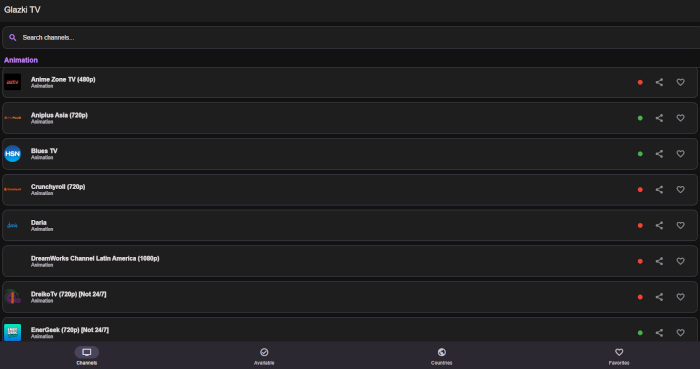
  • Glazki TV: Modern player for Internet television

    Glazki TV is a modern, high-performance player for Internet television (IPTV), built on the basis of React Native and Expo. The project is focused on ease of use and speed, providing a convenient interface for viewing IPTV channels both on mobile devices and in the browser.

    Main features

    • Channel Browsing: Browse thousands of channels, categorized for easy navigation.
    • Search: Quickly find the channels you need by name.
    • Favorites: Save your favorite channels for quick access (data saved locally).
    • Deep Linking: Share direct links to channels that open automatically.
    • Theme support: The interface automatically adapts to the system dark or light theme.
    • Web support: The player is fully functional in the browser with URL synchronization.

    Technology stack

    The project is based on modern development tools:

    • Framework: React Native + Expo
    • Video Player: expo-video (замена устаревшему expo-av)
    • UI Toolkit: react-native-paper
    • Playlist Parser: iptv-playlist-parser

    Web version:
    https://demensdeum.com/software/glazki-tv/

    Google Play version:
    https://play.google.com/store/apps/details?id=com.demensdeum.glazkitv

  • Zefir1990


    Zefir1990 – Ilia Prokhorov, I am a developer with more than 15 years of experience in commercial development. Founder of the Demens Deum studio, which develops games and applications for mobile, web, and desktop systems. The first 3D OpenGL ES 2 game Mad Racer on Android 2 was released in 2010, he was a programmer and game designer on the project, he also involved composer Anton Dmitriev (coolspotdreamer) in the development, after the successful launch of the game he was engaged in full-time custom development and project development under contracts. Clients include Decathlon, Playboy, Fitbit.

    I am also the author of articles on software development, games, design patterns, algorithms, AI, and I plan to write a book about software entropy.

    Preferred programming languages: ASM, C, C++, ObjC, Python, Kotlin, Swift, Java, Rust, Go, TypeScript, JavaScript, C#, Dart, PHP.

    LinkedIn: linkedin.com/in/zefir1990
    GitHub: github.com/zefir1990
    Telegram: t.me/zefir1990
    Email: ceo@demensdeum.com
    Twitch: twitch.tv/zefir1990
    Youtube: youtube.com/zefir1990