Category: Notes

  • Instalación de OpenCode y conexión de DeepSeek

    OpenCode es un agente de programación abierto que reside directamente en la terminal. Puede leer archivos de proyecto, editar código, ejecutar comandos y pruebas, buscar en el repositorio y trabajar con git, casi lo mismo que hacen Claude Code y otros agentes de consola. La principal diferencia es que OpenCode no está vinculado a un solo proveedor modelo: a través de él se pueden conectar docenas de proveedores, incluido DeepSeek. En esta publicación describiré la instalación del agente y la conexión de DeepSeek a él.

    Lo que necesitas

    Sólo necesitas dos cosas para funcionar:

    • Terminal moderno. WezTerm, Alacritty, Ghostty, Kitty o cualquier otro servirá.
    • Clave API del proveedor. En nuestro caso, DeepSeek.

    No se requiere Node.js si instala el agente con un script de instalación estándar: el binario llega listo para usar.

    Instalación

    La forma más sencilla es el script de instalación oficial:

    curl -fsSL https://opencode.ai/install | bash
    

    Detectará la plataforma y colocará el archivo ejecutable en PATH. Después de la instalación, debes verificar que todo esté en su lugar:

    opencode --version
    

    Si el comando muestra la versión, la instalación fue exitosa.

    Instalación utilizando otros métodos

    Si prefiere los administradores de paquetes, existen varias opciones. A través de Node.js:

    npm install -g opencode-ai
    

    Bun, pnpm y Yarn pueden hacer lo mismo:

    bun install -g opencode-ai
    pnpm install -g opencode-ai
    yarn global add opencode-ai
    

    macOS y Linux tienen Homebrew. Tenga en cuenta: lo que se recomienda es el toque de los desarrolladores, y no la fórmula oficial; se actualiza con menos frecuencia:

    brew install anomalyco/tap/opencode
    

    En ArchLinux:

    sudo pacman -S opencode
    paru -S opencode-bin
    

    El primer comando instala la versión estable desde el repositorio, el segundo, la última versión de AUR.

    Instalación en Windows

    En Windows se recomienda trabajar vía WSL: de esta forma el rendimiento es mayor y la compatibilidad con las capacidades del agente es completa. Pero también existen métodos nativos. Vía Chocolatey, Scoop o npm:

    choco install opencode
    scoop install opencode
    npm install -g opencode-ai
    

    También hay una opción a través de Mise, así como un contenedor Docker:

    mise use -g github:anomalyco/opencode
    docker run -it --rm ghcr.io/anomalyco/opencode
    

    Finalmente, el binario terminado siempre se puede obtener de la página de lanzamientos en GitHub.

    Tecla de búsqueda profunda

    La clave se crea en su cuenta personal de DeepSeek. Vaya a platform.deepseek.com, abra la sección con claves API y haga clic en crear una nueva clave. Es mejor guardar la cadena resultante inmediatamente: se mostrará sólo una vez.

    Conexión DeepSeek

    Luego todo se hace dentro del propio agente. Inicie OpenCode en la terminal:

    opencode
    

    En la interfaz ejecutamos el comando de conexión:

    /connect
    

    En la lista de proveedores que se abre, busque DeepSeek, selecciónelo e inserte la clave API. Las claves agregadas de esta manera se guardan en un archivo:

    ~/.local/share/opencode/auth.json
    

    Después de conectarnos, solo queda seleccionar el modelo con el comando:

    /models
    

    Los modelos de DeepSeek estarán disponibles en la lista, incluidos deepseek-v4-pro, deepseek-flash y deepseek-v4-flash. Para el trabajo rutinario en el repositorio, la opción flash es suficiente; Para tareas complejas, tiene sentido cambiar a profesional.

    Configuración mediante config

    Si no desea almacenar la clave a través de un maestro o necesita configurar su propia dirección API, el proveedor se describe directamente en el archivo de configuración opencode.json:

    {
      "$schema": "https://opencode.ai/config.json",
      "provider": {
        "deepseek": {
          "options": {
            "baseURL": "https://api.deepseek.com"
          }
        }
      }
    }
    

    El campo baseURL es útil si utiliza un proxy o su propia puerta de enlace. En este caso, es conveniente transferir la clave a una variable de entorno:

    export DEEPSEEK_API_KEY=ваш_ключ_deepseek
    opencode
    

    Esta opción es buena para CI y lanzamientos únicos: la clave no termina en el almacenamiento, sino que vive solo en el entorno del proceso.

    Primer lanzamiento del proyecto

    Vaya al directorio del proyecto e inicie el agente:

    cd ваш_проект
    opencode
    

    El primer paso es inicializarlo:

    /init
    

    OpenCode analizará la estructura del proyecto y creará un archivo AGENTS.md, un análogo de las instrucciones del agente. Vale la pena comprometer este archivo con git: ayuda al agente a comprender las convenciones y patrones adoptados en el proyecto.

    Cómo usarlo

    El trabajo se estructura de forma muy parecida a como ocurre con otros agentes. Un par de trucos que debes saber de inmediato:

    • Modo de planificación. La tecla Tab cambia el agente entre los modos de planificación y ensamblaje. En el primero, sólo sugiere cómo solucionar el problema y no cambia nada; conviene comprobar la idea antes de realizar cambios.
    • Enlaces a archivos. La tecla @ abre una búsqueda difusa en los archivos del proyecto para transferir un archivo específico al agente en el contexto.
    • Revertir cambios. El comando /undo deshace las últimas ediciones y devuelve la solicitud original, /redo las devuelve. Puedes retroceder varios pasos seguidos.
    • Compartir una conversación. El comando /share crea un enlace a la conversación actual y lo copia en el portapapeles. De forma predeterminada, las conversaciones no se publican en ningún lugar.

    Para cambios simples, no es necesario cambiar al modo de planificación, sino describir inmediatamente lo que se debe hacer y especificar los archivos mediante @.

    A qué prestar atención

    Un par de puntos prácticos. OpenCode no requiere suscripción: usted paga al proveedor directamente cuando gasta tokens, por lo que las sesiones largas con DeepSeek son previsiblemente más baratas que los mejores modelos. La clave se almacena localmente en auth.json; vale la pena considerar esto en una máquina compartida, pero para entornos de otras personas una variable de entorno es más confiable.

    Y una cosa más: la calidad de las respuestas a problemas arquitectónicos complejos difiere entre modelos de diferentes clases, por lo que para el diseño tiene sentido tomar un modelo más fuerte y dejar la rutina por uno rápido y barato.

    Enlaces

    https://opencode.ai/
    https://opencode.ai/docs/
    https://opencode.ai/docs/providers/
    https://github.com/anomalyco/opencode
    https://platform.deepseek.com/api_keys
    https://api-docs.deepseek.com

    Fuentes

    https://opencode.ai/docs/
    https://opencode.ai/docs/providers/#deepseek
    https://github.com/anomalyco/opencode/releases
    https://models.dev/

  • Instalación de Asahi Linux en una MacBook con procesador M2

    En una Mac con un procesador Apple Silicon, no puede instalar Linux de la forma habitual: arrancar desde una unidad flash aquí es imposible y el gestor de arranque está firmado por Apple. El proyecto Asahi Linux se propuso solucionar este problema: sus participantes utilizaron ingeniería inversa para hacer que el hardware M1 y M2 funcionara en Linux normal. Ahora la distribución insignia del proyecto es Fedora Asahi Remix y funciona de manera bastante confiable en el M2. En este post describiré la instalación paso a paso.

    ¿Qué es Asahi Linux?

    El proyecto comenzó en 2020, cuando Apple cambió a sus propios chips y con ellos llegó un esquema de arranque cerrado: el dispositivo ejecuta solo código firmado por Apple. Los participantes de Asahi Linux escribieron su gestor de arranque m1n1, además del cual escribieron U-Boot y un entorno UEFI. A continuación, se carga el sistema ARM64 más común, pero con un kernel Linux-asahi, al que se le agregan controladores para hardware no estándar de Apple: GPU, video, sonido, unidades de cámara.

    En la práctica, se ve así: ejecuta el instalador desde macOS, particiona el disco, instala la cadena de arranque y el sistema. macOS permanece en su lugar, obtienes arranque dual y eliges tu sistema cuando lo enciendes.

    Requisitos

    • Mac con chip M2: MacBook Air, MacBook Pro de 13″, así como de 14″ y 16″ con M2 Pro y M2 Max. Los coches M1 también son compatibles.
    • macOS actual. El instalador requiere la última versión del sistema, así que actualízala antes de comenzar.
    • Espacio libre. Mínimo unos 30 GB, cómodo: 100 GB o más. El espacio se corta del contenedor APFS y no volverá por sí solo.
    • Contraseña de administrador de macOS. La necesitarás tanto durante la partición como cuando inicies en modo de recuperación por primera vez.
    • Copia de seguridad. La partición del disco es una operación que se inicia mejor con una copia de seguridad nueva.

    Paso 1. Copia de seguridad y actualización

    Haga una copia a través de Time Machine o cualquier otro método. Actualice macOS a la última versión disponible y reinicie. Si FileVault está habilitado, la contraseña seguirá siendo necesaria en la etapa de inicio en el modo de recuperación; el instalador debe desbloquear la unidad.

    Paso 2. Inicie el instalador

    Abra Terminal en macOS y ejecute un comando:

    curl https://alx.sh | sh
    

    Este es el instalador oficial del proyecto. Se descargará solo, verificará su modelo de Mac y le ofrecerá elegir una distribución. También hay una opción directamente para Fedora:

    curl https://fedora-asahi-remix.org/install | sh
    

    Es preferible la primera opción: muestra qué sistemas están disponibles actualmente y también ofrece una opción de escritorio.

    Paso 3. Partición del disco

    El instalador solicitará la contraseña de administrador y mostrará el diseño actual. Entonces el diálogo se ve así:

    • Presione r para cambiar el tamaño de la partición de macOS.
    • Ingrese el tamaño de la nueva partición de Linux. Puede ser en gigabytes, puede ser como un porcentaje del disco o puede escribir min; entonces se cortará la pieza más pequeña posible.
    • Confirma la marca con la letra y. Este paso es el más largo: el sistema mueve físicamente los datos en el contenedor APFS; en un disco grande, esto lleva varios minutos.
    • Presione f para dirigir el instalador a la partición libre recién creada.

    Es importante entender lo que está sucediendo: Linux no está instalado dentro de APFS, sino en una partición separada al lado. Es por eso que macOS permanece intacto y la reversión se reduce a eliminar esta sección.

    Paso 4. Seleccionar distribución y escritorio

    A continuación, el instalador ofrecerá el sistema y el entorno de escritorio. Fedora Asahi Remix viene con KDE Plasma de forma predeterminada: es la opción insignia que recibe actualizaciones primero. Una alternativa es GNOME, que tiene una sensación más cercana a macOS. También hay una imagen mínima si no necesitas un entorno gráfico.

    Paso 5. Primer arranque en modo de recuperación

    Después de la partición, el instalador le pedirá que continúe y la Mac se apagará. Aquí viene la parte más inusual:

    • Espera al menos 25 segundos: este es el requisito de Apple para ingresar al modo de recuperación.
    • Mantén presionado el botón de encendido hasta que aparezcan las opciones de inicio.
    • Seleccione el volumen de instalación e ingrese su contraseña de macOS.

    En este paso, la cadena de arranque se instala en la partición de servicio: m1n1, U-Boot y entorno UEFI. Luego, la máquina se reiniciará nuevamente: mantenga presionado el botón de encendido nuevamente y seleccione un nuevo volumen, esta vez para ingresar al sistema. Habrá varios reinicios de este tipo, cada uno de los cuales requerirá selección manual: de forma predeterminada, Mac continúa cargando macOS.

    Paso 6. Instalación del sistema

    A continuación, se inicia el asistente de configuración inicial: nombre del sistema, usuario, contraseña, zona horaria, distribución del teclado. Después de eso, comienza la instalación y ya proviene de Internet; necesitará una conexión estable y, con el tiempo, tardará entre quince minutos y media hora.

    Cuando se complete la instalación, reinicie y seleccione Linux en el menú de inicio. Cuando inicie sesión por primera vez, el sistema le pedirá que complete la configuración y la actualización.

    Qué funciona y qué no

    Antes de la instalación, debes evaluar con seriedad lo que perderás. En los portátiles M2 la situación es la siguiente:

    Obras:

    • Wi-Fi y Bluetooth – sin restricciones.
    • Pantalla y gráficos integrados: aceleración por hardware, incluidos OpenGL y Vulkan.
    • Cámara web, micrófono y altavoces en MacBook Air y MacBook Pro.
    • Modo de suspensión: funciona normalmente.
    • Decodificación de vídeo por hardware: los reproductores no cargan el procesador.
    • Puertos USB, incluidos USB 2 y USB 3 mediante conectores Thunderbolt.

    No funciona o funciona parcialmente:

    • Touch ID. La huella digital no está disponible en Linux: inicie sesión con contraseña.
    • Thunderbolt (USB4). Estado: en desarrollo. Lamentablemente, los dispositivos que requieren específicamente Thunderbolt no funcionarán.
    • Monitor externo a través de USB-C. El modo DisplayPort Alt también está en funcionamiento. Las computadoras portátiles M2 no tienen un puerto HDMI, por lo que no puedes conectar una pantalla externa. Los modelos con M2 Pro y M2 Max tienen HDMI y funciona. Encontrará una solución alternativa para USB-C en la sección principal de Fairydust a continuación.
    • La

    • codificación de vídeo por hardware está en los planes, la decodificación ya está implementada.

    En pocas palabras, es un gran sistema para trabajar con código, terminal, navegador y modelos locales, pero no para una base para monitor externo.

    Monitor externo a través del núcleo Fairydust

    La salida de imagen USB-C está disponible en la rama experimental del kernel Fairydust del equipo de Asahi Linux. Se necesita mucho tiempo para ensamblarlo manualmente, por lo que es más fácil usar el script contenedor del proyecto asahi-fairydust-display:

    git clone https://github.com/bharambetejas/asahi-fairydust-display
    cd asahi-fairydust-display
    chmod +x asahi-fairydust-build.sh
    ./asahi-fairydust-build.sh
    

    El script clona la rama Fairydust, configura y ensambla el kernel, lo coloca al lado del estándar y edita GRUB. Necesita 15 GB de espacio libre, un adaptador USB-C → HDMI o DisplayPort y entre 60 y 90 minutos para montarlo. Después del reinicio, seleccione el kernel etiquetado -fairydust en GRUB e inserte el adaptador en el puerto USB-C frontal.

    Verificar después de la descarga:

    uname -r
    glxinfo | grep "OpenGL renderer"
    xrandr
    

    El primer comando debería mostrar la versión con el sufijo -fairydust, el segundo debería mostrar el Apple M2, no llvmpipe, el tercero debería mostrar la salida DP-1 conectada.

    Reservas. La rama es experimental y no tiene soporte oficial. La salida solo funciona a través de un puerto USB-C y no siempre sobrevive a la conexión en caliente; es más seguro reiniciar con el adaptador ya insertado. El script no configura automáticamente la pantalla: el paso correspondiente está deshabilitado porque provocó un bucle de inicio de sesión en Wayland. La actualización del kernel estándar a través de dnf reorganiza el enlace simbólico /boot/dtb, por lo que la salida puede dejar de funcionar silenciosamente; luego, se debe repetir la compilación.

    El kernel estándar no se toca: para regresar, simplemente selecciónelo en el menú de GRUB.

    Unidad externa en lugar de actualización

    Aquí está el lado bueno. La MacBook no se puede actualizar: la memoria y el almacenamiento están soldados a la placa y su capacidad se selecciona una vez al momento de la compra. En macOS, el disco externo sigue siendo externo: el sistema y las aplicaciones realmente no se pueden transferir a él.

    En Linux, esta limitación se elimina: un SSD externo a través de USB es un dispositivo de bloque normal y cualquier punto de montaje se puede transferir a él a través de /etc/fstab. Si desea transferir su directorio de inicio, biblioteca de Steam, imágenes de máquinas virtuales o modelos locales, hágalo. Resulta exactamente la actualización que este auto no tiene.

    Se parece a esto. Primero, mira el UUID de la partición deseada:

    lsblk -f
    sudo blkid
    

    Luego agregue la línea a /etc/fstab:

    UUID=ваш-uuid  /home  ext4  defaults,nofail  0  2
    

    La transferencia en sí se realiza mediante copia: los datos se mueven a una unidad externa y luego se montan en el punto deseado. La mayoría de las veces, de esta manera no se elimina todo el /home, sino directorios pesados ​​individuales; de esta manera hay menos riesgo.

    Un par de advertencias. Vale la pena configurar el parámetro nofail en las opciones: sin él, el sistema no arrancará si el disco no está conectado. La velocidad de una unidad USB sigue siendo inferior a la del NVMe integrado, por lo que es mejor dejar espacio en el disco interno para operaciones frecuentes de E/S. Y no es necesario sacar el disco mientras se mueve con los directorios montados allí; primero desmóntelo.

    Cómo cambiar entre sistemas

    Cuando lo enciendas, mantén presionado el botón de encendido; aparecerá el menú de inicio, que contendrá macOS y Linux. Puede seleccionar el sistema predeterminado en macOS: “Preferencias del sistema” → “General” → “Disco del sistema”. Linux también tiene la configuración correspondiente, por lo que puedes cambiar en ambas direcciones sin un terminal.

    Enlaces

    https://asahilinux.org/fedora/
    https://asahilinux.org/docs/
    https://asahilinux.org/docs/platform/feature-support/m2/
    https://fedoraproject.org/asahi-remix
    https://github.com/bharambetejas/asahi-fairydust-display
    https://github.com/AsahiLinux/linux/tree/fairydust

    Fuentes

    https://asahilinux.org/docs/platform/feature-support/m2/
    https://discussion.fedoraproject.org/t/fedora-asahi-remix-installation-guide/
    https://github.com/AsahiLinux/docs
    https://github.com/bharambetejas/asahi-fairydust-display/blob/main/README.md
    https://github.com/bharambetejas/asahi-fairydust-display/blob/main/asahi-fairydust-build.sh

  • Installing VirtualBox with Guest Additions on an ARM Mac

    Instructions for installing Ubuntu Server in VirtualBox on a Mac with an ARM64 processor and connecting Guest Additions.

    Installing VirtualBox

    Download the ARM64 build of VirtualBox, mount the image and transfer VirtualBox.app to Applications.

    Configuring a virtual machine

    We create a new machine, specify the Linux type and the Ubuntu version (64-bit ARM). In the settings we set:

    • TPM – disable
    • UEFI – disable
    • RAM – 4096 MB.
    • Graphics controller – VMSVGA (for VBoxLinuxAdditions).
    • Processor – 4 cores.

    Installing Ubuntu Server

    Mount the Ubuntu Server ISO image for ARM64 into the CD-ROM drive. In the download section, put the optical drive first in the list. We start the machine and go through the installation of Ubuntu Server.

    Installing xubuntu-desktop

    Install the XFCE graphical environment:

    sudo apt update
    sudo apt install -y xubuntu-desktop
    

    In the login manager selection dialog, select lightdm.

    Reboot the guest system:

    sudo reboot
    

    Guest Additions

    After the first boot, install packages for building kernel modules:

    sudo apt update
    sudo apt install -y build-essential linux-headers-$(uname -r)
    

    We mount the disk with Guest Additions through the VirtualBox menu: Devices → Mount Guest Additions disk image. The disk will appear inside the guest in the /media/$USER directory.

    Open a terminal in Xubuntu, go to the directory of the mounted disk and run the installer:

    cd /media/$USER/*
    sudo ./VBoxLinuxAdditions-arm64.run
    

    Reboot the guest system:

    sudo reboot
    

    What should work after installation

    We check that the kernel modules are loaded:

    lsmod | grep vbox
    

    The output should include vboxguest and vboxsf.

    Add a shared folder in the machine properties and mount it inside the guest:

    sudo mkdir -p /media/sf_shared
    sudo mount -t vboxsf shared /media/sf_shared
    

    Working features:

    • Shared folders – the host directory is visible inside the guest via vboxsf.
    • Shared clipboard – copy text between host and guest.
    • Mouse integration – the cursor freely extends outside the machine window.
    • Automatic resolution change – the guest screen adjusts to the window size.
    • Time synchronization – the guest’s time is adjusted to the host’s time.

    Sources

    https://www.virtualbox.org/manual/topics/guestadditions.html
    https://forums.virtualbox.org/viewtopic.php?t=112886

  • How to connect DeepSeek to Claude Code

    Claude Code is a console agent from Anthropic that can read project files, edit code, run commands and tests, search the repository, and work with git. The main inconvenience when using it is the cost: long sessions with a lot of context quickly eat up the subscription budget.

    There is a solution. DeepSeek provides an endpoint compatible with the Anthropic API. It is enough to change the base address and token, and Claude Code will start working on DeepSeek models, without requiring any reinstallation or patches. In this post I will describe how to set this up on macOS, Linux and Windows.

    Why is this needed

    The reasons may be different:
    – Price. DeepSeek models are noticeably cheaper than Claude, and for routine agent tasks – navigating a project, minor edits, running tests – top quality is not always needed.
    – Availability. If you do not have a subscription or payment with an Anthropic card is not available for some reason, DeepSeek becomes a working option.
    – Experiments. It’s interesting to compare how different models handle the same codebase in the same environment.

    What you need

    You need Claude Code installed and the DeepSeek API key. If Claude Code is not already installed, the order is as follows:
    1. Install Node.js 18 or later. On Windows, you will additionally need Git for Windows.
    2. Install Claude Code itself using the command below.
    3. Check the installation.

    npm install -g @anthropic-ai/claude-code
    claude --version
    

    If the version is displayed, then the installation was successful. The API key is created in your DeepSeek personal account on the keys page.

    Configuration via environment variables

    All integration comes down to environment variables. For macOS and Linux it looks like this:

    export ANTHROPIC_BASE_URL=https://api.deepseek.com/anthropic
    export ANTHROPIC_AUTH_TOKEN=ваш_ключ_deepseek
    
    export ANTHROPIC_MODEL=deepseek-flash[1m]
    export ANTHROPIC_DEFAULT_OPUS_MODEL=deepseek-flash[1m]
    export ANTHROPIC_DEFAULT_SONNET_MODEL=deepseek-flash[1m]
    export ANTHROPIC_DEFAULT_HAIKU_MODEL=deepseek-flash
    export CLAUDE_CODE_SUBAGENT_MODEL=deepseek-flash
    
    export CLAUDE_CODE_EFFORT_LEVEL=max
    export CLAUDE_CODE_AUTO_COMPACT_WINDOW=786432
    

    For Windows in PowerShell the syntax is different, but the variable names are the same:

    $env:ANTHROPIC_BASE_URL="https://api.deepseek.com/anthropic"
    $env:ANTHROPIC_AUTH_TOKEN="ваш_ключ_deepseek"
    $env:ANTHROPIC_MODEL="deepseek-flash[1m]"
    

    Let’s figure out what’s what here. The `ANTHROPIC_BASE_URL` variable redirects requests from Anthropic servers to DeepSeek. `ANTHROPIC_AUTH_TOKEN` substitutes your key. The remaining variables determine which model is used in which role. There are models with the `[1m]` suffix – this is an option with a context window of about a million tokens, which allows the agent to hold significantly more project files at a time. Accordingly, `CLAUDE_CODE_AUTO_COMPACT_WINDOW` is set to the size of this window so that automatic history compression does not work too early.

    It is convenient not to export variables manually each time, but to register them in the Claude Code configuration. Then the settings will be picked up automatically upon startup.

    {
      "env": {
        "ANTHROPIC_BASE_URL": "https://api.deepseek.com/anthropic",
        "ANTHROPIC_AUTH_TOKEN": "ваш_ключ_deepseek",
        "ANTHROPIC_MODEL": "deepseek-flash[1m]",
        "ANTHROPIC_DEFAULT_HAIKU_MODEL": "deepseek-flash",
        "CLAUDE_CODE_SUBAGENT_MODEL": "deepseek-flash"
      }
    }
    

    After that, go to the project directory and run the agent:

    cd ваш_проект
    claude
    

    Claude Code in VS Code

    Claude Code is available not only in the terminal, but also as an extension for VS Code. It is installed in the normal way: open the extensions panel using Cmd+Shift+X, find “Claude Code” and click Install. The expansion is produced by Anthropic itself.

    The extension contains its own copy of the CLI, and it reads the same ~/.claude/settings.json file as the terminal version. The settings from the previous section also apply here – but with one caveat, which most often causes confusion.

    Input verification occurs before launch

    Before starting, the extension checks the credentials from its own `claudeCode.environmentVariables` setting, and not from settings.json. The values ​​from settings.json reach the running process – that is, the API address and selected models are picked up correctly – but they do not pass the extension’s own login check. If you see the login screen even though everything is already working in the terminal, this is the reason.

    This can be cured with a few lines in the VS Code settings: duplicate the variables in `claudeCode.environmentVariables` and disable the login request.

    {
      "claudeCode.environmentVariables": [
        { "name": "ANTHROPIC_BASE_URL", "value": "https://api.deepseek.com/anthropic" },
        { "name": "ANTHROPIC_AUTH_TOKEN", "value": "ваш_ключ_deepseek" },
        { "name": "ANTHROPIC_MODEL", "value": "deepseek-flash[1m]" }
      ],
      "claudeCode.disableLoginPrompt": true
    }
    

    macOS nuance

    If you launch VS Code from the Dock or Finder, it does not inherit environment variables from ~/.zshrc. This is standard macOS behavior and is specifically discussed in the Claude Code documentation. That is, `export ANTHROPIC_BASE_URL=…` in your shell for the extension simply will not work – this variable will not be in its environment.

    There are two conclusions from this. Firstly, the settings in `claudeCode.environmentVariables` are more reliable than shell variables. Secondly, if you still prefer a shell, launch the editor from the terminal, where the variables are already exported:

    code .
    

    What won’t work

    On a third-party provider, some extension features are not available because they require a claude.ai account:
    – there will be no plan usage bar, voice input and Web tab for cloud sessions;
    – logout commands are not shown in the menu;
    – `/usage` will show the consumption and number of tokens of the current session instead of plan limits;
    – Remote Control does not work if the base address is not Anthropic.

    This is expected behavior and not a sign that the setup failed.

    Separately, I would like to add that JetBrains has its own plugin, but it is designed differently: it does not contain a built-in CLI, but launches one already installed in the integrated terminal. There are no settings for environment variables, so you should launch the IDE from the terminal with already exported variables.

    How DeepSeek understands Claude model names

    Claude Code internally refers to models by names like claude-opus, claude-sonnet and claude-haiku. DeepSeek intercepts these names and replaces them with its own:
    – everything that starts with claude-opus goes to deepseek-v4-pro;
    – everything that starts with claude-sonnet or claude-haiku goes to deepseek-flash;
    – the unknown model name is also reduced to deepseek-flash.

    This means that even without explicitly specifying the models, the integration will work – but it is better to control explicitly which models and at what tariff will serve the request. That is why in the settings above all roles are written manually.

    What to pay attention to

    Compatibility is incomplete, and you should know this in advance. DeepSeek simply ignores some of the capabilities of the Anthropic API:

    – Caching prompts. The `cache_control` field is not supported. Claude Code actively uses the cache so as not to overpay for sending the same context repeatedly. This will not happen here, so long sessions are more expensive than you would expect from the price per token. Periodically start a new dialogue instead of endlessly continuing the old one.
    – Thinking Budget. The `thinking` parameter is supported, but the `budget_tokens` inside it are ignored.
    – Miscellaneous. The `top_k`, `service_tier`, `container` fields and the connection of MCP servers from the API are also ignored.
    – MCP. The built-in MCP server mechanism on the DeepSeek side does not work, although the agent’s usual tools – reading files, editing, running commands, searching – function normally.

    Separately, it is worth mentioning proxies. There are projects in the community like `ds-cc-proxy`, which are placed between Claude Code and DeepSeek and take on the task of smoothing out minor incompatibilities, as well as separating the main session and subagents into different models. If the standard setup behaves unstable, such an intermediate layer can help.

    Claude Code Router

    The method described above puts one model on all tasks. But the agent does very different things: he understands the structure of the project, corrects little things, and sometimes solves a truly complex problem. It is logical that different models should be used for different types of work. This is exactly what the claude-code-router (CCR) can do – a local gateway that stands between Claude Code and model providers.

    What does it give

    – Routing by rules. You can set which model serves the main session, which one serves background tasks, which one serves the scheduling mode. It makes sense to use an expensive model only for complex reasoning, and to give away the routine to a cheap one.
    – Backup options. If the provider returns an error, the request goes to the next model in the chain, rather than dropping the session.
    – Observability. The interface shows the request log, delays, token consumption and cost – something that you can only guess about with a direct connection.
    – One address for several agents. Providers, keys and rules live in one place, and clients connect to one local address.

    First about versions – this is important

    It’s worth warning here because it will save you time. CCR has been heavily redesigned over its history, and almost all the articles you find in a search describe the outdated version.

    In older versions, the configuration was in the file ~/.claude-code-router/config.json with the Providers and Router blocks, and everything was launched with the `ccr code` command. Now it doesn’t work that way anymore. The current version (3.x) stores settings in the SQLite database and is managed via a web interface. The old config.json is read exactly once as a source for migration if there is no database yet – after that, edits to it do not affect anything.

    That is, if you found instructions on the Internet with editing config.json and the `ccr code` command and nothing worked for you, you are editing a file that no one reads anymore. It’s not your fault.

    Installation

    You will need Node.js 22 or later.

    npm install -g @musistudio/claude-code-router
    ccr ui
    

    The `ccr ui` command brings up the service in the background and opens the management interface in the browser. It is useful to know the other commands: `ccr start` starts a service, `ccr stop` stops it, `ccr serve` works in the foreground and is convenient when you need to see logs.

    By default, the management interface lives on port 3458, and the gateway itself for models lives on port 3456.

    Settings

    Everything is done in the web interface, without manually editing files:
    1. In the Providers section, add the DeepSeek provider and specify its key. Please note: the full address up to the chat/completions point is needed here, not just the domain.
    2. In the Models section, describe what this model is – the description helps routing.
    3. In the Agent Config section, set the default model.
    4. In the Routing section, configure the rules: which model responds to which requests.
    5. On the API Keys page, create a CCR client key – this is what Claude Code will use, not the DeepSeek key.

    After this, all that remains is to send Claude Code to the gateway: specify the gateway address shown in the interface as the base address, and the CCR client key as the token.

    A nice thing: routing rules can be written not only with fields, but also with a JavaScript script, if the logic is more complex than comparing one field.

    Is it worth using it

    Connecting DeepSeek to Claude Code is primarily a way to reduce costs without giving up a convenient agent environment. You get the same interface, the same tools, and the same workflow, but on a different model. The setup takes a few minutes and is completely reversible: just remove the environment variables to return to Anthropic models.

    The limitations are also clear: there is no prompt cache, incomplete compatibility with respect to API fields, and the quality of the model may differ for complex architectural tasks. For routine work in the repository – navigation, refactoring, running tests – this is more than enough.

    Example: Oni-Extended

    A living example of such a combination is my project Oni-Extended, a fork of the port of the game Oni (Bungie, 2001) for Apple Silicon. The game sources are written in C and have been around for more than twenty years; there have never been any tests in them, and the file sizes are measured in tens of thousands of lines. However, new features have been added to the project via Claude Code from DeepSeek: fast saving and loading via F5/F9, a key hold block, and a -nodamage launch flag that disables damage.

    This is a good illustration of what was said above. All tasks relate to routine work in a large repository – the agent examines other people’s code, finds connections between modules and tests hypotheses, rather than designing an architecture from scratch. The cost of such sessions on DeepSeek turns out to be noticeably lower than on Anthropic models, despite the fact that the result is verified by the project’s own infrastructure: assembly, level run stand and offline tests.

    Links

    https://platform.deepseek.com/api_keys
    https://api-docs.deepseek.com
    https://docs.anthropic.com/en/docs/claude-code
    https://github.com/anthropics/claude-code
    https://github.com/musistudio/claude-code-router
    https://ccrdesk.top/en/guides/cli/
    https://github.com/zefir1990/Oni-Extended

    Sources

    https://api-docs.deepseek.com/guides/anthropic_api
    https://api-docs.deepseek.com/quick_start/agent_integrations/claude_code
    https://ccrdesk.top/en/routing/
    https://code.claude.com/docs/en/vs-code
  • Donki Hills has officially been on Steam for over a year!

    Donki Hills has been on Steam for over a year now!

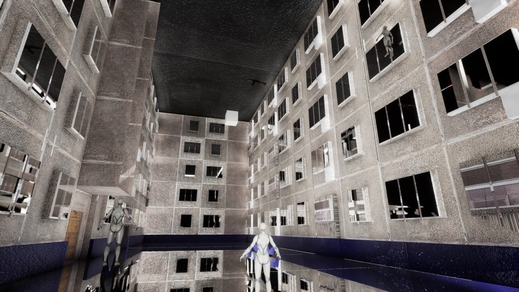
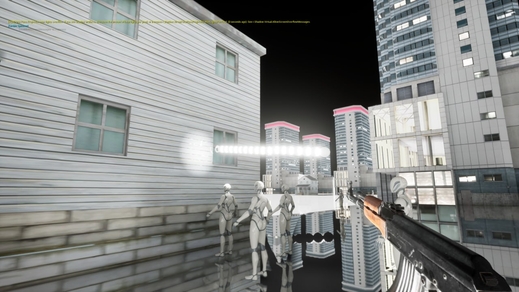
    Exactly a year ago the project appeared on the Steam page, and since then the game has come a long way. During this time, there were many experiments, changes and searches for the very direction in which Donki Hills should develop.

    Work on the gameplay continues, and now the project is gradually acquiring its true face. Donki Hills is starting to turn into what it was intended to be – Comedy First Person Roguelike Parody Survival Horror.

    A strange adventure where horror meets humor, exploration and unexpected situations. You have to go to the city, look for objects, solve riddles and gradually uncover the secret that will lead you to Maria.

    Below are fresh screenshots from the next playtest of the prototype. This is not the final look of the game yet, but you can already feel the atmosphere of the city and the direction in which the project is moving.

    Very interested to hear your reaction! 👀
    How do you like the new direction? What are your impressions of the atmosphere and ideas of the game?

    Thanks to everyone who added Donki Hills to their wishlist, follows the development and supports the project ❤️

    There are still many experiments, new mechanics and strange adventures ahead.

    https://store.steampowered.com/app/3476390/Donki_Hills/

  • Bypassing throttling on gaming laptop processors

    Manufacturers of modern gaming laptops often configure systems so that the processor warms up to 90 degrees and even reaches 100 degrees Celsius under load. This problem is especially acute in the summer when running demanding games or heavy work tasks.

    Due to extreme heating, throttling is activated (resetting the processor frequencies to prevent physical damage), which leads to a sharp loss of performance, freezes and a drop in FPS. There are many ways to combat overheating (from using cooling pads to undervolting), but in this article I will describe the simplest and fastest method that is relevant for Windows 11 and earlier versions of the operating system.

    The method is to limit the maximum processor state through power supply settings:

    1. Open Power Options via Windows Search or Control Panel.
    2. In the active power plan, go to the section for changing additional parameters.
    3. Find the Processor power management branch.
    4. Expand the Maximum processor state option.
    5. For Plugged In, change the value from 100% to 80% or less.

    After applying these settings, the processor will no longer automatically overclock to extreme frequencies that generate excess heat. Although the maximum peak performance will decrease by approximately 20%, the processor will no longer overheat. Stable operation at a reduced frequency without throttling is MUCH better and more comfortable for the system than constant sharp jumps in performance due to overheating at temperatures under 100 degrees.

    Each laptop is unique, so I recommend that users experiment and find the optimal balance (percentage) that will provide the desired performance without overheating.

  • Porting Surreal Engine C++ to WebAssembly

    In this post I will describe how I ported the Surreal Engine game engine to WebAssembly.
    https://demensdeum.com/demos/SurrealEngine/”
    Surreal Engine – a game engine that implements most of the functionality of the Unreal Engine 1, famous games on this engine – Unreal Tournament 99, Unreal, Deus Ex, Undying. It refers to classic engines that worked primarily in a single-threaded execution environment.
    I originally had the idea of ​​taking on a project that I couldn’t complete in any reasonable time frame, thus showing my Twitch followers that there are projects that even I can’t do. During my first stream, I suddenly realized that the task of porting Surreal Engine C++ to WebAssembly using Emscripten was feasible.

    A month later, I can demonstrate my fork and engine assembly on WebAssembly:
    https://demensdeum.com/demos/SurrealEngine/
    Control, as in the original, is carried out using the keyboard arrows. Next, I plan to adapt it for mobile control (tachi), adding correct lighting and other graphic features of the Unreal Tournament 99 render.

    Where to start?

    The first thing I want to say is that any project can be ported from C++ to WebAssembly using Emscripten, the only question is how complete the functionality will be. Choose a project whose library ports are already available for Emscripten; in the case of Surreal Engine, you are very lucky, because the engine uses the SDL 2, OpenAL – libraries. they are both ported to Emscripten. However, Vulkan is used as a graphics API, which is currently not available for HTML5, work is underway to implement WebGPU, but it is also in the draft stage, and it is also unknown how simple the further port from Vulkan to WebGPU will be, after it is fully standardized. Therefore, I had to write my own basic OpenGL-ES / WebGL renderer for Surreal Engine.

    Building the project

    Build system in Surreal Engine – CMake, which also simplifies porting, because Emscripten provides its native builders – emcmake, emmake.
    The Surreal Engine port was based on the code of my latest game in WebGL/OpenGL ES and C++ called Death-Mask, because of this the development was much simpler, I had all the necessary build flags with me and code examples.
    One of the most important points in CMakeLists.txt is the build flags for Emscripten, below is an example from the project file:

    set(CMAKE_CXX_FLAGS "-s MIN_WEBGL_VERSION=2 
    -s MAX_WEBGL_VERSION=2 
    -s EXCEPTION_DEBUG 
    -fexceptions 
    --preload-file UnrealTournament/ 
    --preload-file SurrealEngine.pk3 
    --bind 
    --use-preload-plugins 
    -Wall 
    -Wextra 
    -Werror=return-type 
    -s USE_SDL=2 
    -s ASSERTIONS=1 
    -w 
    -g4 
    -s DISABLE_EXCEPTION_CATCHING=0 
    -O3 
    --no-heap-copy 
    -s ALLOW_MEMORY_GROWTH=1 
    -s EXIT_RUNTIME=1")
    

    The build script itself:

    clear
    emmake make -j 16
    cp SurrealEngine.data /srv/http/SurrealEngine/SurrealEngine.data
    cp SurrealEngine.js /srv/http/SurrealEngine/SurrealEngine.js
    cp SurrealEngine.wasm /srv/http/SurrealEngine/SurrealEngine.wasm
    cp ../buildScripts/Emscripten/index.html /srv/http/SurrealEngine/index.html
    

    Next, let’s prepare index.html, which includes the project file system preloader. To upload to the web, I used Unreal Tournament Demo version 338. As you can see from the CMake file, the unpacked game folder was added to the build directory and linked as a preload-file for Emscripten.

    Main code changes

    Then we had to change the game loop of the game, you can’t run an endless loop, this leads to the browser freezing, instead you need to use emscripten_set_main_loop, I wrote about this feature in my 2017 note “Porting SDL C++ games to HTML5 (Emscripten)”
    We change the code for exiting the while loop to if, then we display the main class of the game engine, which contains the game loop, in the global scope, and write a global function that will call the game loop step from the global object:

    #if __EMSCRIPTEN__
    #include <emscripten.h>
    Engine *EMSCRIPTEN_GLOBAL_GAME_ENGINE = nullptr;
    void emscripten_game_loop_step() {
    	EMSCRIPTEN_GLOBAL_GAME_ENGINE->Run();
    }
    #endif
    

    After this, you need to make sure that there are no background threads in the application; if there are, then get ready to rewrite them for single-threaded execution, or use the phtread library in Emscripten.
    The background thread in Surreal Engine is used to play music, data comes from the main engine thread about the current track, the need to play music, or its absence, then the background thread receives a new state via a mutex and starts playing new music, or pauses. The background thread is also used to buffer music during playback.
    My attempts to build Surreal Engine for Emscripten with pthread were unsuccessful, because the SDL2 and OpenAL ports were built without pthread support, and I didn’t want to rebuild them for the sake of music. Therefore, I transferred the functionality of the background music stream to single-threaded execution using a loop. By removing pthread calls from the C++ code, I moved the buffering and music playback to the main thread, so that there would be no delays, I increased the buffer by a few seconds.
    Next, I will describe specific implementations of graphics and sound.

    Vulkan is not supported!

    Yes, Vulkan is not supported in HTML5, although all the marketing brochures present cross-platform and broad platform support as the main advantage of Vulkan. For this reason, I had to write my own basic graphics renderer for a simplified OpenGL type – ES, it is used on mobile devices, sometimes it does not contain the fashionable features of modern OpenGL, but it ports very well to WebGL, which is exactly what Emscripten implements. Writing basic tile rendering, bsp rendering, for the simplest GUI display, and rendering models + maps was completed in two weeks. This was perhaps the most difficult part of the project. There is still a lot of work ahead to implement the full functionality of Surreal Engine rendering, so any help from readers is welcome in the form of code and pull requests.

    OpenAL supported!

    The big luck is that Surreal Engine uses OpenAL for audio output. Having written a simple hello world in OpenAL and assembled it in WebAssembly using Emscripten, it became clear to me how simple everything was, and I set off to port the sound.
    After several hours of debugging, it became obvious that the OpenAL implementation of Emscripten has several bugs, for example, when initializing reading the number of mono channels, the method returned an infinite number, and after trying to initialize a vector of infinite size, C++ crashes with the exception vector::length_error.
    We managed to get around this by hardcoding the number of mono channels to 2048:

    		alcGetIntegerv(alDevice, ALC_MONO_SOURCES, 1, &monoSources);
    		alcGetIntegerv(alDevice, ALC_STEREO_SOURCES, 1, &stereoSources);
    
    #if __EMSCRIPTEN__
    		monoSources = 2048; // for some reason Emscripten's OpenAL gives infinite monoSources count, bug?
    #endif


    Is there a network?

    Surreal Engine does not currently support online play, play with bots is supported, but we need someone to write AI for these bots. Theoretically, you can implement a network game on WebAssembly/Emscripten using Websockets.

    Conclusion

    In conclusion, I would like to say that the porting of Surreal Engine turned out to be quite smooth due to the use of libraries for which there are Emscripten ports, as well as my past experience in implementing a game in C++ for WebAssembly on Emscripten. Below are links to sources of knowledge and repositories on the topic.
    M-M-M-MONSTER KILL!
    Also, if you want to help the project, preferably with WebGL/OpenGL ES rendering code, then write to me in Telegram:
    https://t.me/demenscave

    Links

    https://demensdeum.com/demos/SurrealEngine/

    https://github.com/demensdeum/SurrealEngine-Emscripten

    https://github.com/dpjudas/SurrealEngine

  • Port forwarding between clients via Chisel: a stripped-down tunnel without L3

    When two devices are behind NAT or strict firewalls and cannot “see” each other directly, a VPN seems to be the standard solution. But a full-fledged L3 tunnel (like WireGuard or OpenVPN) is often redundant: it requires root rights, setting up virtual interfaces, and can conflict with existing routes.

    In such cases, it is convenient to use Chisel – a TCP/UDP tunnel that runs on top of HTTP and uses WebSockets for data transfer. In this note I will show how to “forward” a port from one client to another through an intermediate server.

    How does it work?

    Imagine the situation: you have Client A (for example, your home server), Client B (your work laptop) and a VPS with a public IP address. Clients A and B can access the VPS, but not each other.

    The forwarding scheme will look like this:
    1. Client A connects to the VPS and opens a “reverse” port on the server. Now everything that comes to port X of the server goes to port Y of Client A.
    2. Client B connects to the VPS and forwards port Z from its local machine to port X of the server.
    3. As a result, Client B accesses localhost:Z and ends up on Client A:Y.

    This approach is one of the solutions in cases where communication with a VPS does not implement an L3 layer or there is no ability to configure routing between clients. We work exclusively at the application and port level.

    Step 1: Start the server

    On your VPS, just run Chisel in server mode. The --reverse flag is required to allow clients to open ports on the server side.

    chisel server --port 8080 --reverse
    

    Step 2: Connecting Client A (Source)

    Let’s say Client A wants to open access to his local web server on port 3000. He connects to the VPS and says: “reserve port 2000 on the server and forward it to me to 3000.”

    chisel client vps-ip:8080 R:2000:127.0.0.1:3000
    

    Now port 2000 on the VPS (on the loopback interface) leads to Client A.

    Step 3: Connecting Client B (Consumer)

    Now Client B wants to access this resource. It connects to the same VPS and forwards its local port 8080 to port 2000 of the server.

    chisel client vps-ip:8080 8080:127.0.0.1:2000
    

    Ready! Now, when you open http://localhost:8080 on Client B, you will see the service running on Client A.

    Safety and nuances

    Chisel supports authentication via the --auth flag, which is highly recommended when working through public servers. You can also use TLS certificates to encrypt traffic.

    The main advantage of this approach is that there is no need for TUN/TAP devices and complex routing tables. This is a stripped-down tunnel that does exactly one thing: binds ports via a WebSocket connection. This even works through corporate proxies if you configure Chisel to work through port 443.

    Output

    Chisel is a utility for specific network tasks. When you need to forward ports between isolated nodes without setting up a full-fledged VPN, a combination of forward and reverse tunnels through a relay server turns out to be a completely viable solution.

    Links

    https://github.com/jpillora/chisel

  • Why can’t I fix the bug?

    You spend hours working on the code, going through hypotheses, adjusting the conditions, but the bug is still reproduced. Sound familiar? This state of frustration is often called “ghost hunting.” The program seems to live its own life, ignoring your corrections.

    One of the most common – and most annoying – reasons for this situation is looking for an error in completely the wrong place in the application.

    The trap of “false symptoms”

    When we see an error, our attention is drawn to the place where it “shot”. But in complex systems, where a bug occurs (crash or incorrect value) is only the end of a long chain of events. When you try to fix the ending, you are fighting the symptoms, not the disease.

    This is where the flowchart concept comes in.

    How it works in reality

    Of course, it is not necessary to directly draw (draw) a flowchart on paper every time, but it is important to have it in your head or at hand as an architectural guide. A flowchart allows you to visualize the operation of an application as a tree of outcomes.

    Without understanding this structure, the developer is often groping in the dark. Imagine the situation: you edit the logic in one condition branch, while the application (due to a certain set of parameters) goes to a completely different branch that you didn’t even think about.

    Result: You spend hours on a “perfect” code fix in one part of the algorithm, which, of course, does nothing to fix the problem in another part of the algorithm where it actually fails.


    Algorithm for defeating a bug

    To stop beating on a closed door, you need to change your approach to diagnosis:

    • Find the state in the outcome tree:Before writing code, you need to determine exactly the path that the application has taken. At what point did logic take a wrong turn? What specific state (State) led to the problem?
    • Reproduction is 80% of success: This is usually done by testers and automated tests. If the bug is “floating”, development is involved in the process to jointly search for conditions.
    • Use as much information as possible: Logs, OS version, device parameters, connection type (Wi-Fi/5G) and even a specific telecom operator are important for localization.

    “Photograph” of the moment of error

    Ideally, to fix it, you need to get the full state of the application at the time the bug was reproduced. Interaction logs are also critically important: they show not only the final point, but also the entire user path (what actions preceded the failure). This helps to understand how to recreate a similar state again.

    Future tip: If you encounter a complex case, add extended debug logging information to this section of code in case the situation happens again.


    The problem of “elusive” states in the era of AI

    In modern systems using LLM (Large Language Models), classical determinism (“one input, one output”) is often violated. You can pass exactly the same input data, but get a different result.

    This happens due to the non-determinism of modern production systems:

    • GPU Parallelism: GPU floating point operations are not always associative. Due to parallel execution of threads, the order in which numbers are added may change slightly, which may affect the result.
    • GPU temperature and throttling: Execution speed and load distribution may depend on the physical state of the hardware. In huge models, these microscopic differences accumulate and can lead to the selection of a different token at the output.
    • Dynamic batching: In the cloud, your request is combined with others. Different batch sizes change the mathematics of calculations in the kernels.

    Under such conditions, it becomes almost impossible to reproduce “that same state”. Only a statistical approach to testing can save you here.


    When logic fails: Memory problems

    If you are working with “unsafe” languages ​​(C or C++), the bug may occur due to Memory Corruption.

    These are the most severe cases: an error in one module can “overwrite” data in another. This leads to completely inexplicable and isolated failures that cannot be traced using normal application logic.

    How to protect yourself at the architectural level?

    To avoid such “mystical” bugs, you should use modern approaches:

    • Multithreaded programming patterns:Clear synchronization eliminates race conditions.
    • Thread-safe languages: Tools that guarantee memory safety at compile time:
      • Rust: Ownership system eliminates memory errors.
      • Swift 6 Concurrency:Strong data isolation checks.
      • Erlang: Complete process isolation through the actor model.

    Summary

    Fixing a bug is not about writing new code, but about understanding how the old one works. Remember: you could be wasting time editing a branch that management doesn’t even touch. Record the state of the system, take into account the factor of AI non-determinism and choose safe tools.

  • Why documentation is your best friend

    (and how to create solutions that continue to work after updates)

    “Apps may only use public APIs and must run on the currently shipping OS.” Apple App Review Guidelines

    If you’ve ever started working with a new framework and found yourself thinking: “Now I’ll understand everything myself, reading the documentation is too long,” you’re definitely not alone. Many of us have a natural investigative instinct: try first, and only then look at the instructions. And that’s completely normal.

    However, at this stage it can be easy to get carried away and end up in a situation where the code works great, but perhaps relies on non-obvious features of the system.

    Why is it sometimes not enough to simply “figure it out on your own”?

    Frameworks, especially closed ones, are complex and multi-layered systems. They often hide internal logic and optimizations that:

    * are not described in public documentation;
    * do not guarantee that behavior will be maintained in the future;
    * may change with the release of new versions;
    * may contain features known to the developers that have not yet been fixed.

    When we act intuitively, there is a risk of building architecture on random observations rather than on documented rules. This can make the code more sensitive to updates.

    Documentation is not a limitation, but a reliable support

    Framework developers create manuals to help us. Acting within the documentation, we get:

    * stability;
    * support;
    * predictable system behavior.

    By going beyond these limits, we take on additional risks, and maintaining such code becomes more difficult.

    Experiments? Certainly. But with an understanding of boundaries.
    Curiosity is a great trait to have in a developer. Exploring and trying new things is absolutely essential. But here is a small wish:

    The most comfortable way to experiment is to rely on best practices.

    The documentation is a map that shows which paths are the most secure and supported by the creators.

    An outside perspective: expert advice

    We often learn from experienced colleagues:

    * they conduct useful courses,
    * speak at conferences,
    * write wonderful books and blogs,
    * share their unique vision.

    Many of them share truly valuable experiences. But it is worth remembering: if the author’s approaches contradict the official documentation, they may turn out to be fragile.

    Such “empirical patterns” sometimes:

    * work only on a specific version of the framework;
    * sensitive to updates;
    * may behave unpredictably in unusual situations.

    Learning from the community is great and rewarding. But any advice, even the most authoritative, should always be carefully checked with official manuals.

    A little about SOLID

    Three ideas from the SOLID principles perfectly complement this approach:

    * Open/Closed Principle: Try to extend behavior through public APIs and, if possible, not depend on hidden implementation.
    * Liskov Substitution Principle: Rely on the contract, not the specific implementation. Otherwise, changes under the hood can lead to unexpected difficulties.
    * Dependency Inversion: build dependencies on abstractions, not details.

    In practice, this means that being tied to internal, undocumented details of the framework makes the system brittle.
    Based on public interfaces and contracts, we get:

    * better isolation of code from changes in the framework;
    * ease of testing;
    * predictability and reliability of the architecture.

    What if there is a bug?

    It also happens that everything is done according to the rules, but the result does not meet expectations. Frameworks evolve and are not always perfect. In such cases:

    * Build a minimal example that reproduces the problem.
    * Ensure that only documented APIs are used.
    * Send a bug report – the development team will certainly appreciate your work and try to help.

    If the example relies on workarounds, it will be much more difficult for developers to provide support.

    How to get the most out of the framework

    *Refer to documentation.
    * Follow the guides and recommendations of the authors.
    * Experiment within the described functionality.
    * Check advice from the Internet with official sources.
    * Localize bugs while respecting framework contracts.

    Conclusion

    Frameworks are powerful tools with their own rules of the game. By forgetting about them, we risk making our code overly vulnerable. But we all want the created products to live for a long time and not require urgent corrections after each minor update.

    Manuals and documentation are excellent support that helps create truly reliable solutions.

    Sources

    https://developer.apple.com/app-store/review/guidelines/
    https://en.wikipedia.org/wiki/SOLID
    https://en.wikipedia.org/wiki/API
    https://en.wikipedia.org/wiki/RTFM

  • Building a C++ SDL application for iOS on Linux

    In this note, I will describe the procedure for building a C++ SDL application for iOS on Linux, signing an ipa archive without a paid Apple Developer subscription, and installing it on a clean device (iPad) using macOS without Jailbreak.

    First, let’s install the build toolchain for Linux:
    https://github.com/tpoechtrager/cctools-port

    The toolchain needs to be downloaded from the repository, then follow the instructions on the Godot Engine website to complete the installation:
    https://docs.godotengine.org/ru/latest/development/compiling/cross-compiling_for_ios_on_linux.html

    At the moment, you need to download Xcode dmg and copy the sdk from there to build cctools-port. This stage is easier to complete on macOS; just copy the necessary sdk files from the installed Xcode. After successful assembly, the terminal will contain the path to the cross-compiler toolchain.
    Next, you can start building the SDL application for iOS. Let’s open cmake and add the necessary changes to build the C++ code:

    SET(CMAKE_SYSTEM_NAME Darwin)
    SET(CMAKE_C_COMPILER arm-apple-darwin11-clang)
    SET(CMAKE_CXX_COMPILER arm-apple-darwin11-clang++)
    SET(CMAKE_LINKER arm-apple-darwin11-ld)


    Now you can compile using cmake and make, but do not forget to add $PATH to the cross-compiler toolchain:

    
    PATH=$PATH:~/Sources/cctools-port/usage_examples/ios_toolchain/target/bin


    For correct linking with frameworks and SDL, we write them in cmake, dependencies of the game Space Jaguar for example:

    
    target_link_libraries(
    ${FSEGT_PROJECT_NAME}
    ${FLAME_STEEL_PROJECT_ROOT_DIRECTORY}/scripts/buildScripts/ios/resources/libs/libclang_rt.ios.a
    ${FLAME_STEEL_PROJECT_ROOT_DIRECTORY}/scripts/buildScripts/ios/resources/libs/libSDL2.a
    ${FLAME_STEEL_PROJECT_ROOT_DIRECTORY}/scripts/buildScripts/ios/resources/libs/libSDL2_mixer.a
    ${FLAME_STEEL_PROJECT_ROOT_DIRECTORY}/scripts/buildScripts/ios/resources/libs/libSDL2_image.a
    "${FLAME_STEEL_PROJECT_ROOT_DIRECTORY}/scripts/buildScripts/ios/resources/libs/CoreServices.framework"
    "${FLAME_STEEL_PROJECT_ROOT_DIRECTORY}/scripts/buildScripts/ios/resources/libs/ImageIO.framework"
    "${FLAME_STEEL_PROJECT_ROOT_DIRECTORY}/scripts/buildScripts/ios/resources/libs/Metal.framework"
    "${FLAME_STEEL_PROJECT_ROOT_DIRECTORY}/scripts/buildScripts/ios/resources/libs/AVFoundation.framework"
    "${FLAME_STEEL_PROJECT_ROOT_DIRECTORY}/scripts/buildScripts/ios/resources/libs/GameController.framework"
    "${FLAME_STEEL_PROJECT_ROOT_DIRECTORY}/scripts/buildScripts/ios/resources/libs/CoreMotion.framework"
    "${FLAME_STEEL_PROJECT_ROOT_DIRECTORY}/scripts/buildScripts/ios/resources/libs/CoreGraphics.framework"
    "${FLAME_STEEL_PROJECT_ROOT_DIRECTORY}/scripts/buildScripts/ios/resources/libs/AudioToolbox.framework"
    "${FLAME_STEEL_PROJECT_ROOT_DIRECTORY}/scripts/buildScripts/ios/resources/libs/CoreAudio.framework"
    "${FLAME_STEEL_PROJECT_ROOT_DIRECTORY}/scripts/buildScripts/ios/resources/libs/QuartzCore.framework"
    "${FLAME_STEEL_PROJECT_ROOT_DIRECTORY}/scripts/buildScripts/ios/resources/libs/OpenGLES.framework"
    "${FLAME_STEEL_PROJECT_ROOT_DIRECTORY}/scripts/buildScripts/ios/resources/libs/UIKit.framework"
    "${FLAME_STEEL_PROJECT_ROOT_DIRECTORY}/scripts/buildScripts/ios/resources/libs/Foundation.framework"
    )


    In my case, the SDL, SDL_Image, SDL_mixer libraries are compiled in Xcode on macOS in advance for static linking; Frameworks copied from Xcode. Also added is the libclang_rt.ios.a library, which includes iOS-specific runtime calls, for example isOSVersionAtLeast. Included a macro for working with OpenGL ES, disabling unsupported functions in the mobile version, similar to Android.
    After solving all the build problems, you should get the assembled binary for arm. Next, let’s consider running the assembled binary on a device without Jailbreak.
    On macOS, install Xcode, register on the Apple portal, without paying for the developer program. Add an account in Xcode -> Preferences -> Accounts, create a blank application and build on a real device. During assembly, the device will be added to your free developer account. After assembly and launch, you need to build the archive; to do this, select Generic iOS Device and Product -> Archive. Once the archive is built, extract the embedded.mobileprovision and PkgInfo files from it. From the build log to the device, find the codesign line with the correct signature key, the path to the entitlements file with the extension app.xcent, copy it.
    Copy the .app folder from the archive, replace the binary in the archive with one compiled by a cross-compiler in Linux (for example, SpaceJaguar.app/SpaceJaguar), then add the necessary resources to the .app, check the integrity of the PkgInfo and embedded.mobileprovision files in the .app from the archive, copy again if necessary. We re-sign the .app using the codesign command – codesign requires an input key for sign, the path to the entitlements file (can be renamed with a .plist extension)
    After re-signing, create a Payload folder, move the folder with the .app extension there, create a zip archive with Payload in the root, rename the archive with the .ipa extension. After that, in Xcode, open the list of devices and Drag’n’Drop the new ipa to the device’s list of applications; Installation via Apple Configurator 2 does not work for this method. If the re-signing is done correctly, then the application with the new binary will be installed on an iOS device (for example, iPad) with a 7-day certificate, this is enough for the testing period.

    Sources

    https://github.com/tpoechtrager/cctools-port

    https://docs.godotengine.org/ru/latest/development/compiling/cross-compiling_for_ios_on_linux.html

    https://jonnyzzz.com/blog/2018/06/13/link-error-3/

    https://stackoverflow.com/questions/6896029/re-sign-ipa-iphone

    https://developer.apple.com/library/archive/documentation/Security/Conceptual/CodeSigningGuide/Procedures/Procedures.html

  • Build for Windows under Ubuntu MinGW CMake

    In this post I will describe the process of building libraries and applications for Windows using the MinGW32 toolchain on Ubuntu.
    Install wine, mingw:

    sudo apt-get install wine mingw-w64
    

    After this, you can already build C/C++ applications for Windows:

    # C
    i686-w64-mingw32-gcc helloWorld.c -o helloWorld32.exe      # 32-bit
    x86_64-w64-mingw32-gcc helloWorld.c -o helloWorld64.exe    # 64-bit
     
    # C++
    i686-w64-mingw32-g++ helloWorld.cc -o helloWorld32.exe     # 32-bit
    x86_64-w64-mingw32-g++ helloWorld.cc -o helloWorld64.exe   # 64-bit
    

    The collected exe can be checked using wine.
    Next, let’s look at the changes to the CMake build, the CMakeLists.txt file, adding MinGW specific things to the build file:

    if (MINGW32)
    set(CMAKE_SYSTEM_NAME Windows)
    SET(CMAKE_C_COMPILER i686-w64-mingw32-gcc)
    SET(CMAKE_CXX_COMPILER i686-w64-mingw32-g++)
    SET(CMAKE_RC_COMPILER i686-w64-mingw32-windres)
    set(CMAKE_RANLIB i686-w64-mingw32-ranlib)
    endif()
    
    // для сборки shared dll
    elseif (MINGW32)
    add_library(FlameSteelEngineGameToolkit.dll SHARED ${SOURCE_FILES})
    else()
    
    // обязательно линкуем со всеми зависимостями
    if (MINGW32)
    target_link_libraries(
                            FlameSteelEngineGameToolkit.dll 
                            -static-libgcc
                            -static-libstdc++
                            SDL2 
                            SDL2_mixer 
                            /home/demensdeum/Sources/cube-art-project-bootstrap/FlameSteelFramework/FlameSteelCore/FlameSteelCore.dll
                            /home/demensdeum/Sources/cube-art-project-bootstrap/FlameSteelFramework/FlameSteelBattleHorn/FlameSteelBattleHorn.dll
                            /home/demensdeum/Sources/cube-art-project-bootstrap/FlameSteelFramework/FlameSteelCommonTraits/FlameSteelCommonTraits.dll)
    
    set_target_properties(FlameSteelEngineGameToolkit.dll PROPERTIES
            PREFIX ""
            SUFFIX ""
            LINK_FLAGS "-Wl,--add-stdcall-alias"
            POSITION_INDEPENDENT_CODE 0 # this is to avoid MinGW warning; 
            # MinGW generates position-independent-code for DLL by default
    )
    else()
    

    We collect:

    cmake -DMINGW32=1 .
    make
    

    The output will be a dll or exe, depending on what you are collecting. For a working example, you can look at the repository of the new Cube-Art-Project and its libraries:
    https://gitlab.com/demensdeum/cube-art-project

    https://gitlab.com/demensdeum/FlameSteelEngineGameToolkitFSGL

    https://gitlab.com/demensdeum/cube-art-project-bootstrap

    Sources
    https://arrayfire.com/cross-compile-to-windows-from-linux/

  • Building macOS applications for Ubuntu OSXCross CMake

    In this post, I will describe building cross-platform C++ applications for macOS on an Ubuntu build machine using CMake and osxcross.
    First, install the osxcross toolchain:
    https://github.com/tpoechtrager/osxcross
    Installation occurs in 3 stages, downloading dependencies:

    cd tools
    ./get_dependencies.sh
    

    Download XCode.xip from the official Apple website, then download the SDK from XCode:

    ./gen_sdk_package_pbzx.sh /media/demensdeum/2CE62A79E62A4404/LinuxSupportStorage/xcode111.xip
    

    I hope you read the XCode license agreement in the last step? Next, build the toolchain with the required prefix:

    INSTALLPREFIX=/home/demensdeum/Apps/osxcross ./build.sh 
    

    Now you can use osxcross from the prefix directory of the previous step. Let’s add a new build macro for CMake and write everything necessary:

    if (OSXCROSS)
    SET(CMAKE_SYSTEM_NAME Darwin)
    SET(CMAKE_C_COMPILER o64-clang)
    SET(CMAKE_CXX_COMPILER o64-clang++)
    SET(CMAKE_C_COMPILER_AR x86_64-apple-darwin19-ar)
    SET(CMAKE_CXX_COMPILER_AR x86_64-apple-darwin19-ar)
    SET(CMAKE_LINKER x86_64-apple-darwin19-ld)
    SET(ENV{OSXCROSS_MP_INC} 1)
    endif()
    

    Dynamic linking was not successful for me, so we export the libraries statically:

    if (OSXCROSS)
    add_library(FlameSteelCore STATIC ${SOURCE_FILES})
    else()
    

    Next, you may be faced with the fact that you do not have the necessary libraries for osxcross, I encountered this when using SDL2. osxcross supports ready-made library packages – macports. For example, installing SDL2-mixer:

    osxcross-macports -v install libsdl2_mixer
    

    After this, you can start building libraries/applications as usual in the cmake-make link, do not forget to specify static linking of libraries if necessary.

    Manual assembly of libraries

    Currently, I have encountered the problem of incorrect archiving of libraries during static linking; when building the final application I receive the error:

    file was built for archive which is not the architecture being linked (x86_64)
    

    Very similar to this ticket, we managed to implement a workaround resulting in the build completing correctly. Let’s unzip the static library and build it anew using the osxcross archiver:

    ar x ../libFlameSteelCore.a
    rm ../libFlameSteelCore.a
    x86_64-apple-darwin19-ar rcs ../libFlameSteelCore.a *.o
    

    Also, one of the problems I personally consider is the lack of ability to run macOS applications directly on Ubuntu (at least with part of the functionality). Of course, there is a project darling, but the support still leaves much to be desired.

    Sources

    https://github.com/tpoechtrager/osxcross

  • Local image generation: ComfyUI and FLUX model

    Nowadays, you don’t have to rely on cloud services: you can generate high-quality images entirely on your own hardware. In this post, I will describe how to run the modern FLUX model locally on your computer using ComfyUI.

    ComfyUI uses node-based architecture. This allows you to:
    – Totally control every stage of generation.
    – Easily share ready-made “workflows”

    FLUX is a large model, so the hardware requirements are higher than SD 1.5 or SDXL:
    – Video card (GPU): Nvidia RTX with 12 GB VRAM or higher (for comfortable work). If you have 8 GB or less, you will have to use the quantized versions (GGUF or NF4).
    – Random access memory (RAM): minimum 16 GB (preferably 32 GB and above).
    – Disk Space: Approximately 20–50 GB for models and components.

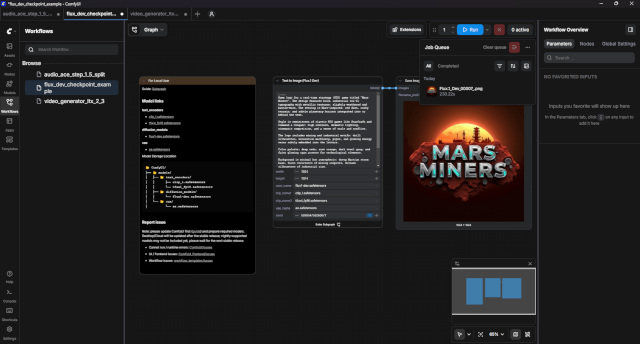
    The easiest way to start FLUX is to use a ready-made template. Just search for flux text to image in the workflows window and install.

    Write a prompt in English in the `Text to Image (Flux.1 Dev)` node, select the resolution (FLUX works well with 1024×1024 and even higher) and press RUN.

    The first generation may take time as the models will be loaded into the video card memory.

    https://github.com/comfyanonymous/ComfyUI

  • Local Vibe coding: LM Studio, VS Code and Continue

    If you had a desire to use neural networks to help write code (so-called Vibe coding), and you have a fairly powerful computer, for example with an Nvidia RTX video card, then you can deploy the entire environment absolutely free on your machine. This solves problems with paid subscriptions and allows you to safely work with projects under NDA, since your code is not sent anywhere. In this post I will describe how to assemble a local bundle of LM Studio, VS Code and the Continue extension.

    Tools for local Vibe coding

    For comfortable work we need three main components:
    – LM Studio: a convenient application for downloading and running local LLMs. It takes on all the complexity of working with GGUF models and puts up a local server compatible with the OpenAI API.
    – VS Code: a popular and familiar code editor.
    – Continue: extension for VS Code that integrates neural networks directly into the work environment. Allows you to chat, highlight code for refactoring, and supports autocomplete.

    Hardware requirements

    Local language models are memory intensive:
    – Video card (GPU): Nvidia with 8 GB VRAM or higher (for comfortable work with models with 7-8 billion parameters). Heavier models will require 16 GB of VRAM.
    – Disk space: about 500 GB for storing various downloaded models.

    Configuring the link

    The setup process is quite simple and does not require complex manipulations in the terminal:
    1. Download and install LM Studio. Use the built-in search to find a lightweight model like Qwen Coder or gemma3:12b.
    2. In LM Studio, go to the Local Server tab and click Start Server. By default it will start on `http://localhost:1234/v1`.
    3. Open VS Code and install the Continue extension from the plugin store.
    4. Open the Continue configuration file and add a new model, specifying the `openai` provider and the address of your local server from LM Studio.

    You can then communicate with your local LLM directly in the Continue sidebar, ask questions about your code, and generate new components.

    Why does this work?

    As I wrote earlier, LLMs do better with flat structure and WET (Write Everything Twice) code. Local parameter models may be inferior to giants like GPT-4 when it comes to designing complex architectures, but they are more than capable of generating boilerplate code, refactoring simple functions, and rapid prototyping.

    Additionally, with local Vibe coding, your code never leaves the machine. This makes this combination ideal for corporate development and working with sensitive data.

    Output

    Local neural networks are not capable of fully replacing a programmer or designing a complex system. However, the combination of LM Studio + VS Code + Continue provides independence from cloud services and maintains privacy. This is a completely working auxiliary tool for routine tasks, if you are willing to put up with the limitations of small models and independently control the project architecture.

    Links

    https://code.visualstudio.com/
    https://lmstudio.ai/
    https://continue.dev/

    Sources

    https://youtu.be/IqqCwhG46jY
    https://www.youtube.com/watch?v=7AImkA96mE8

  • Local video generation: ComfyUI and LTX-2.3

    Previously, creating videos using neural networks was the prerogative of cloud services like Runway or Luma. Today, if you have a modern Nvidia graphics card, you can generate high-quality videos right on your computer. In this post, I will tell you how to set up local video generation using ComfyUI and the effective LTX-2.3 model.

    Tools for video generation

    For work we will need:
    – ComfyUI: a powerful interface with a node-based architecture that allows you to flexibly customize the generation process.
    – LTX-2.3: A modern model from Lightricks, optimized for creating smooth and detailed videos with relatively moderate video memory requirements.

    Hardware requirements

    Generating video is a much more resource-intensive process than working with images:
    – Video card (GPU): Nvidia RTX with 8 GB VRAM is the minimum required for a resolution of 768×512. For comfortable operation and higher resolutions, it is highly desirable to have 16–24 GB of VRAM.
    – Random access memory (RAM): minimum 32 GB. Video models and VAEs take up a lot of space when downloading.
    – Disk space: about 500 GB for the model itself and related components.

    Setup and launch

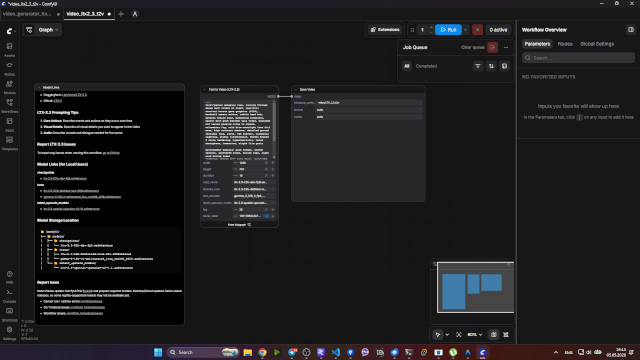
    The process of launching LTX-2.3 in ComfyUI is as follows:
    1. Update ComfyUI: The model is relatively new, so make sure you have the latest version of the interface installed.
    2. Install Workflow: The easiest way is to find a ready-made JSON template for LTX Video. The model requires specific nodes to work with video latent space.
    3. Prompt and parameters: Enter a description of the scene in English. Note that the LTX-2.3 understands motion well (eg “camera orbits around”, “fast movement”).

    Why choose LTX-2.3?

    LTX-2.3 is notable because it delivers results comparable to proprietary cloud services, but runs locally. This gives you:
    – Complete privacy: your prompts and generated videos do not go to other people’s servers.
    – Control: you can experiment with frame rate (FPS), resolution and prompt strength without having to pay for each attempt.

    Local video generation is still in active development, and LTX-2.3 is a great entry into the world of “home Hollywood.”

    Links

    https://github.com/comfyanonymous/ComfyUI
    https://huggingface.co/Lightricks/LTX-Video

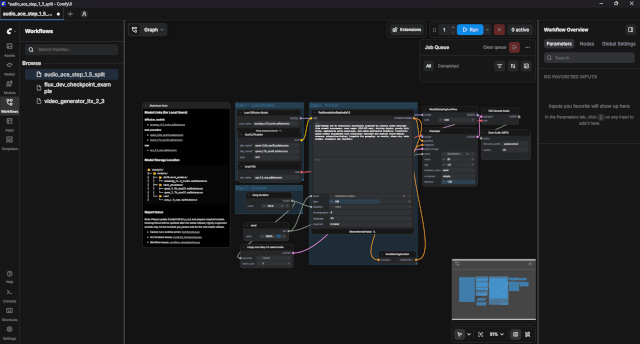
  • Local music generation: ComfyUI and ACE-Step-1.5 model

    Nowadays, you don’t have to rely on cloud services to create content: you can generate high-quality music entirely on your own hardware. In this post, I will describe how to run the modern ACE-Step-1.5 model locally on your computer using ComfyUI.

    ComfyUI uses node-based architecture. This allows you to:
    – Totally control every stage of audio generation.
    – Easily share ready-made “workflows”.

    ACE-Step-1.5 is an advanced model for music generation that requires significant computational resources. The hardware requirements are higher than those of many simple synthesizers:
    – Video card (GPU): Nvidia RTX with 8 GB VRAM or higher (12 GB+ recommended) for comfortable work at high quality.
    – Random access memory (RAM): minimum 16 GB (preferably 32 GB and above).
    – Processor (CPU): Modern multi-core processor with good support for AVX/CUDA computing.
    – Disk Space: Approximately 20–50 GB for models and components.

    The easiest way to run ACE-Step-1.5 is to use a ready-made audio generation template. Just search for music text to audio in the workflows window and install.

    Write a prompt describing the genre and mood (for example, “uplifting synthwave track with heavy bass”) in the `Prompt Input` node. Specify the desired duration and press RUN.
    The first generation may take time, as the models will be loaded into the video card memory and process complex acoustic patterns.

    https://github.com/comfyanonymous/ComfyUI
    https://www.youtube.com/watch?v=UAlLD5fS7-c

  • Local neural networks using ollama

    If you had a desire to launch something like ChatGPT and you have a fairly powerful computer, for example with an Nvidia RTX video card, then you can run the ollama project, which will allow you to use one of the ready-made LLM models on your local machine, absolutely free. ollama provides the ability to communicate with LLM models, in the manner of ChatGPT; also in the latest version, the ability to read images and format the output data in json format has been announced.

    I also ran the project itself on a MacBook with an Apple M2 processor, and I know that the latest models of video cards from AMD are supported.

    To install on macOS, go to the ollama website:
    https://ollama.com/download/mac

    Click “Download for macOS”, you will download an archive of the form ollama-darwin.zip, inside the archive there will be Ollama.app which needs to be copied to “Applications”. After this, launch Ollama.app, most likely the installation process will occur on the first launch. After that, in the tray you saw the ollama icon, the tray is on the top right next to the clock.

    After that, launch a regular macOS terminal, and type the command to download, install and run any ollama model. A list of available models, descriptions, and their characteristics can be seen on the ollama website:
    https://ollama.com/search

    Choose the model with the fewest parameters if it does not fit into your video card at launch.

    For example, the command to launch the llama3.1:latest model:

    ollama run llama3.1:latest
    

    Installation for Windows and Linux is generally similar, in one case there will be an ollama installer and further work with it via Powershell.
    For Linux, installation is done using a script, but I recommend using the version of your specific package manager. On Linux, ollama can also be launched via a regular bash terminal.

    Sources
    https://www.youtube.com/watch?v=Wjrdr0NU4Sk
    https://ollama.com

  • Video stabilization using ffmpeg

    If you want to stabilize videos and remove camera shake, the `ffmpeg` tool offers a powerful solution. Thanks to the built-in filters `vidstabdetect` and `vidstabtransform`, you can achieve professional results without using complex video editors.

    Preparing for work

    Before you start, make sure your `ffmpeg` supports the `vidstab` library. On Linux you can check this with the command:

    bash  
    ffmpeg -filters | grep vidstab  
    

    If the library is not installed, you can add it:

    sudo apt install ffmpeg libvidstab-dev  
    

    Installation for macOS via brew:

    brew install libvidstab
    brew install ffmpeg
    

    Now let’s move on to the process.

    Step 1: Motion Analysis

    First you need to analyze the motion of the video and create a file with stabilization parameters.

    ffmpeg -i input.mp4 -vf vidstabdetect=shakiness=10:accuracy=15 transfile=transforms.trf -f null -  
    

    Parameters:

    shakiness: Video shake level (default 5, can be increased to 10 for more complex cases).
    accuracy: Analysis accuracy (default 15).
    transfile: File name to save the motion parameters.

    Step 2: Apply Stabilization

    Now you can apply stabilization using the transformation file:

    ffmpeg -i input.mp4 -vf vidstabtransform=input=transforms.trf:zoom=5 output.mp4
    

    Parameters:

    input: Points to the file with transformation parameters (created in the first step).
    zoom: Zoom factor to remove black edges (e.g. 5 – auto zoom until artifacts are removed).

  • máquinas informáticas de turing

    Les presento una traducción de las primeras páginas del artículo de Alan Turing “SOBRE NÚMEROS COMPUTABLES CON UNA APLICACIÓN AL PROBLEMA DE RESOLUCIÓN” de 1936. Los primeros capítulos contienen una descripción de las computadoras, que luego se convirtieron en la base de la informática moderna.

    La traducción completa del artículo y la explicación se pueden leer en el libro del divulgador estadounidense Charles Petzold, titulado “Reading Turing: A Journey Through Turing’s Historical Article on Computability and Turing Machines” (ISBN 978-5-97060-231-7, 978-0-470-22905-7)

    Artículo original:
    https://www.astro.puc.cl/~rparra/tools/PAPERS/turing_1936.pdf

    SOBRE NÚMEROS COMPUTABLES CON APLICACIÓN AL PROBLEMA DE RESOLUCIÓN

    AM TURING

    [Recibido el 28 de mayo de 1936 – Leído el 12 de noviembre de 1936]

    Los números “computables” pueden describirse brevemente como números reales cuyas expresiones como fracciones decimales se pueden calcular de un número finito de formas. Aunque a primera vista este artículo trata los números como computables, es casi igual de fácil definir y explorar funciones computables de una variable entera, una variable real, una variable computable, predicados computables y similares. Sin embargo, los problemas fundamentales asociados con estos objetos computables son los mismos en cada caso. Para una consideración detallada, elegí los números computables como objeto computable porque el método para considerarlos es el menos engorroso. Espero describir pronto la relación de los números computables con las funciones computables, etc. Paralelamente se realizarán investigaciones en el campo de la teoría de funciones de una variable real expresada en términos de números computables. Según mi definición, un número real es computable si su representación decimal puede ser escrita por una máquina.

    En los párrafos 9 y 10 doy algunos argumentos para demostrar que los números computables incluyen todos los números que naturalmente se consideran computables. En particular, muestro que algunas clases grandes de números son computables. Incluyen, por ejemplo, las partes reales de todos los números algebraicos, las partes reales de los ceros de las funciones de Bessel, los números π, e y otros. Sin embargo, los números computables no incluyen todos los números definibles, como lo demuestra el siguiente ejemplo de un número definible que no es computable.

    Aunque la clase de números computables es muy grande y en muchos aspectos similar a la clase de números reales, sigue siendo enumerable. En el §8 considero ciertos argumentos que parecerían sostener lo contrario. Cuando uno de estos argumentos se aplica correctamente, se extraen conclusiones que, a primera vista, son similares a las de Gödel*. Estos resultados tienen aplicaciones extremadamente importantes. En particular, como se muestra a continuación (§11), el problema de resolución no puede tener solución.

    En un artículo reciente, Alonzo Church introdujo la idea de “calculabilidad efectiva”, que es equivalente a mi idea de “computabilidad”, pero tiene una definición completamente diferente. Church también llega a conclusiones similares respecto del problema de la resolución. La prueba de la equivalencia de “computabilidad” y “efectivamente calculable” se presenta en el anexo de este artículo.

    1. Computadoras

    Ya hemos dicho que los números computables son aquellos números cuyas cifras decimales son contables por medios finitos. Aquí se necesita una definición más clara. Este artículo no hará ningún intento real de justificar las definiciones aquí dadas hasta que lleguemos al §9. Por ahora, sólo señalaré que la razón (lógica) (para esto) es que la memoria humana es, por necesidad, limitada.

    Comparemos a una persona en el proceso de calcular un número real con una máquina que es capaz de cumplir sólo un número finito de condiciones q1, q2, …, qR; Llamemos a estas condiciones “configuraciones m”. Esta máquina (es decir, así definida) está equipada con una “cinta” (análoga al papel). Esta cinta que pasa por la máquina se divide en tramos. Llamémoslos “cuadrados”. Cada uno de estos cuadrados puede contener algún tipo de “símbolo”. En cualquier momento, sólo hay uno de esos cuadrados, digamos el r, que contiene el símbolo que está “en esta máquina”. Llamemos a ese cuadrado “símbolo escaneado”. Un “carácter escaneado” es el único carácter del que la máquina es, por así decirlo, “directamente consciente”. Sin embargo, al cambiar su configuración m, la máquina puede recordar efectivamente algunos de los caracteres que ha “visto” (escaneado) anteriormente. El posible comportamiento de la máquina en cualquier momento está determinado por la configuración m qn y el símbolo escaneado***. Llamemos a este par de símbolos qn, “configuración”. La configuración así designada determina el posible comportamiento de una máquina determinada. En algunas de estas configuraciones en las que el cuadrado escaneado está en blanco (es decir, no contiene un carácter), la máquina escribe un nuevo carácter en el cuadrado escaneado y en otras de estas configuraciones borra el carácter escaneado. Esta máquina también es capaz de moverse para escanear otro cuadrado, pero de esta manera sólo puede moverse al cuadrado adyacente a la derecha o a la izquierda. Además de cualquiera de estas operaciones, se puede cambiar la configuración m de la máquina. En este caso, algunos de los caracteres escritos formarán una secuencia de dígitos, que es la parte decimal del número real que se está calculando. El resto no serán más que marcas imprecisas para “ayudar a la memoria”. En este caso, sólo se podrán borrar las marcas inexactas mencionadas anteriormente.

    Afirmo que las operaciones aquí consideradas incluyen todas aquellas operaciones que se utilizan en el cálculo. El fundamento de esta afirmación es más fácil de entender para el lector que comprende la teoría de máquinas. Por lo tanto, en la siguiente sección continuaré desarrollando la teoría en cuestión, a partir de la comprensión del significado de los términos “máquina”, “cinta”, “escaneado”, etc.

    *Gödel “Sobre las oraciones formalmente indecidibles de los Principia Mathematics (publicado por Whitehead y Russell en 1910, 1912 y 1913) y sistemas relacionados, Parte I”, Journal of Mathematics. Física, boletín mensual en alemán n° 38 (año 1931, págs. 173-198).
    ** Alonzo Church, “Un problema indecidible en la teoría elemental de números”, American J. of Math., No. 58 (1936), págs. 345-363.
    *** Alonzo Church, “Una nota sobre el problema de la resolución”, J. of Symbolic Logic, No. 1 (1936), págs. 40-41