模板法

模式方法指的是行为设计​​模式。该模式描述了一种按需替换类的部分逻辑的方法,而对于后代而言,整个部分保持不变。

Cuban Cars

假设我们正在开发一家客户银行,请考虑开发授权模块的任务——用户必须能够使用抽象登录数据登录应用程序。
授权模块必须是跨平台的,支持不同的授权技术,存储不同平台的加密数据。为了实现该模块,我们选择跨平台的Kotlin语言,使用授权模块的抽象类(协议),我们将为MyPhone手机编写一个实现:

class MyPhoneSuperDuperSecretMyPhoneAuthorizationStorage {
    fun loginAndPassword() : Pair {
        return Pair("admin", "qwerty65435")
    }
}

class ServerApiClient {
    fun authorize(authorizationData: AuthorizationData) : Unit {
        println(authorizationData.login)
        println(authorizationData.password)
        println("Authorized")
    }
}

class AuthorizationData {
    var login: String? = null
    var password: String? = null
}

interface AuthorizationModule {
    abstract fun fetchAuthorizationData() : AuthorizationData
    abstract fun authorize(authorizationData: AuthorizationData)
}

class MyPhoneAuthorizationModule: AuthorizationModule {
    
    override fun fetchAuthorizationData() : AuthorizationData {
        val loginAndPassword = MyPhoneSuperDuperSecretMyPhoneAuthorizationStorage().loginAndPassword()
        val authorizationData = AuthorizationData()
        authorizationData.login = loginAndPassword.first
        authorizationData.password = loginAndPassword.second
        
        return authorizationData
    }
    
    override fun authorize(authorizationData: AuthorizationData) {
        ServerApiClient().authorize(authorizationData)
    }
    
}

fun main() {
    val authorizationModule = MyPhoneAuthorizationModule()
    val authorizationData = authorizationModule.fetchAuthorizationData()
    authorizationModule.authorize(authorizationData)
}

现在,对于每个手机/平台,我们都必须复制用于向服务器发送授权的代码,这违反了 DRY 原则。上面的例子很简单,在更复杂的类中会有更多的重复。为了消除代码重复,您应该使用模板方法模式。
让我们将模块的公共部分移至不可变的方法中,并将加密数据传输的功能转移到特定的平台类:

class MyPhoneSuperDuperSecretMyPhoneAuthorizationStorage {
    fun loginAndPassword() : Pair {
        return Pair("admin", "qwerty65435")
    }
}

class ServerApiClient {
    fun authorize(authorizationData: AuthorizationData) : Unit {
        println(authorizationData.login)
        println(authorizationData.password)
        println("Authorized")
    }
}

class AuthorizationData {
    var login: String? = null
    var password: String? = null
}

interface AuthorizationModule {
    abstract fun fetchAuthorizationData() : AuthorizationData
    
    fun authorize(authorizationData: AuthorizationData) {
        ServerApiClient().authorize(authorizationData)
    }
}

class MyPhoneAuthorizationModule: AuthorizationModule {
    
    override fun fetchAuthorizationData() : AuthorizationData {
        val loginAndPassword = MyPhoneSuperDuperSecretMyPhoneAuthorizationStorage().loginAndPassword()
        val authorizationData = AuthorizationData()
        authorizationData.login = loginAndPassword.first
        authorizationData.password = loginAndPassword.second
        
        return authorizationData
    }
    
}

fun main() {
    val authorizationModule = MyPhoneAuthorizationModule()
    val authorizationData = authorizationModule.fetchAuthorizationData()
    authorizationModule.authorize(authorizationData)
}

来源

https://refactoring.guru/ru/design-模式/模板方法

源代码

https://gitlab.com/demensdeum/patterns/< /p>

图案桥

桥接模式是指结构设计模式。它允许您通过将逻辑移动到单独的抽象类中来抽象类逻辑的实现。听起来很简单,对吧?

假设我们实现一个垃圾邮件机器人,它应该能够向不同类型的信使发送消息。
我们使用通用协议来实现它:

protocol User {
    let token: String
    let username: String
}

protocol Messenger {
    var authorize(login: String, password: String)
    var send(message: String, to user: User)
}

class iSeekUUser: User {
    let token: String
    let username: String
}

class iSeekU: Messenger {

    var authorizedUser: User?
    var requestSender: RequestSender?
    var requestFactory: RequestFactory?

    func authorize(login: String, password: String) {
        authorizedUser = requestSender?.perform(requestFactory.loginRequest(login: login, password: password))
    }
    
    func send(message: String, to user: User) {
        requestSender?.perform(requestFactory.messageRequest(message: message, to: user)
    }
}

class SpamBot {
    func start(usersList: [User]) {
        let iSeekUMessenger = iSeekU()
        iSeekUMessenger.authorize(login: "SpamBot", password: "SpamPassword")
        
        for user in usersList {
            iSeekUMessennger.send(message: "Hey checkout demensdeum blog! http://demensdeum.com", to: user)
        }
    }
}

现在让我们想象一下,用于为 iSekU Messenger 发送消息的新的、更快的协议的发布。要添加新协议,您需要复制 iSekU 机器人的实现,仅更改其中的一小部分。如果只改变了一小部分类逻辑,则不清楚为什么要这样做。这种做法违反了 DRY 原则;随着产品的进一步开发,新功能的实现会出现错误和延迟,从而体现出缺乏灵活性。
让我们将协议的逻辑转移到一个抽象类中,从而实现桥接模式:

protocol User {
    let token: String
    let username: String
}

protocol Messenger {
    var authorize(login: String, password: String)
    var send(message: String, to user: User)
}

protocol MessagesSender {
    func send(message: String, to user: User)
}

class iSeekUUser: User {
    let token: String
    let username: String
}

class iSeekUFastMessengerSender: MessagesSender {
    func send(message: String, to user: User) {
        requestSender?.perform(requestFactory.messageRequest(message: message, to: user)
    }
}

class iSeekU: Messenger {

    var authorizedUser: User?
    var requestSender: RequestSender?
    var requestFactory: RequestFactory?
    var messagesSender: MessengerMessagesSender?

    func authorize(login: String, password: String) {
        authorizedUser = requestSender?.perform(requestFactory.loginRequest(login: login, password: password))
    }
    
    func send(message: String, to user: User) {
        messagesSender?.send(message: message, to: user)
    }
}

class SpamBot {

    var messagesSender: MessagesSender?

    func start(usersList: [User]) {
        let iSeekUMessenger = iSeekU()
        iSeekUMessenger.authorize(login: "SpamBot", password: "SpamPassword")
        
        for user in usersList {
            messagesSender.send(message: "Hey checkout demensdeum blog! http://demensdeum.com", to: user)
        }
    }
}

这种方法的优点之一无疑是能够通过编写实现抽象逻辑的插件/库来扩展应用程序的功能,而无需更改主应用程序的代码。
与策略模式有什么区别?两种模式非常相似,但是,策略描述了切换*算法*,而桥接允许您切换大部分*任何复杂逻辑*。

来源

https://refactoring.guru/ru/design-patterns/bridge

源代码

https://gitlab.com/demensdeum/patterns/ p>

责任链模式

责任链是指行为设计模式。


Ganna Dolbieva

电影公司 Jah-Pictures 制作了一部关于利比里亚共产主义拉斯塔法里教徒的纪录片,名为《马利的红色黎明》。这部电影很长(8小时),很有趣,但在上映之前,事实证明,在一些国家,电影中的镜头和短语可能被认为是异端邪说,不会获得发行许可。电影制片人决定手动和自动地从电影中删除包含可疑短语的时刻。需要进行双重检查,以免在人工检查和安装过程中出现错误时,经销商代表不会在某些国家被简单枪决。
国家分为四组:没有审查制度的国家,有中等、中等和非常严格的审查制度。决定使用神经网络对观看的电影片段中的异端级别进行分类。对于该项目,需要购买非常昂贵的最先进的神经元,并针对不同级别的审查进行训练,这是开发人员的任务 -将影片分成碎片,并通过一系列神经网络传输它们,从自由到严格,直到其中一个检测到异端,然后将片段转移到人工审查以进一步编辑。不可能通过所有神经元,因为他们的工作需要太多的计算能力(毕竟我们还要支付电费),在第一个工作时停止就足够了。
朴素的伪代码实现:

import StateOfArtCensorshipHLNNClassifiers

protocol MovieCensorshipClassifier {
    func shouldBeCensored(movieChunk: MovieChunk) -> Bool
}

class CensorshipClassifier: MovieCensorshipClassifier {

    let hnnclassifier: StateOfArtCensorshipHLNNClassifier

    init(_ hnnclassifier: StateOfArtCensorshipHLNNClassifier) {
        self.hnnclassifier = hnnclassifier
    }
    
    func shouldBeCensored(_ movieChunk: MovieChunk) -> Bool {
        return hnnclassifier.shouldBeCensored(movieChunk)
    }
}

let lightCensorshipClassifier = CensorshipClassifier(StateOfArtCensorshipHLNNClassifier("light"))
let normalCensorshipClassifier = CensorshipClassifier(StateOfArtCensorshipHLNNClassifier("normal"))
let hardCensorshipClassifier = CensorshipClassifier(StateOfArtCensorshipHLNNClassifier("hard"))

let classifiers = [lightCensorshipClassifier, normalCensorshipClassifier, hardCensorshipClassifier]

let movie = Movie("Red Jah rising")
for chunk in movie.chunks {
    for classifier in classifiers {
        if classifier.shouldBeCensored(chunk) == true {
            print("Should censor movie chunk: \(chunk), reported by \(classifier)")
        }
   }
}

一般来说,使用分类器数组的解决方案并没有那么糟糕,但是!让我们想象一下,我们无法创建一个数组,我们有机会只创建一个分类器实体,它已经确定了电影片段的审查类型。在开发扩展应用程序功能的库(插件)时,此类限制是可能的。
让我们使用装饰器模式–让我们将链中下一个分类器的引用添加到分类器类中,并在第一个成功分类时停止验证过程。
因此,我们实现了责任链模式:

import StateOfArtCensorshipHLNNClassifiers

protocol MovieCensorshipClassifier {
    func shouldBeCensored(movieChunk: MovieChunk) -> Bool
}

class CensorshipClassifier: MovieCensorshipClassifier {

    let nextClassifier: CensorshipClassifier?
    let hnnclassifier: StateOfArtCensorshipHLNNClassifier

    init(_ hnnclassifier: StateOfArtCensorshipHLNNClassifier, nextClassifier: CensorshipClassifiers?) {
            self.nextClassifier = nextClassifier
            self.hnnclassifier = hnnclassifier
    }
    
    func shouldBeCensored(_ movieChunk: MovieChunk) -> Bool {
        let result = hnnclassifier.shouldBeCensored(movieChunk)
        
        print("Should censor movie chunk: \(movieChunk), reported by \(self)")
        
        if result == true {
                return true
        }
        else {
                return nextClassifier?.shouldBeCensored(movieChunk) ?? false
        }
    }
}

let censorshipClassifier = CensorshipClassifier(StateOfArtCensorshipHLNNClassifier("light"), nextClassifier: CensorshipClassifier(StateOfArtCensorshipHLNNClassifier("normal", nextClassifier: CensorshipClassifier(StateOfArtCensorshipHLNNClassifier("hard")))))

let movie = Movie("Red Jah rising")
for chunk in movie.chunks {
    censorshipClassifier.shouldBeCensored(chunk)
}

参考文献

https://refactoring.guru/ru/设计模式/责任链

源代码

https://gitlab.com/demensdeum/patterns/< /p>

图案装饰器

Decorator模式是指结构设计模式。

装饰器用作继承的替代方法来扩展类的功能。
有一项任务是根据产品类型扩展应用程序的功能。客户需要三种类型的产品——基础、专业、终极。
基本的–统计字符数,专业–功能 基本+以大写字母打印文本,终极&#8211;基本+专业+打印文字“ULTIMATE”。
我们使用继承来实现它:

protocol Feature {
	func textOperation(text: String)
}

class BasicVersionFeature: Feature {
	func textOperation(text: String) {
		print("\(text.count)")
	}
}

class ProfessionalVersionFeature: BasicVersionFeature {
	override func textOperation(text: String) {
		super.textOperation(text: text)
		print("\(text.uppercased())")
	}
}

class UltimateVersionFeature: ProfessionalVersionFeature {
	override func textOperation(text: String) {
		super.textOperation(text: text)
		print("ULTIMATE: \(text)")
	}
}

let textToFormat = "Hello Decorator"

let basicProduct = BasicVersionFeature()
basicProduct.textOperation(text: textToFormat)

let professionalProduct = ProfessionalVersionFeature()
professionalProduct.textOperation(text: textToFormat)

let ultimateProduct = UltimateVersionFeature()
ultimateProduct.textOperation(text: textToFormat)

现在有需求实现“极致之光”产品——基本版 + 旗舰版,但没有专业版的功能。第一个发生是因为……您必须为这样一个简单的任务创建一个单独的类并复制代码。
让我们继续使用继承来实现:

protocol Feature {
	func textOperation(text: String)
}

class BasicVersionFeature: Feature {
	func textOperation(text: String) {
		print("\(text.count)")
	}
}

class ProfessionalVersionFeature: BasicVersionFeature {
	override func textOperation(text: String) {
		super.textOperation(text: text)
		print("\(text.uppercased())")
	}
}

class UltimateVersionFeature: ProfessionalVersionFeature {
	override func textOperation(text: String) {
		super.textOperation(text: text)
		print("ULTIMATE: \(text)")
	}
}

class UltimateLightVersionFeature: BasicVersionFeature {
	override func textOperation(text: String) {
		super.textOperation(text: text)
		print("ULTIMATE: \(text)")	
	}
}

let textToFormat = "Hello Decorator"

let basicProduct = BasicVersionFeature()
basicProduct.textOperation(text: textToFormat)

let professionalProduct = ProfessionalVersionFeature()
professionalProduct.textOperation(text: textToFormat)

let ultimateProduct = UltimateVersionFeature()
ultimateProduct.textOperation(text: textToFormat)

let ultimateLightProduct = UltimateLightVersionFeature()
ultimateLightProduct.textOperation(text: textToFormat)

为了清楚起见,可以进一步开发该示例,但即使现在,支持基于继承基础的系统的复杂性也是可见的——麻烦且缺乏灵活性。
装饰器是一组描述功能的协议,是一个抽象类,其中包含对扩展功能的装饰器类的子具体实例的引用。
让我们使用以下模式重写上面的示例:

protocol Feature {
	func textOperation(text: String)
}

class FeatureDecorator: Feature {
	private var feature: Feature?
	
	init(feature: Feature? = nil) {
		self.feature = feature
	}
	
	func textOperation(text: String) {
		feature?.textOperation(text: text)
	}
}

class BasicVersionFeature: FeatureDecorator {
	override func textOperation(text: String) {
		super.textOperation(text: text)
		print("\(text.count)")
	}
}

class ProfessionalVersionFeature: FeatureDecorator {
	override func textOperation(text: String) {
		super.textOperation(text: text)
		print("\(text.uppercased())")
	}
}

class UltimateVersionFeature: FeatureDecorator {
	override func textOperation(text: String) {
		super.textOperation(text: text)
		print("ULTIMATE: \(text)")
	}
}

let textToFormat = "Hello Decorator"

let basicProduct = BasicVersionFeature(feature: UltimateVersionFeature())
basicProduct.textOperation(text: textToFormat)

let professionalProduct = ProfessionalVersionFeature(feature: UltimateVersionFeature())
professionalProduct.textOperation(text: textToFormat)

let ultimateProduct = BasicVersionFeature(feature: UltimateVersionFeature(feature: ProfessionalVersionFeature()))
ultimateProduct.textOperation(text: textToFormat)

let ultimateLightProduct = BasicVersionFeature(feature: UltimateVersionFeature())
ultimateLightProduct.textOperation(text: textToFormat)

现在我们可以创建任何类型产品的变体——在应用程序启动阶段初始化组合类型就足够了,下面的例子是Ultimate + Professional版本的创建:

ultimateProfessionalProduct.textOperation(text: textToFormat)

来源

https://refactoring.guru/ru/design-patterns/decorator

源代码

https://gitlab.com/demensdeum/patterns

模式中介者

中介者模式指的是行为设计​​模式。

有一天,您收到一份开发笑话应用程序的订单 –用户按下屏幕中间的按钮,就会听到鸭子嘎嘎的有趣声音。
上传到应用商店后,该应用程序大受欢迎:每个人都在浏览你的应用程序,埃隆·马斯克在下一次火星超高速隧道启动时在他的 Instagram 上嘎嘎叫,希拉里·克林顿在辩论中击败了唐纳德·特朗普并赢得乌克兰选举,成功!
应用程序的简单实现如下所示:

class DuckButton {
    func didPress() {
        print("quack!")
    }
}

let duckButton = DuckButton()
duckButton.didPress()

接下来,您决定添加狗吠的声音,为此您需要显示两个用于选择声音的按钮:与一只鸭子和一只狗。让我们创建两个按钮类:DuckButton 和 DogButton。
更改代码:

class DuckButton {
    func didPress() {
        print("quack!")
    }
}

class DogButton {
    func didPress() {
        print("bark!")
    }
}

let duckButton = DuckButton()
duckButton.didPress()

let dogButton = DogButton()
dogButton.didPress()

再一次成功后,我们添加了猪叫声,已经有三类按钮了:

class DuckButton {
    func didPress() {
        print("quack!")
    }
}

class DogButton {
    func didPress() {
        print("bark!")
    }
}

class PigButton {
    func didPress() {
        print("oink!")
    }
}

let duckButton = DuckButton()
duckButton.didPress()

let dogButton = DogButton()
dogButton.didPress()

let pigButton = PigButton()
pigButton.didPress()

用户抱怨声音相互重叠。
我们添加一个检查来防止这种情况发生,同时将类相互引入:

class DuckButton {
    var isMakingSound = false
    var dogButton: DogButton?
    var pigButton: PigButton?
    func didPress() {
        guard dogButton?.isMakingSound ?? false == false &&
                pigButton?.isMakingSound ?? false == false else { return }
        isMakingSound = true
        print("quack!")
        isMakingSound = false
    }
}

class DogButton {
    var isMakingSound = false
    var duckButton: DuckButton?
    var pigButton: PigButton?
    func didPress() {
        guard duckButton?.isMakingSound ?? false == false &&
                pigButton?.isMakingSound ?? false == false else { return }
        isMakingSound = true
        print("bark!")
        isMakingSound = false
    }
}

class PigButton {
    var isMakingSound = false
    var duckButton: DuckButton?
    var dogButton: DogButton?
    func didPress() {
        guard duckButton?.isMakingSound ?? false == false && 
                dogButton?.isMakingSound ?? false == false else { return }
        isMakingSound = true
        print("oink!")
        isMakingSound = false
    }
}

let duckButton = DuckButton()
duckButton.didPress()

let dogButton = DogButton()
dogButton.didPress()

let pigButton = PigButton()
pigButton.didPress()

在您申请成功的浪潮中,政府决定制定一项法律,规定移动设备上的嘎嘎声、吠声和咕噜声只能在工作日的上午 9:00 至 15:00 进行;届时,您的应用程序的用户将面临因使用个人电子设备制作淫秽声音而被判处 5 年监禁的风险。
更改代码:

import Foundation

extension Date {
    func mobileDeviceAllowedSoundTime() -> Bool {
        let hour = Calendar.current.component(.hour, from: self)
        let weekend = Calendar.current.isDateInWeekend(self)
        
        let result = hour >= 9 && hour <= 14 && weekend == false
        
        return result
    }
}

class DuckButton {
    var isMakingSound = false
    var dogButton: DogButton?
    var pigButton: PigButton?
    func didPress() {
        guard dogButton?.isMakingSound ?? false == false &&
                pigButton?.isMakingSound ?? false == false &&
                 Date().mobileDeviceAllowedSoundTime() == true else { return }
        isMakingSound = true
        print("quack!")
        isMakingSound = false
    }
}

class DogButton {
    var isMakingSound = false
    var duckButton: DuckButton?
    var pigButton: PigButton?
    func didPress() {
        guard duckButton?.isMakingSound ?? false == false &&
                pigButton?.isMakingSound ?? false == false &&
                 Date().mobileDeviceAllowedSoundTime() == true else { return }
        isMakingSound = true
        print("bark!")
        isMakingSound = false
    }
}

class PigButton {
    var isMakingSound = false
    var duckButton: DuckButton?
    var dogButton: DogButton?
    func didPress() {
        guard duckButton?.isMakingSound ?? false == false && 
                dogButton?.isMakingSound ?? false == false &&
                 Date().mobileDeviceAllowedSoundTime() == true else { return }
        isMakingSound = true
        print("oink!")
        isMakingSound = false
    }
}

let duckButton = DuckButton()
let dogButton = DogButton()
let pigButton = PigButton()

duckButton.dogButton = dogButton
duckButton.pigButton = pigButton

dogButton.duckButton = duckButton
dogButton.pigButton = pigButton

pigButton.duckButton = duckButton
pigButton.dogButton = dogButton

duckButton.didPress()
dogButton.didPress()
pigButton.didPress()

突然,手电筒应用程序开始将我们的应用程序挤出市场,我们不要让它打败我们,通过按“oink-oink”按钮添加手电筒,以及其余按钮:

import Foundation

extension Date {
    func mobileDeviceAllowedSoundTime() -> Bool {
        let hour = Calendar.current.component(.hour, from: self)
        let weekend = Calendar.current.isDateInWeekend(self)
        
        let result = hour >= 9 && hour <= 14 && weekend == false
        
        return result
    }
}

class Flashlight {

    var isOn = false

    func turn(on: Bool) {
        isOn = on
    }
}

class DuckButton {
    var isMakingSound = false
    var dogButton: DogButton?
    var pigButton: PigButton?
    var flashlight: Flashlight?
    func didPress() {
        flashlight?.turn(on: true)
        guard dogButton?.isMakingSound ?? false == false &&
                pigButton?.isMakingSound ?? false == false &&
                 Date().mobileDeviceAllowedSoundTime() == true else { return }
        isMakingSound = true
        print("quack!")
        isMakingSound = false
    }
}

class DogButton {
    var isMakingSound = false
    var duckButton: DuckButton?
    var pigButton: PigButton?
    var flashlight: Flashlight?
    func didPress() {
        flashlight?.turn(on: true)
        guard duckButton?.isMakingSound ?? false == false &&
                pigButton?.isMakingSound ?? false == false &&
                 Date().mobileDeviceAllowedSoundTime() == true else { return }
        isMakingSound = true
        print("bark!")
        isMakingSound = false
    }
}

class PigButton {
    var isMakingSound = false
    var duckButton: DuckButton?
    var dogButton: DogButton?
    var flashlight: Flashlight?
    func didPress() {
        flashlight?.turn(on: true)
        guard duckButton?.isMakingSound ?? false == false && 
                dogButton?.isMakingSound ?? false == false &&
                 Date().mobileDeviceAllowedSoundTime() == true else { return }
        isMakingSound = true
        print("oink!")
        isMakingSound = false
    }
}

let flashlight = Flashlight()
let duckButton = DuckButton()
let dogButton = DogButton()
let pigButton = PigButton()

duckButton.dogButton = dogButton
duckButton.pigButton = pigButton
duckButton.flashlight = flashlight

dogButton.duckButton = duckButton
dogButton.pigButton = pigButton
dogButton.flashlight = flashlight

pigButton.duckButton = duckButton
pigButton.dogButton = dogButton
pigButton.flashlight = flashlight

duckButton.didPress()
dogButton.didPress()
pigButton.didPress()

这样一来,我们就有了一个庞大的应用程序,其中包含大量的复制粘贴代码,里面的类之间通过死链接连接起来——不存在弱耦合,这样的奇迹很难维护,而且由于犯错误的可能性很高,因此未来会发生变化。

使用中介器

让我们添加一个中间中介类 - ApplicationController。该类将提供对象的松耦合,确保类之间的职责分离,并消除重复的代码。
让我们重写一下:

import Foundation

class ApplicationController {

    private var isMakingSound = false
    private let flashlight = Flashlight()
    private var soundButtons: [SoundButton] = []

    func add(soundButton: SoundButton) {
        soundButtons.append(soundButton)
    }
    
    func didPress(soundButton: SoundButton) {
        flashlight.turn(on: true)
        guard Date().mobileDeviceAllowedSoundTime() && 
                isMakingSound == false else { return }
        isMakingSound = true
        soundButton.didPress()
        isMakingSound = false
    }
}

class SoundButton {
    let soundText: String
    
    init(soundText: String) {
        self.soundText = soundText
    }
    
    func didPress() {
        print(soundText)
    }
}

class Flashlight {
    var isOn = false

    func turn(on: Bool) {
        isOn = on
    }
}

extension Date {
    func mobileDeviceAllowedSoundTime() -> Bool {
        let hour = Calendar.current.component(.hour, from: self)
        let weekend = Calendar.current.isDateInWeekend(self)
        
        let result = hour >= 9 && hour <= 14 && weekend == false
        
        return result
    }
}

let applicationController = ApplicationController()
let pigButton = SoundButton(soundText: "oink!")
let dogButton = SoundButton(soundText: "bark!")
let duckButton = SoundButton(soundText: "quack!")

applicationController.add(soundButton: pigButton)
applicationController.add(soundButton: dogButton)
applicationController.add(soundButton: duckButton)

pigButton.didPress()
dogButton.didPress()
duckButton.didPress()

许多有关用户界面应用程序体系结构的文章描述了 MVC 模式及其派生物。模型用于处理业务逻辑数据,视图或表示在界面中向用户显示信息/提供与用户的交互,控制器是确保系统组件交互的中介者。

来源

https://refactoring.guru/ru/design-patterns/调解员

源代码

https://gitlab.com/demensdeum/patterns/< /p>

Strategy pattern

The Strategy pattern allows you to select the type of algorithm that implements a common interface, right while the application is running. This pattern refers to the behavioral design patterns.

Sun Tzu

Suppose we are developing a music player with embedded codecs. The built-in codecs imply reading music formats without using external sources of the operating system (codecs), the player should be able to read tracks of different formats and play them. VLC player has such capabilities, it supports various types of video and audio formats, it runs on popular and not very operating systems.

Imagine what a naive player implementation looks like:

var player: MusicPlayer?

func play(filePath: String) {
    let extension = filePath.pathExtension

    if extension == "mp3" {
        playMp3(filePath)
    }
    else if extension == "ogg" {
        playOgg(filePath)
    }
}

func playMp3(_ filePath: String) {
    player = MpegPlayer()
    player?.playMp3(filePath)
}

func playOgg(_ filePath: String) {
    player = VorbisPlayer()
    player?.playMusic(filePath)
}

Next, we add several formats, which leads to the need to write additional methods. Plus, the player must support plug-in libraries, with new audio formats that will appear later. There is a need to switch the music playback algorithm, the Strategy pattern is used to solve this problem.

Let’s create a common protocol MusicPlayerCodecAlgorithm, write the implementation of the protocol in two classes MpegMusicPlayerCodecAlgorithm and VorbisMusicPlayerCodecAlgorithm, to play mp3 and ogg files with-but. Create a class MusicPlayer, which will contain a reference for the algorithm that needs to be switched, then by the file extension we implement codec type switching:

import Foundation

class MusicPlayer {
    var playerCodecAlgorithm: MusicPlayerCodecAlgorithm?
    
	func play(_ filePath: String) {
            playerCodecAlgorithm?.play(filePath)
	}
}

protocol MusicPlayerCodecAlgorithm {
    func play(_ filePath: String)
}

class MpegMusicPlayerCodecAlgorithm: MusicPlayerCodecAlgorithm {
	func play(_ filePath: String) {
		debugPrint("mpeg codec - play")
	}
}

class VorbisMusicPlayerCodecAlgorithm: MusicPlayerCodecAlgorithm {
	func play(_ filePath: String) {
		debugPrint("vorbis codec - play")	
	}
}

func play(fileAtPath path: String) {
	guard let url = URL(string: path) else { return }
	let fileExtension = url.pathExtension
		
	let musicPlayer = MusicPlayer()
	var playerCodecAlgorithm: MusicPlayerCodecAlgorithm? 
		
	if fileExtension == "mp3" {
                playerCodecAlgorithm = MpegMusicPlayerCodecAlgorithm()
	}
	else if fileExtension == "ogg" {
                playerCodecAlgorithm = VorbisMusicPlayerCodecAlgorithm()
	}
		
	musicPlayer.playerCodecAlgorithm = playerCodecAlgorithm
	musicPlayer.playerCodecAlgorithm?.play(path)
}

play(fileAtPath: "Djentuggah.mp3")
play(fileAtPath: "Procrastinallica.ogg")

The above example also shows the simplest example of a factory (switching the codec type from the file extension) It is important to note that the Strategy strategy does not create objects, it only describes how to create a common interface for switching the family of algorithms.

Documentation

https://refactoring.guru/en/design-patterns/strategy

Source code

https://gitlab.com/demensdeum/patterns/

Iterator pattern

In this article I will describe the Iterator pattern.
This pattern refers to the behavioral design patterns.

Print it

Suppose we need to print a list of tracks from the album “Procrastinate them all” of the group “Procrastinallica”.
The naive implementation (Swift) looks like this:

for i=0; i < tracks.count; i++ {
    print(tracks[i].title)
}

Suddenly during compilation, it is detected that the class of the tracks object does not give the number of tracks in the count call, and moreover, its elements cannot be accessed by index. Oh…

Filter it

Suppose we are writing an article for the magazine “Wacky Hammer”, we need a list of tracks of the group “Djentuggah” in which bpm exceeds 140 beats per minute. An interesting feature of this group is that its records are stored in a huge collection of underground groups, not sorted by albums, or for any other grounds. Let’s imagine that we work with a language without functionality:

var djentuggahFastTracks = [Track]()

for track in undergroundCollectionTracks {
    if track.band.title == "Djentuggah" && track.info.bpm == 140 {
        djentuggahFastTracks.append(track)
    }
}

Suddenly, a couple of tracks of the group are found in the collection of digitized tapes, and the editor of the magazine suggests finding tracks in this collection and writing about them. A Data Scientist friend suggests to use the Djentuggah track classification algorithm, so you don’t need to listen to a collection of 200 thousand tapes manually. Try:

var djentuggahFastTracks = [Track]()

for track in undergroundCollectionTracks {
    if track.band.title == "Djentuggah" && track.info.bpm == 140 {
        djentuggahFastTracks.append(track)
    }
}

let tracksClassifier = TracksClassifier()
let bpmClassifier = BPMClassifier()

for track in cassetsTracks {
    if tracksClassifier.classify(track).band.title == "Djentuggah" && bpmClassifier.classify(track).bpm == 140 {
        djentuggahFastTracks.append(track)
    }
}

Mistakes

Now, just before sending to print, the editor reports that 140 beats per minute are out of fashion, people are more interested in 160, so the article should be rewritten by adding the necessary tracks.
Apply changes:

var djentuggahFastTracks = [Track]()

for track in undergroundCollectionTracks {
    if track.band.title == "Djentuggah" && track.info.bpm == 160 {
        djentuggahFastTracks.append(track)
    }
}

let tracksClassifier = TracksClassifier()
let bpmClassifier = BPMClassifier()

for track in cassetsTracks {
    if tracksClassifier.classify(track).band.title == "Djentuggah" && bpmClassifier.classify(track).bpm == 140 {
        djentuggahFastTracks.append(track)
    }
}

The most attentive ones noticed an error; the bpm parameter was changed only for the first pass through the list. If there were more passes through the collections, then the chance of a mistake would be higher, that is why the DRY principle should be used. The above example can be developed further, for example, by adding the condition that you need to find several groups with different bpm, by the names of vocalists, guitarists, this will increase the chance of error due to duplication of code.

Behold the Iterator!

In the literature, an iterator is described as a combination of two protocols / interfaces, the first is an iterator interface consisting of two methods – next(), hasNext(), next() returns an object from the collection, and hasNext() reports that there is an object and the list is not over. However in practice, I observed iterators with one method – next(), when the list ended, null was returned from this object. The second is a collection that should have an interface that provides an iterator – the iterator() method, there are variations with the collection interface that returns an iterator in the initial position and in end – the begin() and end() methods are used in C ++ std.
Using the iterator in the example above will remove duplicate code, eliminate the chance of mistake due to duplicate filtering conditions. It will also be easier to work with the collection of tracks on a single interface – if you change the internal structure of the collection, the interface will remain old and the external code will not be affected.
Wow!

let bandFilter = Filter(key: "band", value: "Djentuggah")
let bpmFilter = Filter(key: "bpm", value: 140)
let iterator = tracksCollection.filterableIterator(filters: [bandFilter, bpmFilter])

while let track = iterator.next() {
    print("\(track.band) - \(track.title)")
}

Changes

While the iterator is running, the collection may change, thus causing the iterator’s internal counter to be invalid, and generally breaking such a thing as “next object”. Many frameworks contain a check for changing the state of the collection, and in case of changes they return an error / exception. Some implementations allow you to remove objects from the collection while the iterator is running, by providing the remove() method in the iterator.

Documentation

https://refactoring.guru/en/design-patterns/iterator

Source code

https://gitlab.com/demensdeum/patterns/

模式“快照”

在这篇文章中,我将描述“快照”模式。或“纪念品”

此模式指的是“行为”模式。设计模式。

假设我们正在开发一个图形编辑器,并且我们需要添加根据用户命令回滚操作的功能。同样非常重要的是,在实现此模式时,系统组件无权访问回滚“操作”的内部状态,其他系统组件只能访问快照对象而无法更改;其内部状态,提供清晰、简单的外部接口。为了解决这个问题,使用了“快照”模式。或“守护者”。

工作示例“快照”介绍如下:


单击时,会出现一个精灵,单击卷曲的箭头时,操作会被取消–精灵消失了。该示例由三个类组成:

  1. 显示精灵和图形界面的画布。
  2. 屏幕控制器,它处理点击并控制屏幕的逻辑。
  3. 如有必要,可使用屏幕控制器回滚每次更改后持续存在的画布状态。

在模式“快照”的上下文中课程有:

  1. 画布–源中,此类的状态保存为“快照”,以便以后根据请求回滚。此外,源必须能够在向其传输“快照”时恢复状态。
  2. 控制器保管人,此类知道如何以及何时保存/回滚状态。
  3. 状态–快照,一个存储源状态的类,加上日期信息或可以精确建立回滚顺序的索引。

该模式的一个重要特征是,只有源才能访问快照中已保存状态的内部字段,这是保护快照免受外部更改(来自想要绕过封装进行更改的开发人员的更改)所必需的; ,破坏系统逻辑)。为了实现封装,使用内置类,并且在 C++ 中,它们使用指定友元类的功能。就我个人而言,我为 Rise 实现了一个没有封装的简单版本,并在为 Swift 实现时使用 Generic。在我的版本中– Memento 仅将其内部状态赋予同一类状态的实体:

来源

https://refactoring.guru/design-patterns/memento

源代码

https://gitlab.com/demensdeum/patterns/< /p>

访客模式

在这篇文章中,我将描述一种名为“Visitor”的设计模式。或“访客”
此模式属于行为模式组。

让我们提出一个问题

该模式主要用于绕过早期绑定语言中单次调度的限制。

爱丽丝 X 作者 NFGPhoto (CC-2.0)
让我们创建一个抽象类/协议 Band,创建 MurpleDeep 的子类,创建一个具有两个方法的 Visitor 类 –一个用于将 Band 的任何后代输出到控制台,第二个用于输出任何 MurpleDeep,主要是方法的名称(签名)相同,参数仅因类而异。使用带 Band 参数的中间打印输出方法,我们创建一个 Visitor 实例并调用 MurpleDeep 的访问方法。
下面是 Kotlin 中的代码:

输出将为“这是 Band 类

这怎么可能?!

许多文章(包括俄语)都用巧妙的文字描述了为什么会发生这种情况,但我建议您想象一下编译器如何看待代码,也许一切都会立即变得清晰:

解决问题

有很多解决方案可以解决这个问题,接下来我们将考虑使用访问者模式的解决方案。
我们将带有 Visitor 参数的accept方法添加到抽象类/协议中,在方法内部调用visitor.visit(this),然后将accept方法的重写/实现添加到MurpleDeep类中,果断而冷静地违反了DRY,再次编写Visitor.visit(this).< br />最终代码:

来源

https://refactoring.guru/ru/设计模式/访客双调度

源代码

https://gitlab.com/demensdeum/patterns

蝇量模式

在这篇文章中,我将描述“轻量级”结构模式。或“机会主义者” (蝇量级)
该模式属于结构模式组。

让我们看一下下面该模式如何工作的示例:


为什么需要它? 节省内存。我同意,在Java广泛使用的时代(白白消耗cpu和内存),这不再那么重要,但值得使用。
上面的例子中只输出了 40 个对象,但是如果将数量增加到 120,000,内存消耗也会相应增加。
让我们看看 Chromium 浏览器中不使用享元模式的内存消耗情况:

如果不使用模式,内存消耗约为 300 MB。

现在让我们向应用程序添加一个模式并查看内存消耗:

使用该模式,内存消耗约为 200 MB,因此我们在测试应用程序中节省了 100 MB 内存;在严肃的项目中,差异可能会更大。

它是如何工作的?

在上面的例子中,我们画了 40 只猫,或者为了清楚起见,画了 12 万只猫。每只猫都作为 png 图像加载到内存中,然后在大多数渲染中将其转换为用于渲染的位图(实际上是 bmp),这样做是为了速度,因为压缩的 png 需要很长时间来渲染。不使用该模式时,我们将 12 万张猫的图片加载到 RAM 中并进行绘制,但是当使用“轻量级”模式时,我们会加载 12 万张猫的图片。我们将一只猫加载到内存中,并以不同的位置和透明度将其绘制 12 万次。整个神奇之处在于,我们在渲染时将坐标和透明度与猫图像分开实现,渲染只需要一只猫并使用具有坐标和透明度的对象来正确渲染。

代码是什么样的?

以下是语言 Rise 的示例 >< /p>

不使用模式:


猫图像是为循环中的每个对象单独加载的–猫图像。

使用模式:

一张猫的图片被 12 万个物体使用。

用在什么地方?

用于 GUI 框架,例如 Apple 的“重用”; (重用)UITableViewCell 表格单元格,这为不了解此模式的初学者增加了入门障碍。也常用于游戏开发。

源代码

https://gitlab.com/demensdeum/patterns/< /p>

来源

https://refactoring.guru/ru/design-patterns/蝇量级
http://gameprogrammingpatterns.com/flyweight.html

С++ Application Plugins

In this post I will describe an example of adding functionality to a C ++ application using plugins. The practical part of the implementation for Linux is described; the theory can be found at the links at the end of the article.

Composition over inheritance!

To begin with, we will write a plugin – a function that we will call:

#include "iostream"

using namespace std;

extern "C" void extensionEntryPoint() {
	cout << "Extension entry point called" << endl;
};

Next, we will build the plugin as a dynamic library “extension.so”, which we will connect in the future:
clang++ -shared -fPIC extension.cpp -o extension.so

Next we write the main application that will load the file “extension.so”, look for a pointer to the function “extensionEntryPoint” there, and call it, typing errors if necessary:

#include "iostream"
#include "dlfcn.h"

using namespace std;

typedef void (*VoidFunctionPointer)();	

int main (int argc, char *argv[]) {

	cout << "C++ Plugins Example" << endl;

	auto extensionHandle = dlopen("./extension.so", RTLD_LAZY);
	if (!extensionHandle) {
		string errorString = dlerror();
		throw runtime_error(errorString);
	}

	auto functionPointer = VoidFunctionPointer();
	functionPointer = (VoidFunctionPointer) dlsym(extensionHandle, "extensionEntryPoint");
	auto dlsymError = dlerror();
 	if (dlsymError) {
		string errorString = dlerror();
		throw runtime_error(errorString);
 	}

	functionPointer();

	exit(0);
} 

The dlopen function returns a handler for working with a dynamic library; dlsym function returns a pointer to the required function by string; dlerror contains a pointer to the string with the error text, if any.

Next, build the main application, copy the file of the dynamic library in the folder with it and run. The output should be the “Extension entry point called”

Difficult moments include the lack of a single standard for working with dynamic libraries, because of this there is a need to export the function to a relatively global scope with extern C; the difference in working with different operating systems associated with this subtlety of work; the lack of a C ++ interface to implement OOP approach to working with dynamic libraries, however, there are open-source wrappers, for example m-renaud/libdlibxx

Example Source Code

https://gitlab.com/demensdeum/cpppluginsexample

Documents

http://man7.org/linux/man-pages/man3/dlopen.3.htm
https://gist.github.com/tailriver/30bf0c943325330b7b6a
https://stackoverflow.com/questions/840501/how-do-function-pointers-in-c-work

像米歇尔一样颤抖

[感受人工智能的力量]
在这篇文章中,我将告诉您如何预测未来

在统计学中有一类问题–时间序列分析。有了某个变量的日期和值,您就可以预测该变量将来的值。
起初我想使用 TensorFlow,但找到了库 Prophet by Facebook
Prophet 允许您根据包含日期 (ds) 和变量值 (y) 列的数据 (csv) 进行预测。您可以在官方网站文档中的 快速入门
作为数据集,我使用了从网站上传的 csv https://www.investing.com,在实现时我使用了 R 语言Prophet API 对他来说。我真的很喜欢 R,因为它的语法简化了对大量数据的处理,允许您编写更简单,并且比使用传统语言(Python)时犯的错误更少,因为您必须使用 lambda 表达式,并且在 R 中,您已经拥有所有 lambda 表达式。
为了不准备要处理的数据,我使用了包 anytime,可以将字符串转换为日期,无需预处理。使用 readr 包将货币字符串转换为数字

结果,我收到预测,到 2019 年底,比特币的价格将达到 8,400 美元,美元汇率将为 61 卢布。我们应该相信这些预测吗?就我个人而言,我认为不值得,因为… 如果不了解数学方法的本质,就无法使用数学方法。

来源

https:// facebook.github.io/prophet
https://habr.com/company/ods/blog/323730/
https://www.r-project.org/

源代码

https://gitlab.com/demensdeum/MachineLearning/tree/master/4prophet

特斯拉说话

在这篇文章中,我将描述创建报价生成器的过程。

TL;DR

用于训练和文本生成–使用库 textgenrnn,要过滤需要使用拼写检查的短语 hunspell 及其 C/python 库。在 Colaboratory,您可以开始生成文本。大约 90% 的文本将被完全看不懂,但是剩下的 10% 会包含一点意思,手动修改这些短语看起来会很不错。
最简单的方法是在 Colaboratory 中启动现成的神经网络:
https://colab.research.google.com/drive/1-wbZMmxvsm3SoclJv11villo9VbUesbc(在新选项卡中打开)”>https://colab.research.google.com/drive/1-wbZMmxvsm3SoclJv11villo9VbUesbc

源代码

https://gitlab.com/demensdeum/MachineLearning/tree/master/3quotesGenerator

来源

https://karpathy.github.io/2015/05/21/rnn-effectiveness/https://medium.com/deep-learning-turkey/google-colab-free-gpu-tutorial-e113627b9f5dhttps://minimaxir.com/2018/05/text-neural-networks/
https://github.com/wooorm/dictionaries (opens in a new tab)” href=”https://minimaxir.com/2018/05/text-neural-networks/” target=”_blank”>https://minimaxir.com/2018/05/text-neural-networks/
https://karpathy.github.io/2015/05/21/rnn-effectiveness/
https://medium.com/deep-learning-turkey/google-colab-free-gpu-tutorial-e113627b9f5d
https://karpathy.github.io/2015/05/21/rnn-effectiveness/ (opens in a new tab)” href=”https://karpathy.github.io/2015/05/21/rnn-effectiveness/” target=”_blank”>https://karpathy.github.io/2015/05/21/rnn-effectiveness/
https://medium.com/deep-learning-turkey/google-colab-free-gpu-tutorial-e113627b9f5d
https://karpathy.github.io/2015/05/21/rnn-effectiveness/https://medium.com/deep-learning-turkey/google-colab-free-gpu-tutorial-e113627b9f5dhttps://github.com/wooorm/dictionaries

” rel=”noopener” target=”_blank”>https://github.com/wooorm/dictionaries (opens in a new tab)”>https://github.com/wooorm/dictionaries

你那里有多少错误?

黑客新闻上,我发现了一篇非常有趣的文章,其中作者建议使用Petersen-Lincoln 方法,生物学家使用该方法来计算鸟类、猴子和其他动物的数量,以便在应用程序中*击鼓*计数错误

自然栖息地的虫子– 大脚怪瞄准 作者:德里克·哈特菲尔德

方法很简单,我们取两个鸟类学家,他们发现特定物种的鸟类,它们的任务是“确定这些鸟类的种群规模。两位鸟类学家对发现的鸟类进行标记,然后计算常见鸟类的数量,代入林肯指数公式,即可得出大致的种群规模。
现在开始申请——方法也很简单,我们进行了两次 QA,他们发现了应用程序中的 bug。假设一位测试人员发现了 10 个错误 (E1),第二位测试人员发现了 20 个错误 (E2),现在我们计算错误总数 – 3 (S),然后使用公式我们得到林肯指数

这是对整个应用程序中错误数量的预测,在给出的示例中大约有 66 个错误。

Swift 示例

我已经实现了一个测试平台来测试该方法,你可以在这里看到它:
https://paiza.io/projects/AY_9T3oaN9a-xICAx_H4qw?language=swift

可以更改的参数:

让 aliceErrorFindProbability = 20 – QA Alice 发现的错误百分比 (20%)
让 bobErrorFindProbability = 60 – QA Bob 发现的错误百分比 (60%)
让实际BugsCount = 200 –应用程序中到底有多少错误

在上次运行中我收到了以下数据:
估计错误数:213
实际错误数:200

也就是说,应用程序中有 200 个 bug,林肯指数给出了预测“200 个 bug”。 213:
“Alice 发现了 36 个错误”
“鲍勃发现了 89 个错误”
“常见错误数量:15”

估计错误数:213
实际错误数:200

弱点

此方法可用于评估应用程序在开发的各个阶段的错误数量;理想情况下,错误数量应该减少。 该方法的弱点包括人为因素,因为两个测试人员发现的错误数量应该不同,并且发现了不同的错误,但是 必须找到常见的,否则该方法将不起作用(零常见错误–被零除)< br/>此外,诸如常见错误这样的概念需要专家在场才能理解其共性。

来源

还有多少错误需要查找? –约翰·库克博士,总裁
The thrill of the chase – Brian Hayes

源代码

https://paiza.io/projects/AY_9T3oaN9a-xICAx_H4qw ?语言=swift
https://gitlab.com/demensdeum/statistics/tree/master/1_BugsCountEstimation/src

我们击败了马里维奇,黑色正方形opengl

Malevich定期出现在OpenGL上的任何开发人员。这是出乎意料而大胆地发生的,您只需启动该项目并看到一个黑色正方形而不是一个美妙的渲染:

今天,我将出于什么原因被一个黑色广场拜访,发现的问题是因为OpenGL不会在屏幕上绘制任何内容,有时甚至使窗户透明。

使用工具

对于调试OpenGL,有两个工具帮助了我: renderdoc and renderdoc 和 and and and and apitrace 。 Renderdoc&#8211;用于调试OpenGL渲染过程的工具,您可以查看所有内容&#8211;顶点,着色器,纹理,驾驶员的债务消息。 Apitrace&#8211;一个追踪图形API挑战的工具,进行转储调用并显示参数。还有一个很好的机会可以通过WDIFF(或没有但不那么方便)比较两个转储

检查您与谁一起工作

我有一个操作系统ubuntu 16.10,带有旧的依赖项SDL2,GLM,Assimp,Glew。在最新版本的Ubuntu 18.04中,我得到了游戏的组装“ noopener”> death-mask 在屏幕上没有显示任何东西(仅在屏幕上显示任何东西)。在16.10 I 使用Chroot和组件时,我会使用Graphics 进行游戏组件。

似乎在Ubuntu 18.04

中破裂了

ldd 显示了与相同库SDL2的Linkka,Gl。在Renderdoc驾驶非工作版本,我在顶点着色器的入口处看到垃圾,但我需要更坚实的确认。为了理解二进制技术之间的区别,我将它们俩都通过 apitrace 驱动。垃圾场的比较表明,新鲜的Ubunta上的大会打破了OpenGL的潜在客户计划,实际上将垃圾发送到那里:

矩阵聚集在GLM库中。从16.04&#8211;我再次获得了游戏的工作构建。问题是GLM 9.9.0中单个矩阵的初始化的差异,有必要清楚地指出构造函数中的Mat4(1.0f)参数。更改了初始化并通过写下图书馆的作者,我开始做测试FSGL 。在我在FSGL中发现缺陷的写作过程中,我将进一步描述它们。

确定生命中的谁

对于使用OpenGL进行正确的工作,您需要自愿强行强行 请求某个版本的上下文。因此,它查找SDL2(您需要严格将版本放置在初始化上下文之前):

<! - 使用hilite.me->

生成的html

 sdl_gl_seettribute(sdl_gl_context_major_version, 3 )> 3 );
sdl_gl_settribute(sdl_gl_context_minor_version, 2 );
sdl_gl_settribute(sdl_gl_context_profile_mask,sdl_gl_context_profile_core_core);

例如,renderdoc不适合3.2以下的上下文。我想指出的是,切换上下文之后,看到相同的黑屏的可能性很高。为什么?
因为OpenGL 3.2的上下文必须需要VAO缓冲液的存在,而没有99%的图形驱动程序不起作用。添加简单:
<! - 使用hilite.me->

生成的html

 glgenvertexarrays( 1  vao
Glbindvertexaray(VAO);

不睡觉,冻结

我在kubuntu上也遇到了一个有趣的问题,而不是一个黑色的正方形,我被透明了,有时一切都正确地呈现。我在Stack Overflow上找到了解决此问题的解决方案:
https://stackoverflow.com/questions/38411515/sdl2-opengl-window-appears-semi-transparent-sometimes

FSGL测试渲染代码也存在睡眠(2s);因此,在Xubuntu和Ubuntu上,我收到了正确的渲染并将应用程序入睡,但是在Kubuntu上,我在Dolphin发射的80%和30%的发射和终端中收到了透明的屏幕。为了解决此问题,我按照文档中的建议在SDLEVENT调查后在每个帧中添加了渲染。

测试代码:
https://gitlab.com/demensdeum/FSGLtests/blob/master/renderModelTest/

与驾驶员交谈

Opengl supports the communication channel between the application and the driver, to activate it, you need to turn on the flags Gl_debug_outPut, GL_DEBUG_OUTPUT_SYNCHRONUS, affix the warning GLDEBUGMESSAGECONTROL and tie the calback through GLDEBUGMESSAGECALLBACK
可以在此处以初始化的示例:
https://github.com/rock-core/gui-vizkit3d/blob/master/src/EnableGLDebugOperation.cpp

别害怕,看着它成长

在这篇文章中,我将讨论我使用shared_ptr智能指针的不幸经历。在我的游戏Death-Mask中实现下一代后,我注意到了一段记忆泄露 。每个新级别都会使消耗的 RAM 增加 + 1 MB。 显然有些对象保留在内存中并且没有释放它。为了纠正这个事实,有必要在关卡过载时正确实施资源,但这显然没有做到。由于我使用了智能指针,因此有多种选择可以解决这个问题,第一个涉及手动检查代码(又长又无聊),而第二个涉及研究 lldb 调试器和 libstdc++ 源代码的功能以实现自动跟踪的可能性计数器更改。

在互联网上,所有的建议都归结为手动检查代码、修复它,并在找到有问题的代码行后用鞭子抽打自己。还建议实现您自己的内存处理系统,就像 90 年代和 2000 年代以来在 C++11 标准中智能指针到来之前开发的所有主要项目一样。我尝试在所有共享指针的副本的构造函数上使用断点,但几天后没有发生任何有用的事情。有一个想法是向 libstdc++ 库添加日志记录,但结果证明人工成本非常高。


星际牛仔 (1998)

我突然想到了一个解决方案,那就是跟踪私有变量shared_ptr 的变化–使用计数。这可以使用 lldb 中内置的观察点来完成。通过 make_shared 创建共享指针后,可以使用以下行跟踪 lldb 中计数器的更改:

观看 设置 var 相机._M_refcount._M_pi->_M_use_count

“相机”在哪里?这是一个shared_ptr对象,需要跟踪其计数器状态。当然,shared_ptr的内部会根据libstdc++的版本不同而有所不同,但大体原理还是可以理解的。安装观察点后,我们启动应用程序并读取每个计数器更改的堆栈跟踪,然后查看代码(原文如此!),找到问题并修复它。就我而言,对象并未从缓存表和游戏逻辑表中释放。我希望这个方法能帮助你在使用shared_ptr时处理泄漏,并且更加喜欢这个内存工具。祝调试愉快。

简单的 TensorFlow 示例

我向您展示一个使用深度学习框架的简单示例 – TensorFlow。在此示例中,我们将教神经网络检测正数、负数和零。安装 TensorFlowCUDA我告诉你,这个任务真的不是一件容易的事)

为了解决分类问题,分类器TensorFlow 有几个现成的高级分类器,只需最少的配置即可工作。首先,我们将使用以下方法训练 DNNClassifier具有正数、负数和零的数据集具有正确的“标签”。在人类层面,数据集是一组带有分类结果(标签)的数字:

10 –积极
-22 –负面
0 –零
42 –积极
…其他有分类的号码

接下来,训练开始,之后您可以输入数据集中未包含的数字 –神经网络必须正确识别它们。
下面是分类器的完整代码,带有用于训练和输入数据的数据集生成器:

导入 张量流导入 itertools导入 随机来自 时间 导入时间 分类号:__number = 0__classifiedAs = 3def __init__(自我,数字):自己.__number =数字如果数字 == 0自我.__classifiedAs = <跨度风格=“颜色:#0000dd;字体重量:粗体;”> 0 <跨度风格=“颜色:#888888;”>#零elif 数字 > 0自我.__classifiedAs = <跨度风格=“颜色:#0000dd;字体重量:粗体;”> 1 <跨度风格=“颜色:#888888;”>#积极elif数字 < 0自我.__classifiedAs = <跨度风格=“颜色:#0000dd;字体重量:粗体;”> 2 <跨度风格=“颜色:#888888;”>#负面def 数字(自我):返回 自我.__号码def 分类为(自我):返回 自我.__classifiedAsdef classifiedAsString(classifiedAs):如果分类为== 0返回 “零”elif 分类为 == 1返回 “正”elif 分类为 == 2返回 “负”def trainDatasetFunction():trainNumbers = []trainNumberLabels = []对于 i  范围(-10001001):数字 = ClassifiedNumber(i)trainNumbers.append(number.number())trainNumberLabels.append(number.classifiedAs())返回({“number”:trainNumbers },列车编号标签)def inputDatasetFunction():全局 randomSeedrandom.seed(randomSeed) # 得到相同的结果数字 = []对于 范围(0, 4):数字.append(随机.randint(-9999999, 9999999))返回 {“数字”:数字}def main():print("TensorFlow Positive-Negative-Zero 数字分类器测试,由 demensdeum 2017 (demensdeum@gmail. com)")maximalClassesCount = len(设置< /span>(trainDatasetFunction()[1])) + 1numberFeature =tensorflow.feature_columnnumeric_column("数字")分类器 = 张量流.估计器DNNClassifier(feature_columns = [numberFeature],hidden_​​units = [10, 2010],n_classes = maximalClassesCount)生成器 = 分类器.train(input_fn = trainDatasetFunction,步骤 = 1000).预测(input_fn =  输入数据集函数)inputDataset = inputDatasetFunction()结果 = 列表(itertoolsislice(生成器,len(inputDatasetFunction()[“数字”])))我 = 0for 结果 in 结果:打印("编号:%d 分类为 %s" % (inputDataset["数字"][i], classifiedAsString(结果["class_ids"][0 ])))我 += 1randomSeed = time()主要的()

这一切都从 main() 方法开始,我们设置分类器将使用的数字列– tensorflow.feature_column.numeric_column(“number”) 接下来,设置分类器参数。描述当前的初始化参数是没有用的,因为 API 每天都在变化,你绝对应该查看已安装的 TensorFlow 版本的文档,而不是依赖过时的手册。

接下来,启动训练,指示返回从 -1000 到 1000 的数字数据集的函数 (trainDatasetFunction),并根据正数、负数或零对这些数字进行正确分类。接下来,我们提交训练数据集中不存在的输入数字——从 -9999999 到 9999999 (inputDatasetFunction) 随机进行分类。

最后,我们根据输入数据的数量启动迭代(itertools.islice),打印结果,运行它,你会感到惊讶:

number: 4063470 分类为 Positive编号:6006715 分类为阳性编号:-5367127 分类为负面编号:-7834276 分类为负面

iT 还活着

<脚本异步 src="//s.imgur.com/min/embed.js" charset="utf-8">

说实话,我仍然有点惊讶分类器“理解”甚至那些我没有教过的数字。我希望将来我能更详细地了解机器学习这个主题,并且会有更多教程。

GitLab:
https://gitlab.com/demensdeum/MachineLearning

链接:
https://developers.googleblog.com/2017/09/introducing-tensorflow-datasets.html
https://www.tensorflow.org/versions/master/api_docs/python/tf/estimator/DNNClassifier

打破比特币

本说明不是行动号召;在这里我将描述比特币和区块链技术的弱点和潜在危险的方面。

弱势中心

比特币和区块链的运行原理是存储和更改一个公共数据库,每个网络参与者都存储该数据库的完整副本。该系统看起来是去中心化的,因为……没有存储数据库的单个组织/服务器。此外,去中心化被认为是区块链的主要优势;它保证您的比特币不会在您不知情的情况下发生任何事情。


来自 Elkin

的区块瘟疫原理

为了让区块链发挥作用,需要确保每个用户下载区块链数据库的最新副本并按照一定的规则使用它。这些规则包括比特币挖矿原理的实施,在确认资金从一个钱包转移到另一个钱包时(交易费),收取每笔交易的一定比例。用户无法为自己提取 1,000,000 个比特币并用它们购买东西,因为……对于其他用户,其账户内的金额将保持不变。还排除了仅在您自己的数据库中从别人的钱包中提取资金的选项,因为此更改不会反映在其他比特币用户中,并将被忽略。
当前实现的漏洞是比特币钱包位于服务器 github 上完全屏蔽关于去中心化的广告口号。 无需从单一中心下载钱包——开发者的网站,不可能与比特币一起工作,也就是说,任何时候开发者都可以完全控制网络。因此,区块链技术本身是去中心化的,但是与网络一起工作的客户端是从单一中心下载的>.
攻击场景–假设钱包中添加了一个代码,用于提取所有资金并兑现到第三方帐户,之后任何最新版本钱包的用户都将自动丢失所有比特币(无法恢复)。我怀疑许多钱包所有者会从源代码检查和构建它,因此这种攻击的后果会影响大多数用户。

多数决定

区块链是一个去中心化的p2p网络;所有交易均由用户自己自动确认。攻击场景–需要获得 51% 的网络才能忽略其余 49% 的确认,之后攻击者即可完全控制比特币/区块链。这可以通过连接与其余部分重叠的计算能力来实现。这种攻击场景称为51% 攻击

猜猜我是否可以

当您第一次启动钱包时,计算机会生成一对“私钥和公钥以确保其正确运行。这些密钥的唯一性非常高,但可以选择使用代码字“–”来生成密钥。所谓的“脑钱包”。一个人将钥匙存储在他的脑海中;他不需要备份wallet.dat文件,因为任何时候,都可以使用该代码字重新生成密钥。攻击场景–攻击者选择或学习代码字,生成私钥-公钥对并获得钱包的控制权。

只需复制

私钥-公钥对包含在 wallet.dat 文件中。任何有权访问此文件的软件&#8211;可以访问比特币钱包。防止此类攻击的方法是添加一个代码字,用户必须记住并输入该代码字才能使用钱包进行所有交易。添加密码后,攻击者需要拥有wallet.dat和密码才能获得完全控制权。
还值得补充的是,当您输入代码字时,它会进入计算机的内存,因此任何允许读取“其他人”内存的硬件和/或软件漏洞都将允许病毒软件读取该代码字。

系统错误

破解比特币的加密算法将立即导致其死亡。假设算法的实现中出现了错误,发现错误的攻击者获得了对区块链的全部或部分控制。此外,比特币中使用的加密算法并不能免受未来量子计算机、量子算法的出现和实现的黑客攻击。将结束比特币当前的实施。不过,这可以通过改用后量子加密算法来解决。

WebGL + SDL + Emscripten

我最终使用 SDL 1 和 Emscripten 将 Mika 移植到 WebGL。

接下来我将描述需要在代码中更改哪些内容才能成功完成 JavaScript 中的构建。

  1. 使用 SDL 1 而不是 SDL 2。目前 emscripten 有一个 SDL 2 端口,但我发现使用 emscripten 内置的 SDL 1 更合适。上下文不是在窗口中初始化的,而是使用 SDL_SetVideoMode 和 SDL_OPENGL 标志初始化的。使用 SDL_GL_SwapBuffers() 命令绘制缓冲区
  2. 由于 JavaScript 循环的方式–渲染被放置在一个单独的函数中,并使用 emscripten_set_main_loop
  3. 函数定期调用

  4. 还必须使用密钥“-s FULL_ES2=1”进行组装
  5. 我不得不放弃 assimp 库,从文件系统加载模型,并从磁盘加载纹理。所有必需的缓冲区都已加载到桌面版本上,并插入到 c 头文件中,以便使用 emscripten 进行组装。

代码:
https://github.com/demensdeum/OpenGLES3-Experiments/tree/master/9-sdl-gles-obj-textured-assimp-miku-webgl/mikuWebGL

文章:
http://blog.scottlogic.com/2014/03/12/native-code-emscripten-webgl-simmer-gently.html
https://kripken.github.io/emscripten-site/docs/porting/multimedia_and_graphics/OpenGL-support.html

型号:
https://sketchfab.com/models/7310aaeb8370428e966bdcff414273e7

只有美九一个人

使用 OpenGL ES 和代码处理 FSGL 库的结果:

接下来我将描述它是如何编程的,以及如何解决各种有趣问题。

首先,我们将初始化 OpenGL ES 上下文,正如我在上一篇文章中所写的那样。此外,我们将仅考虑渲染和代码的简要描述。

黑客帝国正在注视着你

视频中 Miku 的这个形象由三角形组成。要在 OpenGL 中绘制三角形,需要指定坐标为 x、y、z 的三个点。在 OpenGL 上下文的 2D 坐标中。
由于我们需要绘制包含 3D 坐标的图形,因此需要使用投影矩阵。我们还需要旋转、放大或任何我们想要对模型执行的操作——为此,使用了模型矩阵。 OpenGL 中没有相机的概念;事实上,对象围绕静态相机旋转。为此,使用了视图矩阵

简化 OpenGL ES 的实现它不包含矩阵数据。您可以使用添加缺失功能的库,例如 GLM

着色器

为了允许开发人员以任何方式绘制任何内容,OpenGL ES 必须实现顶点和片段着色器。顶点着色器必须接收渲染坐标作为输入,使用矩阵执行转换,并将坐标传递给 gl_Position。片段或像素着色器 –已经绘制颜色/纹理、应用叠加等。

我用 GLSL 编写了着色器。在我当前的实现中,着色器作为 C 字符串直接内置到主应用程序代码中。

缓冲区

顶点缓冲区包含顶点(vertices)的坐标;该缓冲区还包含纹理的坐标以及着色器所需的其他数据。生成顶点缓冲区后,需要将指针绑定到顶点着色器的数据。这是通过 glVertexAttribPointer 命令完成的,您需要在其中指定元素数量、指向数据开头的指针以及用于遍历缓冲区的步长。在我的实现中,完成了像素着色器的顶点坐标和纹理坐标的绑定。不过,值得一提的是,数据(纹理坐标)到片段着色器的传输是通过顶点着色器进行的。为了实现这一点,使用variing声明坐标。

这样OpenGL就知道以什么顺序绘制三角形的点–您将需要一个索引缓冲区(索引)。索引缓冲区包含数组中的顶点编号;使用三个这样的索引,可以获得一个三角形。

纹理

首先您需要加载/生成 OpenGL 纹理。为此,我使用了 SDL_LoadBMP,纹理是从 bmp 文件加载的。不过,值得注意的是,只有 24 位 BMP 适合,并且其中的颜色不是按通常的 RGB 顺序存储,而是以 BGR 存储。即加载后需要将红色通道替换为蓝色通道
纹理坐标以以下格式指定: UV,即只需要传递两个坐标即可。纹理输出在片段着色器中完成。为此,您需要将纹理绑定到片段着色器中。

没什么多余的

因为,根据我们的指示,OpenGL 通过 2D 绘制 3D ——然后实现深度,并选择不可见的三角形–您需要使用剔除和深度缓冲区(Z-Buffer)。在我的实现中,我设法避免使用两个命令手动生成深度缓冲区:glEnable(GL_DEPTH_TEST);和选择 glEnable(GL_CULL_FACE);
另外一定要检查投影矩阵的近平面是否大于零,因为使用近平面的空值检查深度将不起作用。

渲染

要使用有意识的东西填充顶点缓冲区、索引缓冲区,例如 Miku 模型,您需要加载此模型。为此,我使用了 assimp 库。 Miku被放置在Wavefront OBJ格式文件中,使用assimp加载,并实现了assimp到顶点和索引缓冲区的数据转换。

渲染分几个阶段进行:

  1. 使用模型矩阵旋转来旋转 Miku
  2. 清除屏幕和深度缓冲区
  3. 使用 glDrawElements 命令绘制三角形。

下一阶段–使用 Emscripten 在 WebGL 中实现渲染。

源代码:
https://github.com/demensdeum/OpenGLES3-Experiments/tree/master/8-sdl-gles-obj-textured-assimp-miku
型号:
https://sketchfab.com/models/7310aaeb8370428e966bdcff414273e7


投影它

在 3D 中绘制了一个红色茶壶后,我认为我有责任简要描述它是如何完成的。

现代OpenGL不绘制3D,它只在2D屏幕坐标中绘制三角形、点等。
要使用 OpenGL 至少输出一些内容,您需要提供一个顶点缓冲区,编写一个顶点着色器,将所有必要的矩阵(投影、模型、视图)添加到顶点着色器,将所有输入数据与着色器,调用OpenGL中的渲染方法。是不是看起来很简单?


好的,什么是顶点缓冲区?要绘制的坐标列表(x,y,z)
顶点着色器告诉 GPU 要绘制什么坐标。
像素着色器告诉绘制什么(颜色、纹理、混合等)
矩阵将 3D 坐标转换为可以渲染的 2D OpenGL 坐标

在接下来的文章中,我将提供代码示例和结果。

SDL2 – OpenGL ES

I love Panda3D game engine. But right now this engine is very hard to compile and debug on Microsoft Windows operation system. So as I said some time ago, I begin to develop my own graphics library. Right now it’s based on OpenGL ES and SDL2.
In this article I am going to tell how to initialize OpenGL ES context and how SDL2 helps in this task. We are going to show nothing.

King Nothing

First of all you need to install OpenGL ES3 – GLES 3 libraries. This operation is platform dependant, for Ubuntu Linux you can just type sudo apt-get install libgles2-mesa-dev. To work with OpenGL you need to initialize OpenGL context. There is many ways to do that, by using one of libraries – SDL2, GLFW, GLFM etc. Actually there is no one right way to initialize OpenGL context, but I chose SDL2 because it’s cross-platform solution, code will look same for Windows/*nix/HTML5/iOS/Android/etc.

To install sdl2 on Ubuntu use this command sudo apt-get install libsdl2-dev

So here is OpenGL context initialization code with SDL2:

    SDL_Window *window = SDL_CreateWindow(
            "SDL2 - OGLES",
            SDL_WINDOWPOS_UNDEFINED,
            SDL_WINDOWPOS_UNDEFINED,
            640,
            480,
            SDL_WINDOW_OPENGL
            );
	    

    SDL_GLContext glContext = SDL_GL_CreateContext(window);

After that, you can use any OpenGL calls in that context.

Here is example code for this article:
https://github.com/demensdeum/OpenGLES3-Experiments/tree/master/3sdl-gles
https://github.com/demensdeum/OpenGLES3-Experiments/blob/master/3sdl-gles/sdlgles.cpp

You can build and test it with command cmake . && make && ./SDLGles

量子黑客 RSA

有一天,我编写了 RSA 公钥加密算法的实现。我还对这个算法做了一个简单的修改,所以我想写一篇关于这个主题的简短说明。 RSA 的防篡改基于因式分解问题。因式分解——多么可怕的词啊…

这并没有那么可怕

事实上,在创建密钥的第一阶段,我们取两个随机数,但这些数字只能被它们本身和一个“整除”。 素数数字。
我们称它们为pq。接下来我们应该得到数字n = p *q。它将用于进一步生成密钥,这些密钥又将用于加密和解密消息。在私钥和公钥的最终版本中,数字n将原样转移。
假设我们手中有一个 RSA 密钥和一条加密消息。我们从密钥中取出数字n并开始破解

因式分解 n

因式分解–将数字分解为素数因子。首先,我们从密钥中取出数字n(在真正的密钥上,您可以使用 openssl 来完成),假设n = 35。然后我们将其分解为简单的因子n = 35 = 5 * 7,这就是我们的pq。现在您可以使用收到的pq重新生成密钥,解密消息并加密它,同时确保原始作者的可见性。

量子位没那么简单

真的有可能那么容易破解任何 RSA 吗?事实上不是,数字pq被故意取大,使得经典计算机上的因式分解任务需要很长的时间(某种程度上10年)< br/>然而,使用 Shor 的量子算法,可以在很短的时间内分解一个数字。目前,有关该主题的文章规定了乘以给定数字的时间,即几乎是立即的。为了让 Shor 算法发挥作用,需要实现具有大量量子位的量子计算机。 2001 年,IBM 使用 7 个量子位对数字 15 进行因式分解。所以这一刻我们还需要等待很长时间,到时候我们就已经转向后量子加密算法了。

触摸短时间

Peter Shore 谈论他的因式分解算法

要在量子模拟器上尝试 Shor 算法,您可以安装 ProjectQ,其示例包括 shor.py 的实现,允许您对用户输入的数字进行因式分解。在模拟器上,执行时间令人沮丧,但这似乎是对量子计算机操作的有趣且好玩的模拟。

文章:
http://www.pagedon.com/rsa-explained-simply/my_programming/
http://southernpacificreview.com/2014/01/06/rsa-key-generation-example/
https://0day.work/how-i-recovered-your-private-key-or-why-small-keys-are-bad/

RSA的Python实现:
https://github.com/demensdeum/RSA-Python

Russian Quantum Hack and Number Generator

[Translation may be, some day]

Эта заметка увеличит длину вашего резюме на 5 см!

Без лишних слов о крутости квантовых компьютеров и всего такого, сегодня я покажу как сделать генератор чисел на реальном квантовом процессоре IBM.
Для этого мы будем использовать всего один кубит, фреймворк для разработки квантового ПО для python – ProjectQ, и 16 кубитовый процессор от IBM, онлайн доступ к которому открыт любому желающему по программе IBM Quantum Experience.

Установка ProjectQ

Для начала у вас должен быть Linux, Python и pip. Какие либо инструкции по установке этих базовых вещей приводить бесполезно, т.к. в любом случае инструкции устареют через неделю, поэтому просто найдите гайд по установке на официальном сайте. Далее устанавливаем ProjectQ, гайд по установке приведен в документации. На данный момент все свелось к установке пакета ProjectQ через pip, одной командой: python -m pip install –user projectq

Ставим кубит в суперпозицию

Создаем файл quantumNumberGenerator.py и берем пример генератора бинарного числа из документации ProjectQ, просто добавляем в него цикл на 32 шага, собираем бинарную строку и переводим в 32-битное число:

import projectq.setups.ibm
from projectq.ops import H, Measure
from projectq import MainEngine
from projectq.backends import IBMBackend

binaryString = ""

eng = MainEngine()

for i in range(1, 33):

 qubit = eng.allocate_qubit()

 H | qubit

 Measure | qubit

 eng.flush()

 binaryString = binaryString + str(int(qubit))

 print("Step " + str(i))

number = int(binaryString, 2)

print("\n--- Quantum 32-Bit Number Generator by demensdeum@gmail.com (2017) ---\n")
print("Binary: " + binaryString)
print("Number: " + str(number))
print("\n---")

Запускаем и получаем число из квантового симулятора с помощью команды python quantumNumberGenerator.py

Незнаю как вы, но я получил вывод и число 3974719468:

--- Quantum 32-Bit Number Generator by demensdeum@gmail.com (2017) ---

Binary: 11101100111010010110011111101100
Number: 3974719468

---

Хорошо, теперь мы запустим наш генератор на реальном квантовом процессоре IBM.

Хакаем IBM

Проходим регистрацию на сайте IBM Quantum Experience, подтверждаем email, в итоге должен остаться email и пароль для доступа.
Далее включаем айбиэмовский движок, меняем строку eng = MainEngine() -> eng = MainEngine(IBMBackend())
В теории после этого вы запускаете код снова и теперь он работает на реальном квантовом процессоре, используя один кубит. Однако после запуска вам придется 32 раза набрать свой email и пароль при каждой аллокации реального кубита. Обойти это можно прописав свой email и пароль прямо в библиотеки ProjectQ.

Заходим в папку где лежит фреймворк ProjectQ, ищем файл с помощью grep по строке IBM QE user (e-mail).
В итоге я исправил строки в файле projectq/backends/_ibm/_ibm_http_client.py:

email = input_fun('IBM QE user (e-mail) > ') -> email = "quantumPsycho@aport.ru"

password = getpass.getpass(prompt='IBM QE password > ') -> password = "ilovequbitsandicannotlie"

Напишите свой email и password со-но.

После этого IBM будет отправлять результаты работы с кубитом онлайн прямо в ваш скрипт, процесс генерации занимает около 20 секунд.

Возможно в дальнейшем я доберусь до работы квантового регистра, и возможно будет туториал, но это не обязательно.
Да прибудет с вами запутанность.

Статья на похожую тему:
Introducing the world’s first game for a quantum computer

Porting SDL C++ Game to HTML5 (Emscripten)

[Translation may be some day]

За последний год я написал простейший движок Flame Steel Engine и набор классов для игровой разработки Flame Steel Engine Game Toolkit. В данной статье я опишу как производил портирование движка и SDL игры Bad Robots на HTML 5, с использованием компилятора Emscripten.

Установка Hello World – Emscripten

Для начала нужно установить Emscripten. Простейшим вариантом оказалось использование скрипта emsdk для Linux. На официальном сайте данный тип установки называется как “Portable Emscripten SDK for Linux and OS X“. Внутри архива есть инструкция по установке с использованием скрипта. Я производил установку в директорию ~/emsdk/emsdk_portable.

После установки emscripten нужно проверить корректность работы компилятора, для этого создаем простейший hello_world.cpp и собираем его в hello_world.html с помощью команд:

source ~/emsdk/emsdk_portable/emsdk_env.sh
emcc hello_world.cpp -o hello_world.html

После компиляции в папке появится hello_world.html и вспомогательные файлы, откройте его в лучшем браузере Firefox, проверьте что все работает корректно.

Портирование кода игры

В javascript нежелательно вызывать бесконечный цикл – это приводит к зависанию браузера. На данный момент корректная стратегия – запрашивать один шаг цикла у браузера с помощью вызова window.requestAnimationFrame(callback)

В Emscripten данное обстоятельство решено с помощью вызова:

emscripten_set_main_loop(em_callback_func func, int fps, int simulate_infinite_loop);

Таким образом, нужно изменить код игры для корректного вызова метода emscripten. Для этого я сделал глобальный метод GLOBAL_fsegt_emscripten_gameLoop, в котором вызываю шаг цикла игрового контроллера. Главный игровой контроллер также вынесен в глобальную видимость:

#ifdef __EMSCRIPTEN__

void GLOBAL_fsegt_emscripten_gameLoop() {

GLOBAL_fsegt_emscripten_gameController->gameLoop();

}
#endif

Также для обработки специфических для Emscripten моментов, нужно использовать макрос __EMSCRIPTEN__.

Ресурсы и оптимизация

Emscripten поддерживает ресурсы и сборку с оптимизацией.

Для добавления изображений, музыки и прочего, положите все файлы в одну папку, например data. Далее в скрипт сборки добавьте:

emcc <файлы для сборки> –use-preload-plugins –preload-file data

Флаг –use-preload-plugins включает красивый прелоадер в углу экрана, –preload-file добавляет указанный ресурс в файл <имя проекта>.data
Код постоянно останавливался с ошибками доступа к ресурсам, пока я не включил оба этих флага. Также стоит заметить что для корректного доступа к ресурсам, желательно запускать игру на https (возможно и http) сервере, или отключить защиту локального доступа к файлам в вашем браузере.

Для включения оптимизации добавьте флаги:

-s TOTAL_MEMORY=67108864 -O3 -ffast-math

TOTAL_MEMORY – оперативная память в байтах(?) необходимая для корректной работы игры. Вы можете использовать флаг для динамического выделения памяти, но тогда часть оптимизаций работать не будет.

Производительность

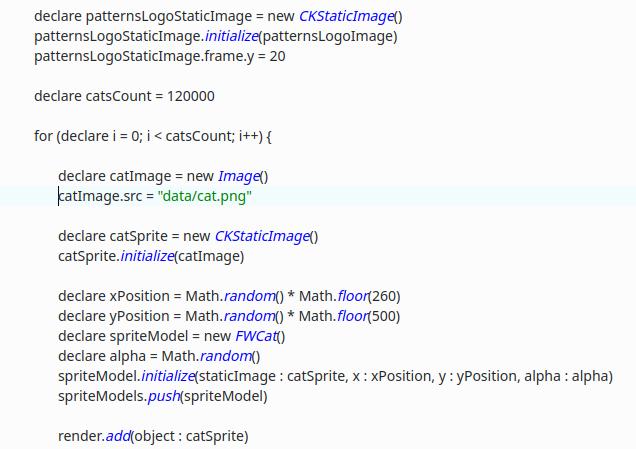
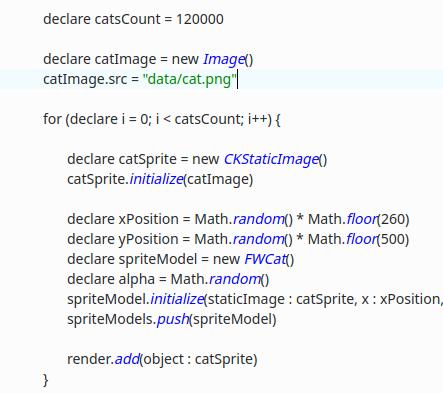
Код javascript из C++ работает гораздо медленнее, даже со включенными оптимизациями. Поэтому если ваша цель это разработка для HTML5, то приготовьтесь к ручной оптимизации алгоритмов игры, паралелльному тестированию, также к написанию javascript кода вручную в особо узких местах. Для написания javascript кода используется макрос EM_ASM. Во время реализации рейкастера на emscripten, мне удалось добиться повышения fps с 2-4 до 30 с помощью прямого использования методов canvas.drawImage, в обход обертки SDL->Canvas, что почти приравнялось к написанию всего на javascript.

Поддержка SDL

На данный момент почти не работает SDL_TTF, поэтому отрисовка шрифта для Game Score в BadRobots очень проста. SDL_Image, SDL_Mixer работают корректно, в mixer я проверил только проигрывание музыки.

Исходный код Flame Steel Engine, Flame Steel Engine Game Toolkit, игры Bad Robots:

https://github.com/demensdeum/BadRobots
https://github.com/demensdeum/FlameSteelEngine
https://github.com/demensdeum/FlameSteelEngineGameToolkit

Статья на эту тему:

https://hacks.mozilla.org/2012/04/porting-me-my-shadow-to-the-web-c-to-javascriptcanvas-via-emscripten/

稀释ECS

<对象宽度="450" 高度="478">
Commission: Mad Scientist by Culpeo-Fox on DeviantArt

在本文中,我将粗略地描述 ECS 模式以及我在 Flame Steel Engine Game Toolkit 中的实现。实体组件系统模式用于游戏,包括游戏。在 Unity 引擎上。 游戏中的每个对象都是一个充满组件的精华。  如果有 OOP,为什么这是必要的?
然后在游戏运行时直接更改对象的属性、行为、显示。这些东西在现实世界的应用程序中是找不到的;参数、对象属性、显示和声音的动态变化比会计软件更具游戏特征。


我们没有传香蕉

假设我们的游戏中有一个香蕉类。游戏设计师希望将香蕉用作武器。假设在当前的架构中,香蕉与武器无关。把香蕉变成武器?让所有物品成为武器?
ECS 为这一紧迫问题提供了解决方案 –游戏中的所有对象都必须由组件组成。以前,banana 是 Banana 类,现在我们将创建它,以及所有其他对象,Entity 类,并向它们添加组件。假设一根香蕉现在由以下部分组成:

  1. 位置组件(游戏世界中的坐标 – x, y, z)
  2. 旋转分量(x、y、z 坐标)
  3. 一根香蕉的热量成分(主角不要太胖)
  4. 香蕉图片组件

现在我们正在为所有香蕉添加一个新组件,这是一个标志,表明它可以用作武器——武器组件。现在,当游戏系统发现玩家接近香蕉时,它会检查香蕉上是否存在武器组件,如果存在,则会用香蕉武装玩家。
在我的游戏《火焰钢之死亡召唤》中,始终使用 ECS 模式。对象由组件组成,组件本身可以包含组件。一般来说,划分对象< – >我的实现中缺少该组件,但这甚至是一个优点。

screenshot_2016-09-24_14-33-43

这张截图中的霰弹枪是玩家的一个组件,同时,第二把霰弹枪只是作为普通物体挂在游戏地图上。
在此屏幕截图中,有两个系统正在运行场景渲染器和界面渲染器。场景渲染器与地图上的霰弹枪图像组件配合使用,界面渲染器与玩家手中的霰弹枪图像组件配合使用。

相关链接:
https://habrahabr.ru/post/197920/
https://www.youtube.com/watch?v=NTWSeQtHZ9M

Flame Steel引擎游戏工具包的架构

今天我会讲一下游戏开发工具包Flame Steel Engine Game Toolkit的架构。
Flame Steel Engine游戏工具包允许您基于Flame Steel Engine创建游戏:
flamesteelgametoolkitschematics

火焰钢发动机的所有类别均以前缀FSE开头(Flame Steel >E 引擎)和FSEGTFlameSteelE引擎G梅Ttoolkit) 用于工具包。
游戏场景、对象、按钮都是FSEObject的子类,并且应该位于FSEGTGameData类内。每个FSEObject必须实现FSESerialize接口,这将允许您保存/加载游戏数据并提供保存机制。
FSEController 类与 FSEObject 类的对象一起使用。该工具包有一个基本的游戏场景控制器类 – FSEGTGameSceneController,您可以继承该类来实现您的游戏逻辑。
IOSystemFSEGTIOSystem接口的对象,该接口包含FSEGTRendererFSEGTInputControllerFSEGTUIRenderer强>。FSEGTIOSystem 必须实现一个渲染器,从键盘、操纵杆(输入设备)接收数据并提供界面元素的渲染以供访问该平台的输入/输出系统
目前,渲染器已经实现,一个基于 SDL 库的键盘控制器,可以在 FSEGTIOSDLSystem 类。

Flame Steel Engine Raycaster Demo

未来计划创建一个基于OpenGL的IOSystem,该类将被称为FSEGTIOGLSystem 。如果你想创建一个基于任何平台的IOSystem,那么你需要使用FSEGTIOSystem接口并实现FSEGTRenderer渲染器,FSEGTInputController平台。

Flame Steel引擎、工具包、游戏源代码:
https://github.com/demensdeum/FlameSteelCallOfTheDeathMask

Unity,为什么荒地 2 不能在我的 Ubuntu 上运行?

我很自豪能成为游戏 Wasteland 2 的支持者。今天我想在 Ubuntu 上启动它,但我不能。然而,经过一个小时的谷歌搜索后,一切都解决了。事实证明Unity在Linux上有一些严重的问题,但是通过使用某些拐杖可以启动游戏:

ulimit -Sn 65536~/.local/share/Steam/steamapps/common/Wasteland\ 2\ 导演\ Cut/Linux/WL2

食谱来自这里:
https://forums.inxile-entertainment.com/viewtopic.php?t=15505