Abstract factory– provides an interface for creating related objects without specifying specific classes.
I really like the alternative name of this pattern – Kit
It is very similar to Factory Method, however Abstract Factories must describe the relationship between the objects being created, otherwise it is simply an anti-pattern God Object, which creates everything in a row in a haphazard manner.
Let’s imagine developing an AR framework for glasses, we display indoor navigation arrows, icons of stores, interesting places, windows and buttons with information about a place where the user is currently located on the screen.
At the same time, we need the ability to customize the appearance and behavior of AR environment controls. This is exactly the case where we need to use the Set pattern.
Let’s write the interface of the Abstract Factory and Abstract Products – parent protocols, elements of the AR environment:
protocol ARFactory {
    func arrow() -> ARArrow
    func icon() -> ARIcon
    func button() -> ARButton
    func window() -> ARWindow
}

protocol ARArrow {
    var image: { get }
    func handleSelection()
}

protocol ARIcon {
    var image: { get }
    var title: String
}

protocol ARButton {
    var title: String
    func handleSelection()
}

protocol ARWindow {
    var title: String
    var draw(canvas: Canvas)
}
Now, set developers will need to implement a Concrete Factory based on the Abstract Factory interface, and all elements will have to be implemented together; other parts of the application will be able to work with the factory without changing their code.
The Factory Method pattern is a creational design pattern. This pattern describes the creation of an interface for creating an object of a specific class. Seems simple, right?
In theory
Let’s say we are developing a framework for working with AR glasses. When tilting the head to the side, a menu of available applications should appear before the user’s eyes. Applications will be developed by third-party companies, clients of our framework. Naturally, we do not know which applications, icons, names should appear, so we must provide an interface for implementing the icon and related information about the application. Let’s call it Product:
protocol Product {
 var name: String { get }
 var image: Image { get }
 var executablePath: String { get }
}
Next, we need to provide an interface for our clients to implement the issuance of an array of applications of their Specific Product – an array of application icons with names, which we will already draw in the framework.
Let’s write this interface – a Creator interface containing a Factory Method that returns an array of Products.
The first client of our AR framework was 7B, a leading supplier of coffee maker software in Honduras. They want to sell augmented reality glasses with the ability to brew coffee, check the water/beans level, and show the way to their nearest coffee maker in indoor map mode.
They take on the development of the software, all we need to do is provide documentation on the Creator and Product interfaces, for the correct display of the list of applications and their subsequent launch.
After the documentation is transferred, the 7B company, using the Creator interface, implements the Concrete Creator class that returns an array of icon applications. The icon applications themselves are Concrete Product classes implementing the Product interface.
Example Code Specific Products:
class CoffeeMachineLocator: implements Product {
 let name = “7B Coffee Machine Locator v.3000”
 let image = Image.atPath(“images/locator.tga”)
 let executablePath = “CoffeeMachineLocator.wasm”
}

class iPuchinno: implements Product {
 let name = “iPuchinno 1.0.3”
 let image = Image.atPath(“images/puchino.pvrtc”)
 let executablePath = “neutron/ipuchBugFixFinalNoFreezeFixAlpha4.js”
}
A Concrete Creator class that returns an array of two applications:
After that, the 7B company compiles the library of Specific Products, Specific Creator and combines it with our framework, starts selling AR glasses for their coffee makers, no modifications are required on our part.
The Command pattern is a behavioral design pattern.
This is the pattern I’ve been sitting with the longest, it’s so simple it’s very complex. But personally, I find the beauty of self-study is that you have all the time in the world to explore a particular issue from all angles.
So, in GoF the applicability is described quite concisely and clearly: Encapsulates a request as an object, allowing you to parameterize clients with different requests, use queues, log requests, and perform cancellation operations.
Now we will implement a simple version of the command from the description:
string fakeTrumpsRequest = “SELECT * from Users where name beginsWith DonaldTrump”
We encapsulated the request in a string class object, it can configure clients, add commands to the queue, log, cancel (using the “Snapshot” pattern)
I think this is quite enough to implement SQL queries and the like, but then the implementation details begin, different application options, the pattern code base, client roles also vary greatly, and auxiliary classes are added.
Material
The Command pattern begins with the Command protocol, which contains a single execute() method. Next comes the Specific Command and the Receiver. The CC implements the operation on the Receiver, describes the connection between the Receiver and the action. Is anything unclear? Me too, but let’s move on. The Client creates an instance of the Specific Command, associates it with the Receiver. Invoker is an object that carries out the process of launching the Command.
Now let’s try to understand it with an example, let’s say we want to update myOS on a myPhone phone, to do this we launch the myOS_Update! application, in it we press the Update Now! button, after 10 seconds the system will report a successful update.
The client in the example above is the myOS_Update! application, the Invoker is the “Update Now!” button, it runs the Specific Command of updating the system using the execute() method, which calls the Receiver – the operating system update daemon.
Example of use
Let’s say the UI of the myOS_Update! application is so good that they decided to sell it as a separate product to provide an interface for updating other operating systems. In this case, we will implement the application with support for extension via libraries, the libraries will contain implementations of Specific Commands, Receivers, we will leave static/immutable Invoker, Client, protocol Commands.
This eliminates the need to support mutable code, since our code will remain unchanged, problems can only arise during implementation on the client side, due to errors in the code of their Specific Commands and Receivers. Also, in such an implementation, there is no need to transfer the source code of the main application, that is, we have implemented the encapsulation of commands and UI interactions using the Command pattern.
In this post I will describe building cross-platform C++ applications for macOS on an Ubuntu build machine using CMake and osxcross. First, install the osxcross toolchain: https://github.com/tpoechtrager/osxcross
Installation occurs in 3 stages, downloading dependencies:
cd tools
./get_dependencies.sh
Download XCode.xip from the official Apple website, then unload the SDK from XCode:
Dynamic linking didn’t work for me, so we export the libraries statically:
if (OSXCROSS)
add_library(FlameSteelCore STATIC ${SOURCE_FILES})
else()
Next you may encounter the fact that you do not have the necessary libraries for osxcross, I encountered this when using SDL2. osxcross supports ready-made library packages – macports. For example, installing SDL2-mixer:
osxcross-macports -v install libsdl2_mixer
After this, you can start assembling libraries/applications as usual in the cmake-make bundle, do not forget to register static linking of libraries if necessary.
Manual assembly of libraries
At the moment I encountered the problem of incorrect archiving of libraries during static linking, when assembling the final application I get an error:
file was built for archive which is not the architecture being linked (x86_64)
Very similar to this ticket, managed to implement a workaround as a result of which the build completes correctly. Let’s unzip the static library and rebuild it using the osxcross archiver:
ar x ../libFlameSteelCore.a
rm ../libFlameSteelCore.a
x86_64-apple-darwin19-ar rcs ../libFlameSteelCore.a *.o
Also, I personally think that one of the problems is the lack of the ability to run macOS applications directly on Ubuntu (at least with some of the functionality), of course there is the darling project, but the support leaves much to be desired.
In this note I will describe the process of building libraries and applications for Windows using the MinGW32 toolchain on Ubuntu. Install wine, mingw:
sudo apt-get install wine mingw-w64
After this, you can already compile C/C++ applications for Windows:
In this note, I will describe the implementation of launching an autotest for the ChromeDriver browser Chrome, which launches an autotest module translated from C++ using Emscripten, reads the console output and returns the test result. First you need to install selenium, for python3-ubuntu it is done like this:
pip3 install selenium
Next, download ChromeDriver from the official website, put chromedriver, for example, in /usr/local/bin, after that you can start implementing the autotest. Below I will provide the code of the autotest, which launches the Chrome browser with the Emscripten autotest page open, checks for the presence of the text “Window test succeded”:
import time
from selenium import webdriver
from selenium.webdriver.common.keys import Keys
from selenium.webdriver.common.desired_capabilities import DesiredCapabilities

capabilities = DesiredCapabilities.CHROME
capabilities['goog:loggingPrefs'] = { 'browser':'ALL' }
driver = webdriver.Chrome()
driver.get("http://localhost/windowInitializeTest/indexFullscreen.html")

time.sleep(2)

exitCode = 1

for entry in driver.get_log('browser'):
    if entry["source"] == "console-api":
        message = entry["message"]
        if "Window test succeded" in message:
            print("Test succeded")
            exitCode = 0

driver.close()
exit(exitCode)
In this note I will describe the assembly of a project consisting of several libraries using Emscripten. At the moment Emscripten does not support building shared libraries, so the first thing we do is convert all libraries from Shared to Static. Emscripten works with its own include files, so we need to solve the issue with the visibility of header files, I solved this by forwarding a symlink from the system directory to the Emscripten toolchain:
If you use CMake, you need to change SHARED->STATIC in the CMakeLists.txt file of the add_library method. You can build a library/application for further static linking using the commands:
emcmake cmake .
emmake make
Next, you will need to build the main application specifying *.a library files at the linking stage. I was unable to specify a relative path, the build completed correctly only after specifying the full paths in the CMakeLists.txt file:
Recently I decided to make all parts of FlameSteelFramework separate shared libraries, below I will show an example of CMakeLists.txt file for FlameSteelCore:
Commands that CMake executes: compiles all files with the *.cpp extension from the src/FlameSteelCore/ directory into a shared library, copies all headers with the *.h extension from src/FlameSteelCore to include/FlameSteelFramework (in my case it is /usr/local/include/FlameSteelFramework), copies shared lib to the lib directory (/usr/local/lib) After installation, you may need to update the LD cache – sudo ldconfig. To build and install on Ubuntu (if you have the correct build toolchain), just run the commands:
cmake . && make && sudo make install
To test the installation process, I pass make prefix to the local folder makeInstallTestPlayground:
cmake -DCMAKE_INSTALL_PREFIX:PATH=/home/demensdeum/makeInstallTestPlayground . && make && make install
Not long ago I came across an interesting project called Cling, a C++ interpreter that can work interactively from the console, among other things. You can get acquainted with the project at the link: https://github.com/root-project/cling Installation for Ubuntu is very simple – download the archive for the required version, unpack it, go to the bin folder and run cling in the terminal. Below is an example of loading the library FlameSteelCore, initializing the object, printing the id:
An interesting feature of Emscripten is that when starting a game loop via emscripten_set_main_loop, you should remember that exception handling must be re-added via try catch directly in the loop method, since the runtime loses the try catch block from the outside. The easiest way to display the error text is through the browser, using javascript alert:
The std implementation of regex may throw an error_complexity exception if it finds the regular expression too complex. This happens in the current emscripten implementation, so I suggest you implement tests for parsing via regular expressions, or use third-party regex implementations.
The Builder pattern belongs to a group of patterns, the existence of which is not particularly clear to me, I note the obvious redundancy of this. Belongs to the group of generative design patterns. It is used to implement a simple interface for creating complex objects.
Applicability
Simplification of the interface. It can make it easier to create an object in constructors with a large number of arguments, objectively improving the readability of the code.
Example in C++ without a builder:
auto weapon = new Weapon(“Claws”);
monster->weapon = weapon;
auto health = new MonsterHealth(100);
monster->health = health;
Пример со строителем на C++:
                  .addWeapon(“Claws”)
                  .addHealth(100)
                  .build();
Однако в языках поддерживающих именованные аргументы (named arguments), необходимость использовать именно для этого случая отпадает.
Пример на Swift с использованием named arguments:
let monster = Monster(weapon: “Claws”, health: 100)
Immutability. Using the builder, you can ensure the encapsulation of the created object until the final assembly stage. Here you need to think carefully whether the use of the pattern will save you from the high dynamics of the environment in which you work, perhaps the use of the pattern will not give anything, due to the simple lack of a culture of using encapsulation in the development team.
Interaction with components at different stages of object creation. Also, using the pattern, it is possible to provide step-by-step creation of an object when interacting with other components of the system. Most likely, this is very useful (?)
Criticism
Of course, you need to *carefully* think about whether it is worth setting up widespread use of the pattern in your project. Languages with modern syntax and advanced IDEs eliminate the need to use the Builder, in terms of improving code readability (see the point about named arguments) Was this pattern necessary in 1994, when the GoF book was published? Most likely yes, but judging by the open source code base of those years, few people used it.
The Composite pattern is a structural design pattern; in domestic sources it is known as the “Composer”. Let’s say we are developing an application – a photo album. The user can create folders, add photos there, and perform other manipulations. It is necessary to be able to show the number of files in folders, the total number of all files and folders. It is obvious that you need to use a tree, but how to implement the tree architecture, with a simple and convenient interface? The Composite pattern comes to the rescue.
We implement the Component interface with the dataCount() method we need, through it we will return the number of files/directories. We will create a Directory class with an interface that allows adding/removing instances of classes implementing the Component interface, according to the pattern scheme this is Composite. We will also create a File class, where we store bytes with a photo, inherit from Component, through dataCount we return 1, like there is one photo!
Next, in Directory we implement the dataCount() method – by going through all the elements in the component array, adding up all their dataCount’s.
Everything is ready!
Below is an example in Go:
package main

import "fmt"

type component interface {

dataCount() int

}

type file struct {

}

type directory struct {

c []component

}

func (f file) dataCount() int {

return 1

}

func (d directory) dataCount() int {

var outputDataCount int = 0

for _, v := range d.c {
outputDataCount += v.dataCount()
}

return outputDataCount

}

func (d *directory) addComponent(c component) {

d.c = append(d.c, c)

}

func main() {

var f file
var rd directory
rd.addComponent(f)
rd.addComponent(f)
rd.addComponent(f)
rd.addComponent(f)

fmt.Println(rd.dataCount())

var sd directory
sd.addComponent(f)

rd.addComponent(sd)
rd.addComponent(sd)
rd.addComponent(sd)

fmt.Println(sd.dataCount())
fmt.Println(rd.dataCount())

}
The Adapter pattern is a structural design pattern.
An adapter provides data/interface conversion between two classes/interfaces.
Let’s say we are developing a system for determining the buyer’s goal in a store based on neural networks. The system receives a video stream from the store’s camera, identifies buyers by their behavior, and classifies them into groups. Types of groups: came to buy (potential buyer), just to look (gaper), came to steal something (thief), came to return goods (dissatisfied buyer), came drunk/high (potential troublemaker).
Like all experienced developers, we find a ready-made neural network that can classify monkey species in a cage based on a video stream, which was kindly made freely available by the Zoological Institute of the Berlin Zoo, we retrain it on a video stream from the store and get a working state-of-the-art system.
There is only one small problem – the video stream is encoded in mpeg2 format, and our system only supports OGG Theora. We do not have the source code of the system, the only thing we can do is change the dataset and train the neural network. What to do? Write an adapter class that will translate the stream from mpeg2 -> OGG Theora and give it to the neural network.
According to the classic scheme, the pattern involves client, target, adaptee and adapter. The client in this case is a neural network receiving a video stream in OGG Theora, target is the interface with which it interacts, adaptee is the interface that outputs the video stream in mpeg2, the adapter converts mpeg2 to OGG Theora and outputs it via the target interface.
The delegate pattern is one of the basic design patterns. Let’s say we are developing a barbershop app. The app has a calendar for choosing a day for an appointment, and when you tap on a date, a list of barbers should open with the option to choose from. We will implement a naive binding of system components, we will combine the calendar and the screen using pointers to each other, to implement the list output:
// псевдокод

class BarbershopScreen {
   let calendar: Calendar

   func showBarbersList(date: Date) {
      showSelectionSheet(barbers(forDate: date))
   }
}

class Calendar {
    let screen: BarbershopScreen

    func handleTap(on date: Date) {
        screen.showBarbersList(date: date)
    }
}
After a few days the requirements change, before displaying the list you need to show offers with a choice of services (beard trimming, etc.) but not always, on all days except Saturday. We add a check to the calendar whether it is Saturday today or not, depending on it we call the method of the list of barbers or the list of services, for clarity I will demonstrate:
// псевдокод

class BarbershopScreen {
   let calendar: Calendar

   func showBarbersList(date: Date) {
      showSelectionSheet(barbers(forDate: date))
   }

   func showOffersList() {
      showSelectionSheet(offers)
   }
}

class Calendar {
    let screen: BarbershopScreen

    func handleTap(on date: Date)  {
        if date.day != .saturday {
             screen.showOffersList()
        }
        else {
             screen.showBarbersList(date: date)
        }
    }
}
A week later we are asked to add a calendar to the feedback screen, and at this point the first architectural ouch happens! What should I do? The calendar is tightly linked to the haircut appointment screen. oh! oof! oh-oh If you continue to work with such a crazy application architecture, you should make a copy of the entire calendar class and link this copy to the feedback screen. Ok, so it seems good, then we added a few more screens and a few copies of the calendar, and then the X-moment came. We were asked to change the calendar design, that is, now we need to find all the copies of the calendar and add the same changes to all of them. This “approach” greatly affects the speed of development, increases the chance of making a mistake. As a result, such projects end up in a broken trough state, when even the author of the original architecture does not understand how the copies of his classes work, other hacks added along the way fall apart on the fly. What should have been done, or better yet, what is not too late to start doing? Use the delegation pattern! Delegation is a way to pass class events through a common interface. Here is an example of a delegate for a calendar:
As a result, we completely untied the calendar from the screen; when selecting a date from the calendar, it passes the date selection event – *delegates* the event processing to the subscriber; the subscriber is the screen. What advantages do we get in this approach? Now we can change the calendar and screen logic independently of each other, without duplicating classes, simplifying further support; thus, the “single responsibility principle” of implementing system components is implemented, the DRY principle is observed. When using delegation, you can add, change the logic of displaying windows, the order of anything on the screen, and this will not affect the calendar and other classes that objectively should not participate in processes not directly related to them. Alternatively, programmers who don’t bother themselves much use sending messages via a common bus, without writing a separate protocol/delegate interface, where it would be better to use delegation. I wrote about the disadvantages of this approach in the previous note – “Observer Pattern”.
Today we release a version of the game Death-Mask, created from scratch together with the Flame Steel Engine, Flame Steel Engine Game Toolkit and other libraries.
In the game you will play the role of a guy named Revil-Razorback, he wants to take possession of an artifact that grants infinite life – the Death Mask. Walking in search you will die at the hands of drones many, many times until you find what you are looking for.
Updates to 3D models and minor gameplay changes are possible in the near future.
Death Mask – a cyber fantasy adventure in an endless techno-labyrinth. Prepare to die!
The Observer pattern is a behavioral design pattern. The pattern allows sending a change in the state of an object to subscribers using a common interface. Let’s say we are developing a messenger for programmers, we have a chat screen in our application. When receiving a message with the text “problem” and “error” or “something is wrong”, we need to paint the error list screen and the settings screen red. Next I will describe 2 options for solving the problem, the first is simple but extremely difficult to support, and the second is much more stable in support, but requires turning on the brain during the initial implementation.
Common Bus
All implementations of the pattern contain sending messages when data changes, subscribing to messages, and further processing in methods. The variant with a common bus contains a single object (usually a singleton is used) that provides dispatching of messages to recipients. The simplicity of implementation is as follows:
The object sends an abstract message to the shared bus
Another object subscribed to the common bus catches the message and decides whether to process it or not.
One of the implementation options available from Apple (NSNotificationCenter subsystem) adds matching of the message header to the name of the method that is called on the recipient upon delivery. The biggest disadvantage of this approach is that when changing the message further, you will first need to remember and then manually edit all the places where it is processed and sent. This is a case of quick initial implementation, followed by long, complex support that requires a knowledge base for correct operation.
Multicast delegate
In this implementation, we will make a final class of multicast delegate, to which, as in the case of a common bus, objects can subscribe to receive “messages” or “events”, but the objects are not assigned the work of parsing and filtering messages. Instead, subscriber classes must implement the methods of the multicast delegate, with the help of which it notifies them. This is implemented by using delegate interfaces/protocols; when the general interface changes, the application will stop assembling, at which point it will be necessary to redo all the places where this message is processed, without the need to maintain a separate knowledge base to remember these places. The compiler is your friend. This approach increases team productivity, since there is no need to write or store documentation, there is no need for a new developer to try to understand how a message is processed, its arguments, instead, work occurs with a convenient and understandable interface, thus implementing the paradigm of documentation through code. The multicast delegate itself is based on the delegate pattern, which I will write about in the next post.
The Proxy pattern is a structural design pattern. The pattern describes the technique of working with a class through a class interlayer – a proxy. The proxy allows you to change the functionality of the original class, with the ability to preserve the original behavior, while maintaining the original interface of the class. Let’s imagine a situation – in 2015, one of the countries of Western Europe decides to record all requests to the websites of the country’s users, in order to improve statistics and gain a deeper understanding of the political moods of citizens. Let’s present a pseudo-code of a naive implementation of a gateway that citizens use to access the Internet:
class InternetRouter {

    private let internet: Internet

    init(internet: Internet) {
        self.internet = internet
    }

    func handle(request: Request, from client: Client) -> Data {
        return self.internet.handle(request)
    }

}
In the code above, we create an Internet router class, with a pointer to an object providing access to the Internet. When a client requests a site, we return a response from the Internet.
Using the Proxy pattern and the singleton anti-pattern, we will add the functionality of logging the client name and URL:
class InternetRouterProxy {

    private let internetRouter: InternetRouter

    init(internet: Internet) {
        self.internetRouter = InternetRouter(internet: internet)
    }

    func handle(request: Request, from client: Client) -> Data {

        Logger.shared.log(“Client name: \(client.name), requested URL: \(request.URL)”)

        return self.internetRouter.handle(request: request, from: client)
    }

}
Due to the preservation of the original InternetRouter interface in the InternetRouterProxy proxy class, it is enough to replace the initialization class from InternetRouter to its proxy, no further changes to the code base are required.
Death-Mask game enters public beta (wild beta) The game’s main menu screen has been redesigned, a view of the blue zone of the techno-labyrinth has been added, with pleasant music in the background.
Next, I plan to rework the gameplay controller, add smooth movement like in old shooters, high-quality 3D models of boxes, weapons, enemies, the ability to move to other levels of the techno-labyrinth not only through portals (elevators, doors, falling through holes in the floor, holes in the walls), I will add a little variety to the environment of the generated labyrinth. I will also work on the game balance. Skeletal animation will be added during the polishing phase before release.
The prototype pattern belongs to the group of generative design patterns. Let’s say we are developing a dating app Tender, according to the business model we have a paid option to make copies of your own profile, changing the name automatically, and the order of the photos in some places. This is done so that the user can have the opportunity to manage several profiles with different sets of friends in the app. By clicking on the button to create a copy of the profile, we need to implement copying of the profile, automatic name generation and re-sorting of photos. Naive pseudocode implementation:
fun didPressOnCopyProfileButton() {
    let profileCopy = new Profile()
    profileCopy.name = generateRandomName()
    profileCopy.age = profile.age
    profileCopy.photos = profile.photos.randomize()
    storage.save(profileCopy)
}
Now let’s imagine that other team members copy-pasted the copy code or came up with it from scratch, and after that a new field was added – likes. This field stores the number of profile likes, now you need to update *all* places where copying occurs manually, adding the new field. This is very long and difficult to maintain the code, as well as to test. To solve this problem, the Prototype design pattern was invented. Let’s create a common Copying protocol, with a copy() method that returns a copy of the object with the necessary fields. After changing the entity fields, you will only need to update one copy() method, instead of manually searching and updating all the places containing the copy code.
In this note I will describe the use of a state machine (State Machine), show a simple implementation, implementation using the State pattern. It is worth mentioning that it is undesirable to use the State pattern if there are less than three states, since this usually leads to unnecessary complication of code readability, associated problems in support – everything should be in moderation.
MEAACT PHOTO / STUART PRICE.
Lord of the Flags
Let’s say we are developing a video player screen for a media system of a civil aircraft. The player should be able to load a video stream, play it, allow the user to stop the loading process, rewind, and perform other operations common to a player. Let’s say the player cached the next chunk of the video stream, checked that there are enough chunks for playback, started playing the fragment to the user and simultaneously continues downloading the next one. At this point, the user rewinds to the middle of the video, i.e. now you need to stop playing the current fragment and start loading from a new position. However, there are situations in which this cannot be done – the user cannot control the playback of the video stream while he is shown a video about air safety. Let’s create a flag isSafetyVideoPlaying to check this situation. The system should also be able to pause the current video and broadcast an announcement from the ship’s captain and crew via the player. Let’s create another flag, isAnnouncementPlaying. Plus, there is a requirement not to pause playback while displaying help on how to use the player, another flag, isHelpPresenting.
Pseudocode of a media player example:
class MediaPlayer {

    public var isHelpPresenting = false
    public var isCaching = false
    public var isMediaPlaying: Bool = false
    public var isAnnouncementPlaying = false
    public var isSafetyVideoPlaying = false

    public var currentMedia: Media = null

    fun play(media: Media) {

        if isMediaPlaying == false, isAnnouncementPlaying == false, isSafetyVideoPlaying == false {

            if isCaching == false {
                if isHelpPresenting == false {
                    media.playAfterHelpClosed()
                }
                else {
                    media.playAfterCaching()
                }
            }
    }

    fun pause() {
        if isAnnouncementPlaying == false, isSafetyVideoPlaying == false {
            currentMedia.pause()
        }
    }
}
The above example is hard to read, and hard to maintain due to high variability (entropy). This example is based on my experience working with the codebase of *many* projects that did not use a state machine. Each checkbox should “manage” the interface elements and business logic of the application in a special way; the developer, adding another checkbox, should be able to juggle them, checking and rechecking everything several times with all possible options. Substituting into the formula “2 ^ number of flags” we can get 2 ^ 6 = 64 variants of application behavior for only 6 flags, all these combinations of flags will need to be checked and supported manually. From the developer’s side, adding new functionality with such a system looks like this: – We need to add the ability to show the airline’s browser page, and it should collapse like with movies if the crew members announce something. – Ok, I’ll do it. (Oh, shit, I’ll have to add another flag and double-check all the places where the flags intersect, that’s a lot to change!)
Also the weak point of the flag system is making changes to the application behavior. It is very difficult to imagine how to quickly/flexibly change behavior based on flags, if after changing just one flag you have to recheck everything. This approach to development leads to a lot of problems, loss of time and money.
Enter The Machine
If you look closely at the flags, you can see that we are actually trying to process specific processes that occur in the real world. Let’s list them: normal mode, showing a safety video, broadcasting a message from the captain or crew members. Each process has a set of rules that change the behavior of the application. According to the rules of the state machine pattern, we list all processes as states in enum, add such a concept as state to the player code, implement behavior based on the state, removing combinations on the flags. In this way, we reduce the options for testing exactly to the number of states.
Pseudocode:
enum MediaPlayerState {
	mediaPlaying,
	mediaCaching,
	crewSpeaking,
	safetyVideoPlaying,
	presentingHelp
}

class MediaPlayer {
	fun play(media: Media) {
		media.play()
	}

	func pause() {
		media.pause()
	}
}

class MediaPlayerStateMachine {
	public state: MediaPlayerState
	public mediaPlayer: MediaPlayer
	public currentMedia: Media

	//.. init (mediaPlayer) etc

	public fun set(state: MediaPlayerState) {
		switch state {
			case mediaPlaying:
				mediaPlayer.play(currentMedia)
			case mediaCaching, crewSpeaking,
			safetyVideoPlaying, presentingHelp:
				mediaPlayer.pause()
		}
	}
}
The big difference between a flag system and a state machine is the logical state switching funnel in the set(state: ..) method, which allows us to translate the human understanding of state into program code, without having to play logic games of converting flags into states in the future code maintenance.
State Pattern
Next I will show the difference between a naive implementation of a state machine and the state pattern. Let’s imagine that it was necessary to add 10 states, as a result the state machine class will grow to the size of a godobject, it will be difficult and expensive to maintain. Of course, this implementation is better than the flag system (with a flag system the developer will shoot himself first, and if not, then seeing 2 ^ 10 = 1024 variations the QA will hang himself, however if both of them *don’t notice* the complexity of the task, then the user will notice it, for whom the application will simply refuse to work with a certain combination of flags) When there are a large number of states, it is necessary to use the State pattern. Let’s put the set of rules into the State protocol:
Let’s take the implementation of the set of rules into separate states, for example, the code of one state:
class CrewSpeakingState: State {
	func playMedia(context: MediaPlayerContext) {
		showWarning(“Can’ t play media - listen to announce!”)
	}

	func mediaCaching(context: MediaPlayerContext) {
		showActivityIndicator()
	}

	func crewSpeaking(context: MediaPlayerContext) {
		set(volume: 100)
	}

	func safetyVideoPlaying(context: MediaPlayerContext) {
		set(volume: 100)
	}

	func presentHelp(context: MediaPlayerContext) {
		showWarning(“Can’ t present help - listen to announce!”)
	}
}
Next, we will create a context with which each state will work, and integrate the state machine:
final class MediaPlayerContext {
	private
	var state: State

	public fun set(state: State) {
		self.state = state
	}

	public fun play(media: Media) {
		state.play(media: media, context: this)
	}

	…
	остальные возможные события
}
Application components work with the context through public methods, state objects themselves decide from which state to which to make the transition using the state machine inside the context. In this way, we have implemented the decomposition of the God Object, maintaining the changing state will be much easier, thanks to the compiler tracking changes in the protocol, reducing the complexity of understanding states due to the reduction in the number of lines of code and focusing on solving a specific problem of the state. Also, now it is possible to divide the work in the team, giving the implementation of a specific state to team members, without worrying about the need to “resolve” conflicts, which happens when working with one large class of state machine.
In this article I will describe my understanding of skeletal animation, which is used in all modern 3D engines for animating characters, game environments, etc. I’ll start the description with the most tangible part – the vertex shader, because the entire calculation path, no matter how complex it is, ends with the transfer of prepared data for display in the vertex shader.
After calculation on the CPU, skeletal animation goes into the vertex shader. Let me remind you of the vertex formula without skeletal animation: gl_Position = projectionMatrix * viewMatrix * modelMatrix * vertex; For those who do not understand how this formula came about, you can read my article describing the principle of working with matrices for displaying 3D content in the context of OpenGL. For the rest – the formula for implementing skeletal animation: ” vec4 animatedVertex = bone0matrix * vertex * bone0weight +” “bone1matrix * vertex * bone1weight +” “bone2matrix * vertex * bone2weight +” “bone3matrix * vertex * bone3weight;\n” ” gl_Position = projectionMatrix * viewMatrix * modelMatrix * animatedVertex;\n”
That is, we multiply the final matrix of bone transformation by the vertex and by the weight of this matrix relative to the vertex. Each vertex can be animated by 4 bones, the force of the impact is regulated by the bone weight parameter, the sum of the impacts must be equal to one. What to do if the vertex is affected by less than 4 bones? You need to divide the weight between them, and make the impact of the rest equal to zero. Mathematically, multiplying a weight by a matrix is called “Matrix-Scalar Multiplication”. Multiplying by a scalar allows you to sum the effects of matrices on the resulting vertex.
The bone transformation matrices themselves are transmitted as an array.Moreover, the array contains matrices for the entire model as a whole, and not for each mesh separately.
But for each vertex the following information is transmitted separately: – Index of the matrix that affects the vertex –The weight of the matrix that acts on the vertex It is not just one bone that is transmitted, usually the effect of 4 bones on the vertex is used. Also, the sum of the weights of 4 dice must always be equal to one. Next, let’s look at how this looks in the shader. Array of matrices: “uniform mat4 bonesMatrices[kMaxBones];”
Information about the impact of the 4 bones on each vertex: “attribute vec2 bone0info;” “attribute vec2 bone1info;” “attribute vec2 bone2info;” “attribute vec2 bone3info;”
vec2 – in the X coordinate we store the bone index (and convert it to int in the shader), in the Y coordinate the weight of the bone’s impact on the vertex. Why do we have to pass this data in a two-dimensional vector? Because GLSL does not support passing readable C structures with correct fields to the shader.
Below is an example of obtaining the necessary information from a vector for further substitution into the animatedVertex formula:
Now the vertex structure that is filled on the CPU should look like this: x, y, z, u, v, bone0index, bone0weight, bone1index, bone1weight, bone2index, bone2weight, bone3index, bone3weight
The vertex buffer structure is filled once during model loading, but the transformation matrices are transferred from the CPU to the shader at each rendering frame.
In the remaining parts I will describe the principle of calculating animation on the CPU, before passing it to the vertex shader, I will describe the tree of bone nodes, the passage through the hierarchy animation-model-nodes-mesh, matrix interpolation.
The template method is a behavioral design pattern. The pattern describes a way to replace part of a class’s logic on demand, while leaving the common part unchanged for descendants.
Let’s say we are developing a bank client, let’s consider the task of developing an authorization module – the user should be able to log in to the application using abstract login data. The authorization module must be cross-platform, support different authorization technologies and storage of encrypted data of different platforms. To implement the module, we choose the cross-platform language Kotlin, using the abstract class (protocol) of the authorization module, we will write an implementation for the MyPhone phone:
class MyPhoneSuperDuperSecretMyPhoneAuthorizationStorage {
    fun loginAndPassword() : Pair {
        return Pair("admin", "qwerty65435")
    }
}

class ServerApiClient {
    fun authorize(authorizationData: AuthorizationData) : Unit {
        println(authorizationData.login)
        println(authorizationData.password)
        println("Authorized")
    }
}

class AuthorizationData {
    var login: String? = null
    var password: String? = null
}

interface AuthorizationModule {
    abstract fun fetchAuthorizationData() : AuthorizationData
    abstract fun authorize(authorizationData: AuthorizationData)
}

class MyPhoneAuthorizationModule: AuthorizationModule {

    override fun fetchAuthorizationData() : AuthorizationData {
        val loginAndPassword = MyPhoneSuperDuperSecretMyPhoneAuthorizationStorage().loginAndPassword()
        val authorizationData = AuthorizationData()
        authorizationData.login = loginAndPassword.first
        authorizationData.password = loginAndPassword.second

        return authorizationData
    }

    override fun authorize(authorizationData: AuthorizationData) {
        ServerApiClient().authorize(authorizationData)
    }

}

fun main() {
    val authorizationModule = MyPhoneAuthorizationModule()
    val authorizationData = authorizationModule.fetchAuthorizationData()
    authorizationModule.authorize(authorizationData)
}
Now for each phone/platform we will have to duplicate the code for sending authorization to the server, there is a violation of the DRY principle. The example above is very simple, in more complex classes there will be even more duplication. To eliminate code duplication, you should use the Template Method pattern. We will move the common parts of the module into immutable methods, and transfer the functionality of transmitting encrypted data to specific platform classes:
class MyPhoneSuperDuperSecretMyPhoneAuthorizationStorage {
    fun loginAndPassword() : Pair {
        return Pair("admin", "qwerty65435")
    }
}

class ServerApiClient {
    fun authorize(authorizationData: AuthorizationData) : Unit {
        println(authorizationData.login)
        println(authorizationData.password)
        println("Authorized")
    }
}

class AuthorizationData {
    var login: String? = null
    var password: String? = null
}

interface AuthorizationModule {
    abstract fun fetchAuthorizationData() : AuthorizationData

    fun authorize(authorizationData: AuthorizationData) {
        ServerApiClient().authorize(authorizationData)
    }
}

class MyPhoneAuthorizationModule: AuthorizationModule {

    override fun fetchAuthorizationData() : AuthorizationData {
        val loginAndPassword = MyPhoneSuperDuperSecretMyPhoneAuthorizationStorage().loginAndPassword()
        val authorizationData = AuthorizationData()
        authorizationData.login = loginAndPassword.first
        authorizationData.password = loginAndPassword.second

        return authorizationData
    }

}

fun main() {
    val authorizationModule = MyPhoneAuthorizationModule()
    val authorizationData = authorizationModule.fetchAuthorizationData()
    authorizationModule.authorize(authorizationData)
}
The Bridge pattern is a structural design pattern. It allows you to abstract the implementation of class logic by moving the logic into a separate abstract class. Sounds simple, right?
Let’s say we are implementing a spam bot that should be able to send messages to different types of messengers. We implement it using a common protocol:
protocol User {
    let token: String
    let username: String
}

protocol Messenger {
    var authorize(login: String, password: String)
    var send(message: String, to user: User)
}

class iSeekUUser: User {
    let token: String
    let username: String
}

class iSeekU: Messenger {

    var authorizedUser: User?
    var requestSender: RequestSender?
    var requestFactory: RequestFactory?

    func authorize(login: String, password: String) {
        authorizedUser = requestSender?.perform(requestFactory.loginRequest(login: login, password: password))
    }

    func send(message: String, to user: User) {
        requestSender?.perform(requestFactory.messageRequest(message: message, to: user)
    }
}

class SpamBot {
    func start(usersList: [User]) {
        let iSeekUMessenger = iSeekU()
        iSeekUMessenger.authorize(login: "SpamBot", password: "SpamPassword")

        for user in usersList {
            iSeekUMessennger.send(message: "Hey checkout demensdeum blog! http://demensdeum.com", to: user)
        }
    }
}
Now let’s imagine a situation where a new, faster messaging protocol for the iSekU messenger is released. To add a new protocol, you will need to duplicate the iSekU bot implementation, changing only a small part of it. It is unclear why this should be done if only a small part of the class logic has changed. This approach violates the DRY principle; with further development of the product, the lack of flexibility will make itself known through errors and delays in the implementation of new features. Let’s move the protocol logic into an abstract class, thus implementing the Bridge pattern:
protocol User {
    let token: String
    let username: String
}

protocol Messenger {
    var authorize(login: String, password: String)
    var send(message: String, to user: User)
}

protocol MessagesSender {
    func send(message: String, to user: User)
}

class iSeekUUser: User {
    let token: String
    let username: String
}

class iSeekUFastMessengerSender: MessagesSender {
    func send(message: String, to user: User) {
        requestSender?.perform(requestFactory.messageRequest(message: message, to: user)
    }
}

class iSeekU: Messenger {

    var authorizedUser: User?
    var requestSender: RequestSender?
    var requestFactory: RequestFactory?
    var messagesSender: MessengerMessagesSender?

    func authorize(login: String, password: String) {
        authorizedUser = requestSender?.perform(requestFactory.loginRequest(login: login, password: password))
    }

    func send(message: String, to user: User) {
        messagesSender?.send(message: message, to: user)
    }
}

class SpamBot {

    var messagesSender: MessagesSender?

    func start(usersList: [User]) {
        let iSeekUMessenger = iSeekU()
        iSeekUMessenger.authorize(login: "SpamBot", password: "SpamPassword")

        for user in usersList {
            messagesSender.send(message: "Hey checkout demensdeum blog! http://demensdeum.com", to: user)
        }
    }
}
One of the advantages of this approach is undoubtedly the ability to expand the functionality of the application by writing plugins/libraries that implement abstracted logic without changing the code of the main application. What’s the difference with the Strategy pattern? Both patterns are very similar, but Strategy describes switching *algorithms*, while Bridge allows switching large parts of *any logic, no matter how complex*.
The film company Ja-pictures shot a documentary about communist Rastafarians from Liberia called “Red Dawn of Marley”. The film is very long (8 hours), interesting, but before sending it to distribution, it turned out that in some countries, frames and phrases from the film may be considered heresy and not give a distribution license. The producers of the film decide to cut out moments containing questionable phrases from the film, manually and automatically. Double checking is necessary so that the distributor’s representatives are not simply shot in some countries, in case of an error during manual viewing and editing. Countries are divided into four groups – countries without censorship, with moderate, medium and very strict censorship. A decision is made to use neural networks to classify the level of heresy in the review fragment of the film. Very expensive state-of-art neural networks trained for different levels of censorship are purchased for the project, the developer’s task is to break the film into fragments and pass them along a chain of neural networks, from free to strict, until one of them detects heresy, then the fragment is transferred for manual review for further editing. It is impossible to go through all the neural networks, since too much computing power is spent on their work (we still have to pay for electricity), it is enough to stop at the first one that worked. Naive pseudocode implementation:
import StateOfArtCensorshipHLNNClassifiers

protocol MovieCensorshipClassifier {
    func shouldBeCensored(movieChunk: MovieChunk) -> Bool
}

class CensorshipClassifier: MovieCensorshipClassifier {

    let hnnclassifier: StateOfArtCensorshipHLNNClassifier

    init(_ hnnclassifier: StateOfArtCensorshipHLNNClassifier) {
        self.hnnclassifier = hnnclassifier
    }

    func shouldBeCensored(_ movieChunk: MovieChunk) -> Bool {
        return hnnclassifier.shouldBeCensored(movieChunk)
    }
}

let lightCensorshipClassifier = CensorshipClassifier(StateOfArtCensorshipHLNNClassifier("light"))
let normalCensorshipClassifier = CensorshipClassifier(StateOfArtCensorshipHLNNClassifier("normal"))
let hardCensorshipClassifier = CensorshipClassifier(StateOfArtCensorshipHLNNClassifier("hard"))

let classifiers = [lightCensorshipClassifier, normalCensorshipClassifier, hardCensorshipClassifier]

let movie = Movie("Red Jah rising")
for chunk in movie.chunks {
    for classifier in classifiers {
        if classifier.shouldBeCensored(chunk) == true {
            print("Should censor movie chunk: \(chunk), reported by \(classifier)")
        }
   }
}
In general, the solution with an array of classifiers is not so bad, However! Let’s imagine that we cannot create an array, we have the ability to create only one classifier entity, which already determines the type of censorship for a fragment of the film. Such restrictions are possible when developing a library that extends the functionality of the application (plugin). Let’s use the decorator pattern – add a reference to the next classifier in the chain to the classifier class, and stop the verification process at the first successful classification. This way we implement the Chain of Responsibility pattern:
import StateOfArtCensorshipHLNNClassifiers

protocol MovieCensorshipClassifier {
    func shouldBeCensored(movieChunk: MovieChunk) -> Bool
}

class CensorshipClassifier: MovieCensorshipClassifier {

    let nextClassifier: CensorshipClassifier?
    let hnnclassifier: StateOfArtCensorshipHLNNClassifier

    init(_ hnnclassifier: StateOfArtCensorshipHLNNClassifier, nextClassifier: CensorshipClassifiers?) {
            self.nextClassifier = nextClassifier
            self.hnnclassifier = hnnclassifier
    }

    func shouldBeCensored(_ movieChunk: MovieChunk) -> Bool {
        let result = hnnclassifier.shouldBeCensored(movieChunk)

        print("Should censor movie chunk: \(movieChunk), reported by \(self)")

        if result == true {
                return true
        }
        else {
                return nextClassifier?.shouldBeCensored(movieChunk) ?? false
        }
    }
}

let censorshipClassifier = CensorshipClassifier(StateOfArtCensorshipHLNNClassifier("light"), nextClassifier: CensorshipClassifier(StateOfArtCensorshipHLNNClassifier("normal", nextClassifier: CensorshipClassifier(StateOfArtCensorshipHLNNClassifier("hard")))))

let movie = Movie("Red Jah rising")
for chunk in movie.chunks {
    censorshipClassifier.shouldBeCensored(chunk)
}
The Decorator pattern is a structural design pattern.
Decorator is used as an alternative to inheritance to extend the functionality of classes. There is a task to expand the functionality of the application depending on the type of product. The customer needs three types of product – Basic, Professional, Ultimate. Basic – counts the number of characters, Professional – Basic + capabilities prints text in capital letters, Ultimate – Basic + Professional + prints text with the inscription ULTIMATE. We implement it using inheritance:
protocol Feature {
	func textOperation(text: String)
}

class BasicVersionFeature: Feature {
	func textOperation(text: String) {
		print("\(text.count)")
	}
}

class ProfessionalVersionFeature: BasicVersionFeature {
	override func textOperation(text: String) {
		super.textOperation(text: text)
		print("\(text.uppercased())")
	}
}

class UltimateVersionFeature: ProfessionalVersionFeature {
	override func textOperation(text: String) {
		super.textOperation(text: text)
		print("ULTIMATE: \(text)")
	}
}

let textToFormat = "Hello Decorator"

let basicProduct = BasicVersionFeature()
basicProduct.textOperation(text: textToFormat)

let professionalProduct = ProfessionalVersionFeature()
professionalProduct.textOperation(text: textToFormat)

let ultimateProduct = UltimateVersionFeature()
ultimateProduct.textOperation(text: textToFormat)
Now there is a requirement to implement the product “Ultimate Light” – Basic + Ultimate but without the capabilities of the Professional version. The first OUCH! happens, because you will have to create a separate class for such a simple task, duplicate the code. Let’s continue the implementation using inheritance:
The example can be developed further for clarity, but even now the complexity of supporting a system based on inheritance is visible – it is cumbersome and lacks flexibility. A decorator is a set of protocols describing functionality, an abstract class containing a reference to a child concrete instance of the decorator class that extends the functionality. Let’s rewrite the example above using the pattern:
Now we can create variations of any type of product – it is enough to initialize the combined types at the stage of application launch, the example below is the creation of the Ultimate + Professional version:
The Mediator pattern is a behavioral design pattern.
One day you receive an order to develop a joke app – the user presses a button in the middle of the screen and a funny duck quacking sound is heard. After uploading to the app store, the app becomes a hit: everyone quacks through your app, Elon Musk quacks on his Instagram at the latest launch of a super-high-speed tunnel on Mars, Hillary Clinton quacks Donald Trump at the debates and wins the elections in Ukraine, success! A naive implementation of the application looks like this:
class DuckButton {
    func didPress() {
        print("quack!")
    }
}

let duckButton = DuckButton()
duckButton.didPress()
Next you decide to add the sound of a dog barking, for this you need to show two buttons for selecting the sound – with a duck and a dog. Create two button classes DuckButton and DogButton. Change the code:
class DuckButton {
    func didPress() {
        print("quack!")
    }
}

class DogButton {
    func didPress() {
        print("bark!")
    }
}

let duckButton = DuckButton()
duckButton.didPress()

let dogButton = DogButton()
dogButton.didPress()
After another success, we add the sound of a pig squeal, now three classes of buttons:
class DuckButton {
    func didPress() {
        print("quack!")
    }
}

class DogButton {
    func didPress() {
        print("bark!")
    }
}

class PigButton {
    func didPress() {
        print("oink!")
    }
}

let duckButton = DuckButton()
duckButton.didPress()

let dogButton = DogButton()
dogButton.didPress()

let pigButton = PigButton()
pigButton.didPress()
Users complain that sounds overlap each other. We add a check to prevent this from happening, and at the same time introduce the classes to each other:
class DuckButton {
    var isMakingSound = false
    var dogButton: DogButton?
    var pigButton: PigButton?
    func didPress() {
        guard dogButton?.isMakingSound ?? false == false &&
                pigButton?.isMakingSound ?? false == false else { return }
        isMakingSound = true
        print("quack!")
        isMakingSound = false
    }
}

class DogButton {
    var isMakingSound = false
    var duckButton: DuckButton?
    var pigButton: PigButton?
    func didPress() {
        guard duckButton?.isMakingSound ?? false == false &&
                pigButton?.isMakingSound ?? false == false else { return }
        isMakingSound = true
        print("bark!")
        isMakingSound = false
    }
}

class PigButton {
    var isMakingSound = false
    var duckButton: DuckButton?
    var dogButton: DogButton?
    func didPress() {
        guard duckButton?.isMakingSound ?? false == false &&
                dogButton?.isMakingSound ?? false == false else { return }
        isMakingSound = true
        print("oink!")
        isMakingSound = false
    }
}

let duckButton = DuckButton()
duckButton.didPress()

let dogButton = DogButton()
dogButton.didPress()

let pigButton = PigButton()
pigButton.didPress()
Based on the success of your app, the government decides to make a law that allows quack, bark and grunt on mobile devices only from 9:00 am to 3:00 pm on weekdays; at other times, the user of your app risks going to prison for 5 years for indecent sound production using personal electronic devices. Change the code:
import Foundation

extension Date {
    func mobileDeviceAllowedSoundTime() -> Bool {
        let hour = Calendar.current.component(.hour, from: self)
        let weekend = Calendar.current.isDateInWeekend(self)

        let result = hour >= 9 && hour <= 14 && weekend == false

        return result
    }
}

class DuckButton {
    var isMakingSound = false
    var dogButton: DogButton?
    var pigButton: PigButton?
    func didPress() {
        guard dogButton?.isMakingSound ?? false == false &&
                pigButton?.isMakingSound ?? false == false &&
                 Date().mobileDeviceAllowedSoundTime() == true else { return }
        isMakingSound = true
        print("quack!")
        isMakingSound = false
    }
}

class DogButton {
    var isMakingSound = false
    var duckButton: DuckButton?
    var pigButton: PigButton?
    func didPress() {
        guard duckButton?.isMakingSound ?? false == false &&
                pigButton?.isMakingSound ?? false == false &&
                 Date().mobileDeviceAllowedSoundTime() == true else { return }
        isMakingSound = true
        print("bark!")
        isMakingSound = false
    }
}

class PigButton {
    var isMakingSound = false
    var duckButton: DuckButton?
    var dogButton: DogButton?
    func didPress() {
        guard duckButton?.isMakingSound ?? false == false &&
                dogButton?.isMakingSound ?? false == false &&
                 Date().mobileDeviceAllowedSoundTime() == true else { return }
        isMakingSound = true
        print("oink!")
        isMakingSound = false
    }
}

let duckButton = DuckButton()
let dogButton = DogButton()
let pigButton = PigButton()

duckButton.dogButton = dogButton
duckButton.pigButton = pigButton

dogButton.duckButton = duckButton
dogButton.pigButton = pigButton

pigButton.duckButton = duckButton
pigButton.dogButton = dogButton

duckButton.didPress()
dogButton.didPress()
pigButton.didPress()
Suddenly a flashlight app starts to push ours out of the market, let's not let it defeat us and add a flashlight by pressing the "oink-oink" button, and so-no to the other buttons:
import Foundation

extension Date {
    func mobileDeviceAllowedSoundTime() -> Bool {
        let hour = Calendar.current.component(.hour, from: self)
        let weekend = Calendar.current.isDateInWeekend(self)

        let result = hour >= 9 && hour <= 14 && weekend == false

        return result
    }
}

class Flashlight {

    var isOn = false

    func turn(on: Bool) {
        isOn = on
    }
}

class DuckButton {
    var isMakingSound = false
    var dogButton: DogButton?
    var pigButton: PigButton?
    var flashlight: Flashlight?
    func didPress() {
        flashlight?.turn(on: true)
        guard dogButton?.isMakingSound ?? false == false &&
                pigButton?.isMakingSound ?? false == false &&
                 Date().mobileDeviceAllowedSoundTime() == true else { return }
        isMakingSound = true
        print("quack!")
        isMakingSound = false
    }
}

class DogButton {
    var isMakingSound = false
    var duckButton: DuckButton?
    var pigButton: PigButton?
    var flashlight: Flashlight?
    func didPress() {
        flashlight?.turn(on: true)
        guard duckButton?.isMakingSound ?? false == false &&
                pigButton?.isMakingSound ?? false == false &&
                 Date().mobileDeviceAllowedSoundTime() == true else { return }
        isMakingSound = true
        print("bark!")
        isMakingSound = false
    }
}

class PigButton {
    var isMakingSound = false
    var duckButton: DuckButton?
    var dogButton: DogButton?
    var flashlight: Flashlight?
    func didPress() {
        flashlight?.turn(on: true)
        guard duckButton?.isMakingSound ?? false == false &&
                dogButton?.isMakingSound ?? false == false &&
                 Date().mobileDeviceAllowedSoundTime() == true else { return }
        isMakingSound = true
        print("oink!")
        isMakingSound = false
    }
}

let flashlight = Flashlight()
let duckButton = DuckButton()
let dogButton = DogButton()
let pigButton = PigButton()

duckButton.dogButton = dogButton
duckButton.pigButton = pigButton
duckButton.flashlight = flashlight

dogButton.duckButton = duckButton
dogButton.pigButton = pigButton
dogButton.flashlight = flashlight

pigButton.duckButton = duckButton
pigButton.dogButton = dogButton
pigButton.flashlight = flashlight

duckButton.didPress()
dogButton.didPress()
pigButton.didPress()
As a result, we have a huge application that contains a lot of copy-paste code, the classes inside are connected to each other by a dead link - there is no weak coupling, such a miracle is very difficult to maintain and change in the future due to the high chances of making a mistake.
Using Mediator
Let's add an intermediate class mediator - ApplicationController. This class will provide weak coupling of objects, ensure separation of class responsibilities, and eliminate duplicate code. Let's rewrite:
import Foundation

class ApplicationController {

    private var isMakingSound = false
    private let flashlight = Flashlight()
    private var soundButtons: [SoundButton] = []

    func add(soundButton: SoundButton) {
        soundButtons.append(soundButton)
    }

    func didPress(soundButton: SoundButton) {
        flashlight.turn(on: true)
        guard Date().mobileDeviceAllowedSoundTime() &&
                isMakingSound == false else { return }
        isMakingSound = true
        soundButton.didPress()
        isMakingSound = false
    }
}

class SoundButton {
    let soundText: String

    init(soundText: String) {
        self.soundText = soundText
    }

    func didPress() {
        print(soundText)
    }
}

class Flashlight {
    var isOn = false

    func turn(on: Bool) {
        isOn = on
    }
}

extension Date {
    func mobileDeviceAllowedSoundTime() -> Bool {
        let hour = Calendar.current.component(.hour, from: self)
        let weekend = Calendar.current.isDateInWeekend(self)

        let result = hour >= 9 && hour <= 14 && weekend == false

        return result
    }
}

let applicationController = ApplicationController()
let pigButton = SoundButton(soundText: "oink!")
let dogButton = SoundButton(soundText: "bark!")
let duckButton = SoundButton(soundText: "quack!")

applicationController.add(soundButton: pigButton)
applicationController.add(soundButton: dogButton)
applicationController.add(soundButton: duckButton)

pigButton.didPress()
dogButton.didPress()
duckButton.didPress()
Many articles devoted to the architecture of applications with a user interface describe the MVC pattern and its derivatives. The model is used to work with business logic data, the view or presentation shows information to the user in the interface/provides interaction with the user, the controller is a mediator providing interaction between system components.
The Strategy pattern allows you to select the type of algorithm that implements a common interface, right while the application is running. This pattern refers to the behavioral design patterns.
Suppose we are developing a music player with embedded codecs. The built-in codecs imply reading music formats without using external sources of the operating system (codecs), the player should be able to read tracks of different formats and play them. VLC player has such capabilities, it supports various types of video and audio formats, it runs on popular and not very operating systems.
Imagine what a naive player implementation looks like:
var player: MusicPlayer?
func play(filePath: String) {
let extension = filePath.pathExtension
if extension == "mp3" {
playMp3(filePath)
}
elseif extension == "ogg" {
playOgg(filePath)
}
}
func playMp3(_ filePath: String) {
player = MpegPlayer()
player?.playMp3(filePath)
}
func playOgg(_ filePath: String) {
player = VorbisPlayer()
player?.playMusic(filePath)
}
Next, we add several formats, which leads to the need to write additional methods.Plus, the player must support plug-in libraries, with new audio formats that will appear later.There is a need to switch the music playback algorithm, the Strategy pattern is used to solve this problem.
Let’s create a common protocol MusicPlayerCodecAlgorithm, write the implementation of the protocol in two classes MpegMusicPlayerCodecAlgorithm and VorbisMusicPlayerCodecAlgorithm, to play mp3 and ogg files with-but.Create a class MusicPlayer, which will contain a reference for the algorithm that needs to be switched, then by the file extension we implement codec type switching:
The above example also shows the simplest example of a factory (switching the codec type from the file extension) It is important to note that the Strategy strategy does not create objects, it only describes how to create a common interface for switching the family of algorithms.
In this article I will describe the Iterator pattern.
This pattern refers to the behavioral design patterns.
Print it
Suppose we need to print a list of tracks from the album “Procrastinate them all” of the group “Procrastinallica”.
The naive implementation (Swift) looks like this:
for i=0; i < tracks.count; i++ {
    print(tracks[i].title)
}
Suddenly during compilation, it is detected that the class of the tracks object does not give the number of tracks in the count call, and moreover, its elements cannot be accessed by index. Oh…
Filter it
Suppose we are writing an article for the magazine “Wacky Hammer”, we need a list of tracks of the group “Djentuggah” in which bpm exceeds 140 beats per minute. An interesting feature of this group is that its records are stored in a huge collection of underground groups, not sorted by albums, or for any other grounds. Let’s imagine that we work with a language without functionality:
var djentuggahFastTracks = [Track]()

for track in undergroundCollectionTracks {
    if track.band.title == "Djentuggah" && track.info.bpm == 140 {
        djentuggahFastTracks.append(track)
    }
}
Suddenly, a couple of tracks of the group are found in the collection of digitized tapes, and the editor of the magazine suggests finding tracks in this collection and writing about them. A Data Scientist friend suggests to use the Djentuggah track classification algorithm, so you don’t need to listen to a collection of 200 thousand tapes manually. Try:
var djentuggahFastTracks = [Track]()

for track in undergroundCollectionTracks {
    if track.band.title == "Djentuggah" && track.info.bpm == 140 {
        djentuggahFastTracks.append(track)
    }
}

let tracksClassifier = TracksClassifier()
let bpmClassifier = BPMClassifier()

for track in cassetsTracks {
    if tracksClassifier.classify(track).band.title == "Djentuggah" && bpmClassifier.classify(track).bpm == 140 {
        djentuggahFastTracks.append(track)
    }
}
Mistakes
Now, just before sending to print, the editor reports that 140 beats per minute are out of fashion, people are more interested in 160, so the article should be rewritten by adding the necessary tracks.
Apply changes:
var djentuggahFastTracks = [Track]()

for track in undergroundCollectionTracks {
    if track.band.title == "Djentuggah" && track.info.bpm == 160 {
        djentuggahFastTracks.append(track)
    }
}

let tracksClassifier = TracksClassifier()
let bpmClassifier = BPMClassifier()

for track in cassetsTracks {
    if tracksClassifier.classify(track).band.title == "Djentuggah" && bpmClassifier.classify(track).bpm == 140 {
        djentuggahFastTracks.append(track)
    }
}
The most attentive ones noticed an error; the bpm parameter was changed only for the first pass through the list. If there were more passes through the collections, then the chance of a mistake would be higher, that is why the DRY principle should be used. The above example can be developed further, for example, by adding the condition that you need to find several groups with different bpm, by the names of vocalists, guitarists, this will increase the chance of error due to duplication of code.
Behold the Iterator!
In the literature, an iterator is described as a combination of two protocols / interfaces, the first is an iterator interface consisting of two methods – next(), hasNext(), next() returns an object from the collection, and hasNext() reports that there is an object and the list is not over. However in practice, I observed iterators with one method – next(), when the list ended, null was returned from this object. The second is a collection that should have an interface that provides an iterator – the iterator() method, there are variations with the collection interface that returns an iterator in the initial position and in end – the begin() and end() methods are used in C ++ std.
Using the iterator in the example above will remove duplicate code, eliminate the chance of mistake due to duplicate filtering conditions. It will also be easier to work with the collection of tracks on a single interface – if you change the internal structure of the collection, the interface will remain old and the external code will not be affected.
Wow!
let bandFilter = Filter(key: "band", value: "Djentuggah")
let bpmFilter = Filter(key: "bpm", value: 140)
let iterator = tracksCollection.filterableIterator(filters: [bandFilter, bpmFilter])

while let track = iterator.next() {
    print("\(track.band) - \(track.title)")
}
Changes
While the iterator is running, the collection may change, thus causing the iterator’s internal counter to be invalid, and generally breaking such a thing as “next object”. Many frameworks contain a check for changing the state of the collection, and in case of changes they return an error / exception. Some implementations allow you to remove objects from the collection while the iterator is running, by providing the remove() method in the iterator.
In this note I will describe the pattern “Snapshot” or “Memento”
This pattern refers to “Behavioural” design patterns.
Let’s say we are developing a graphical editor, and we need to add the ability to roll back actions on user command. It is also very important that the system components do not have access to the internal state of the rolled back “actions”, when implementing this pattern, other system components have access only to the snapshot object without the ability to change its internal state, with the provision of a clear, simple external interface. To solve this problem, the “Snapshot” or “Keeper” pattern is used.
An example of the operation of the “Snapshot” is presented below:
When clicked, the sprite appears, when clicked on the twisted arrow, the action is canceled – the sprite disappears. The example consists of three classes:
Canvas on which sprites and graphical interface are displayed.
Screen controller, it handles clicks and manages the logic of the screen.
Canvas states that are saved on every change are rolled back when needed by the screen controller.
In the context of the pattern “Snapshot”, the classes are:
Canvas is the source, the states of this class are saved as snapshots, for subsequent rollback on request. Also, the source must be able to restore the state when a snapshot is passed to it.
Controller – the keeper, this class knows how and when to save/roll back states.
State is a snapshot, a class that stores the state of the source, plus date information or an index that can be used to accurately determine the order of rollback.
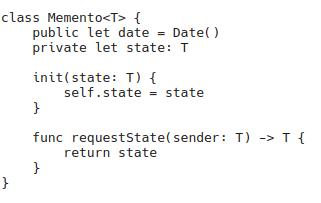
An important feature of the pattern is that only the source should have access to the internal fields of the saved state in the snapshot, this is necessary to protect snapshots from changes from the outside (from handy developers who want to change something bypassing encapsulation, breaking the logic of the system). To implement encapsulation, embedded classes are used, and in C++, the ability to specify friend classes is used. Personally, I implemented a simple version without encapsulation for Rise, and using Generic when implementing for Swift. In my version, – Memento gives its internal state only to entities of the same class as the state:
In this note I will describe a design pattern called “Visitor” or “Visitor” This pattern belongs to the group of Behavioral patterns.
Let’s think of a problem
This pattern is mainly used to work around the single dispatch limitation in early-binding languages.
Alice X by NFGPhoto (CC-2.0) Let’s create an abstract class/protocol Band, make a subclass MurpleDeep, create a class Visitor with two methods – one for outputting to the console any descendant of Band, the second for outputting any MurpleDeep, the main thing is that the names (signatures) of the methods are the same, and the arguments differ only in the class. Through the intermediate method printout with the argument Band, create an instance of Visitor and call the visit method for MurpleDeep. Next is the code in Kotlin:
The output will be “This is Band class“
How is that possible?!
Why this happens is described in clever words in many articles, including in Russian, but I suggest you imagine how the compiler sees the code, perhaps everything will become clear right away:
Solving the problem
There are many solutions to this problem, below we will consider a solution using the Visitor pattern. In the abstract class/protocol we add the accept method with the Visitor argument, inside the method we call visitor.visit(this), after that we add an override/implementation of the accept method to the MurpleDeep class, decisively and calmly violating DRY, we write visitor.visit(this) again. Final code:
We use cookies on our website. By clicking “Accept”, you consent to the use of ALL the cookies. Мы используем куки на сайте. Нажимая "ПРИНЯТЬ" вы соглашаетесь с этим.
This website uses cookies to improve your experience while you navigate through the website. Out of these, the cookies that are categorized as necessary are stored on your browser as they are essential for the working of basic functionalities of the website. We also use third-party cookies that help us analyze and understand how you use this website. These cookies will be stored in your browser only with your consent. You also have the option to opt-out of these cookies. But opting out of some of these cookies may affect your browsing experience.
Necessary cookies are absolutely essential for the website to function properly. This category only includes cookies that ensures basic functionalities and security features of the website. These cookies do not store any personal information.
Any cookies that may not be particularly necessary for the website to function and is used specifically to collect user personal data via analytics, ads, other embedded contents are termed as non-necessary cookies. It is mandatory to procure user consent prior to running these cookies on your website.