С++ Application Plugins

In this post I will describe an example of adding functionality to a C ++ application using plugins. The practical part of the implementation for Linux is described; the theory can be found at the links at the end of the article.

Composition over inheritance!

To begin with, we will write a plugin – a function that we will call:

#include "iostream"

using namespace std;

extern "C" void extensionEntryPoint() {
	cout << "Extension entry point called" << endl;
};

Next, we will build the plugin as a dynamic library “extension.so”, which we will connect in the future:
clang++ -shared -fPIC extension.cpp -o extension.so

Next we write the main application that will load the file “extension.so”, look for a pointer to the function “extensionEntryPoint” there, and call it, typing errors if necessary:

#include "iostream"
#include "dlfcn.h"

using namespace std;

typedef void (*VoidFunctionPointer)();	

int main (int argc, char *argv[]) {

	cout << "C++ Plugins Example" << endl;

	auto extensionHandle = dlopen("./extension.so", RTLD_LAZY);
	if (!extensionHandle) {
		string errorString = dlerror();
		throw runtime_error(errorString);
	}

	auto functionPointer = VoidFunctionPointer();
	functionPointer = (VoidFunctionPointer) dlsym(extensionHandle, "extensionEntryPoint");
	auto dlsymError = dlerror();
 	if (dlsymError) {
		string errorString = dlerror();
		throw runtime_error(errorString);
 	}

	functionPointer();

	exit(0);
} 

The dlopen function returns a handler for working with a dynamic library; dlsym function returns a pointer to the required function by string; dlerror contains a pointer to the string with the error text, if any.

Next, build the main application, copy the file of the dynamic library in the folder with it and run. The output should be the “Extension entry point called”

Difficult moments include the lack of a single standard for working with dynamic libraries, because of this there is a need to export the function to a relatively global scope with extern C; the difference in working with different operating systems associated with this subtlety of work; the lack of a C ++ interface to implement OOP approach to working with dynamic libraries, however, there are open-source wrappers, for example m-renaud/libdlibxx

Example Source Code

https://gitlab.com/demensdeum/cpppluginsexample

Documents

http://man7.org/linux/man-pages/man3/dlopen.3.htm
https://gist.github.com/tailriver/30bf0c943325330b7b6a
https://stackoverflow.com/questions/840501/how-do-function-pointers-in-c-work

Float like Michelle

[Feel the power of Artificial Intelligence]
In this article, I will tell you how to predict the future.

In statistics, there is a class of problems – time series analysis. Given a date and a value of a variable, you can predict the value of this variable in the future.
At first, I wanted to implement a solution to this problem on TensorFlow, but I found the library Prophet from Facebook.
Prophet allows you to make a forecast based on data (csv) containing date (ds) and variable (y) columns. You can find out how to work with it in the documentation on the official website in the section Quick Start
As a dataset, I used the csv download from the site https://www.investing.com, during the implementation I used R language and Prophet API for it. I really liked R, because its syntax simplifies working with large arrays of data, allows you to write simpler, make fewer mistakes than when working with regular languages ​​(Python), since you would have to work with lambda expressions, and in R everything is lambda expressions.
In order not to prepare the data for processing, I used the anytime package, which can convert strings to dates, without preliminary processing. Converting currency strings to numbers is done using the readr package.

As a result, I received a forecast that Bitcoin will cost $8,400 by the end of 2019, and the dollar exchange rate will be 61 rubles. Should I believe these forecasts? Personally, I think that I shouldn’t, because you can’t use mathematical methods without understanding their essence.

Sources

https:// facebook.github.io/prophet
https://habr.com/company/ods/blog/323730/
https://www.r-project.org/

Source code

https://gitlab.com/demensdeum/MachineLearning/tree/master/4prophet

Tesla speaking

In this post I will describe the process of creating a quote generator.

TL;DR

For training and text generation – use the library textgenrnn, to filter phrases you need to use spell checking with the utility hunspell and its C/python library. After training in Colaboratory, you can start generating text. About 90% of the text will be completely unreadable, but the remaining 10% will contain a bit of meaning, and with manual refinement, the phrases will look quite good.
The easiest way to run a ready-made neural network is in Colaboratory:
https://colab.research.google.com/drive/1-wbZMmxvsm3SoclJv11villo9VbUesbc(opens in a new tab)”>https://colab.research.google.com/drive/1-wbZMmxvsm3SoclJv11villo9VbUesbc

Source code

https://gitlab.com/demensdeum/MachineLearning/tree/master/3quotesGenerator

Sources

https://karpathy.github.io/2015/05/21/rnn-effectiveness/https://medium.com/deep-learning-turkey/google-colab-free-gpu-tutorial-e113627b9f5dhttps://minimaxir.com/2018/05/text-neural-networks/
https://github.com/wooorm/dictionaries (opens in a new tab)” href=”https://minimaxir.com/2018/05/text-neural-networks/” target=”_blank”>https://minimaxir.com/2018/05/text-neural-networks/
https://karpathy.github.io/2015/05/21/rnn-effectiveness/
https://medium.com/deep-learning-turkey/google-colab-free-gpu-tutorial-e113627b9f5d
https://karpathy.github.io/2015/05/21/rnn-effectiveness/ (opens in a new tab)” href=”https://karpathy.github.io/2015/05/21/rnn-effectiveness/” target=”_blank”>https://karpathy.github.io/2015/05/21/rnn-effectiveness/
https://medium.com/deep-learning-turkey/google-colab-free-gpu-tutorial-e113627b9f5d
https://karpathy.github.io/2015/05/21/rnn-effectiveness/https://medium.com/deep-learning-turkey/google-colab-free-gpu-tutorial-e113627b9f5dhttps://github.com/wooorm/dictionaries

” rel=”noopener” target=”_blank”>https://github.com/wooorm/dictionaries (opens in a new tab)”>https://github.com/wooorm/dictionaries

How many mistakes do you have there?

On Hacker News I found a very interesting article in which the author suggests using the Petersen-Lincoln method, which is used by biologists to count the population of birds, monkeys and other animals, to *drumroll* count bugs in an application.

A Bug in the Wild – Bigfoot Sighting by Derek Hatfield

The method is very simple, we take two ornithologists, they find birds of a certain species, their task is to determine the population size of these birds. The found birds are marked by both ornithologists, then the number of common ones is calculated, substituted into the Lincoln index formula and we get the approximate population size.
Now for applications – the method is also very simple, we take two QA and they find bugs in the application. Let’s say one tester found 10 bugs (E1), and the second 20 bugs (E2), now we take the number of common bugs – 3 (S), then according to the formula we get the Lincoln index:

This is the forecast for the number of bugs in the entire application, in the given example ~66 bugs.

Swift Example

I have implemented a test stand to check the method, you can see it here:
https://paiza.io/projects/AY_9T3oaN9a-xICAx_H4qw?language=swift

Parameters that can be changed:

let aliceErrorFindProbability = 20 – percentage of bugs found by QA Alice (20%)
let bobErrorFindProbability = 60 – percentage of bugs found by QA Bob (60%)
let actualBugsCount = 200 – how many bugs the app actually has

In the last run I got the following data:
Estimation bugs count: 213
Actual bugs count: 200

That is, there are 200 bugs in the application, the Lincoln index gives a forecast of -213:
“Alice found 36 bugs”
“Bob found 89 bugs”
“Common bugs count: 15”

Estimation bugs count: 213
Actual bugs count: 200

Weaknesses

This method can be used to estimate the number of errors in an application, at all stages of development, ideally, the number of bugs should decrease. I can attribute the human factor to the weak points of the method, since the number of bugs found by two testers should be different and different bugs should be found, however common should also be found, otherwise the method will not work (zero common bugs – division by zero)
Also, such a concept as common bugs requires the presence of an expert to understand their commonality.

Sources

How many errors are left to find? – John D. Cook, PhD, President
The thrill of the chase – Brian Hayes

Source code

https://paiza.io/projects/AY_9T3oaN9a-xICAx_H4qw ?language=swift
https://gitlab.com/demensdeum/statistics/tree/master/1_BugsCountEstimation/src

Grinding gears

Oh muse, how difficult it is to catch you sometimes.
The development of Death-Mask and related frameworks (Flame Steel Core, Game Toolkit, etc.) is suspended for several months in order to decide on the artistic part of the game, the musical and sound accompaniment, and to think through the gameplay.
The plans include creating an editor for the Flame Steel Game Toolkit, writing an interpreter for game scripts (based on the Rise syntax), and implementing the Death-Mask game for as many platforms as possible.
The most difficult stage has been passed – the possibility of writing your own cross-platform game engine, your own IDE, and a set of libraries has been proven in practice.
I’m moving on to the stage of creating a truly thoughtful, interesting project, stay tuned.

Death-Mask is open source

From today the game Death-Mask goes into open access – you can follow the progress of the game implementation at the link: (Wow!)
[Death-Mask Wild]

Currently version – 0.1 contains basic arrow controls, wsad, map generation, items (including death mask!), rendering.
There’s still a lot of work to do, and I’m really interested in your feedback – so feel free to leave comments on the wild version page.
In the final version, the game ends after the player finds the item – the Death-Mask
Enjoy the test 🙂

Авторы ресурсов

Hangar18 source code indexing utility

Hangar18 is a C++ source code indexing utility written in Rust. This utility will implement the “go to definition” functionality in the Saber-Plus IDE.
The utility receives the absolute path to the source code directory and the declaration line that needs to be found as input. The output is grep-like output.

Source code:
https://gitlab.com/demensdeum/hangar18

Taytay monitoring the status of Git repositories

I present to your attention Taytay – a utility for monitoring the status of git repositories for the Swift language. At the moment, Swift can be installed on all mainstream desktop operating systems. For Ubuntu, I recommend using Swiftenv. Taytay is tied to the git-cola utility, but you can edit the source code and replace it with any other program.

Source code:
https://gitlab.com/demensdeum/taytay

We beat Malevich, black squares Opengl

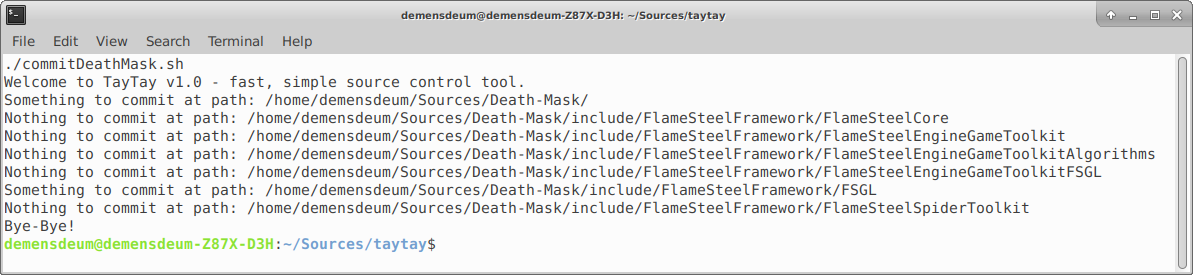
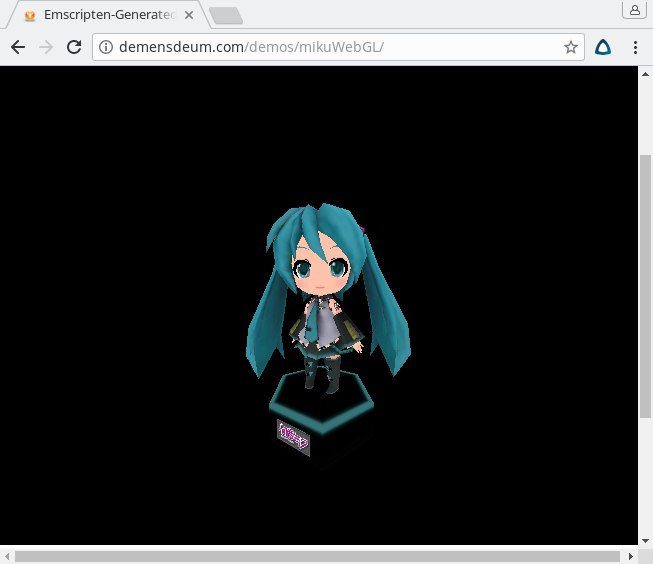
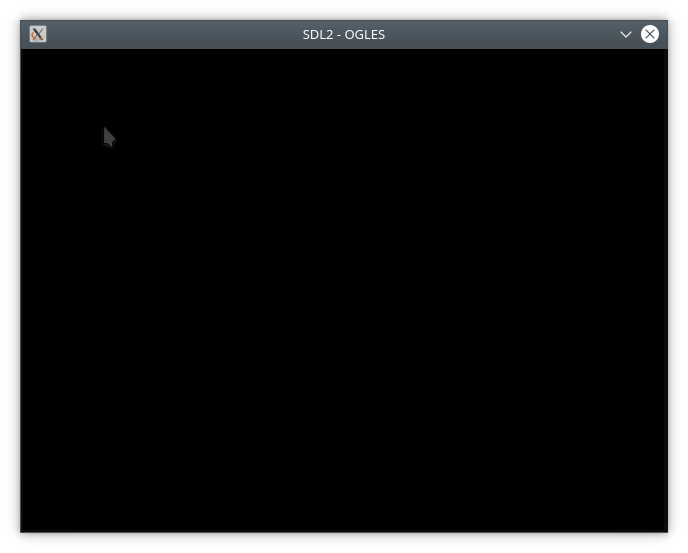
Malevich periodically comes to any developer on OpenGL. This happens unexpectedly and boldly, you just start the project and see a black square instead of a wonderful render:

Today I will describe for what reason I was visited by a black square, the problems found because of which Opengl does not draw anything on the screen, and sometimes even makes the window transparent.

Use tools

For debugging Opengl, two tools helped me: renderdoc and and apitrace . Renderdoc – tool for debugging the OpenGL rendering process, you can view everything – Vertexes, shaders, textures, debt messages from the driver. Apitrace – A tool for tracing challenges of a graphic API, makes a dump calls and shows arguments. There is also a great opportunity to compare two dumps via WDIFF (or without, but not so convenient)

Check with whom you work

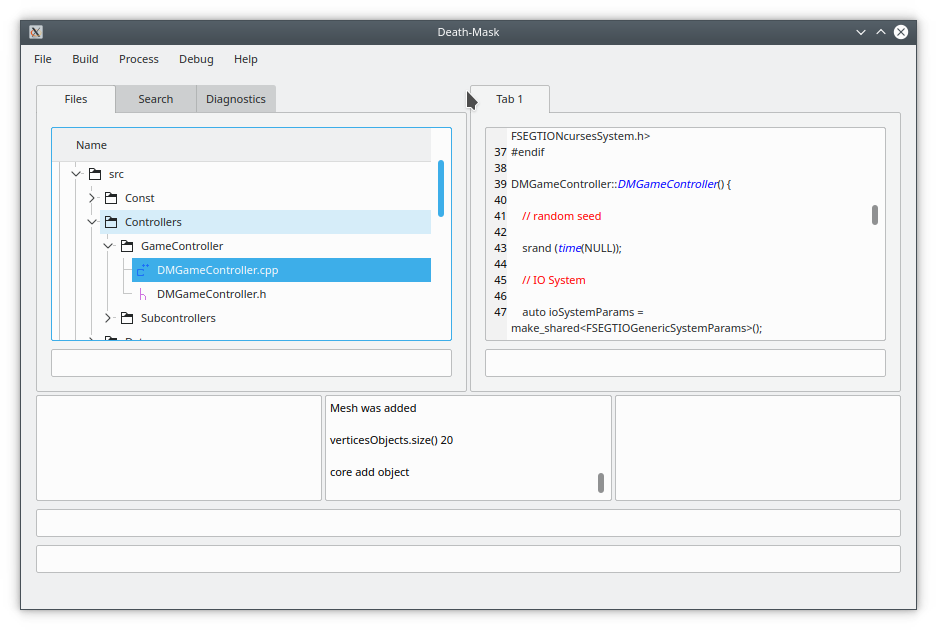
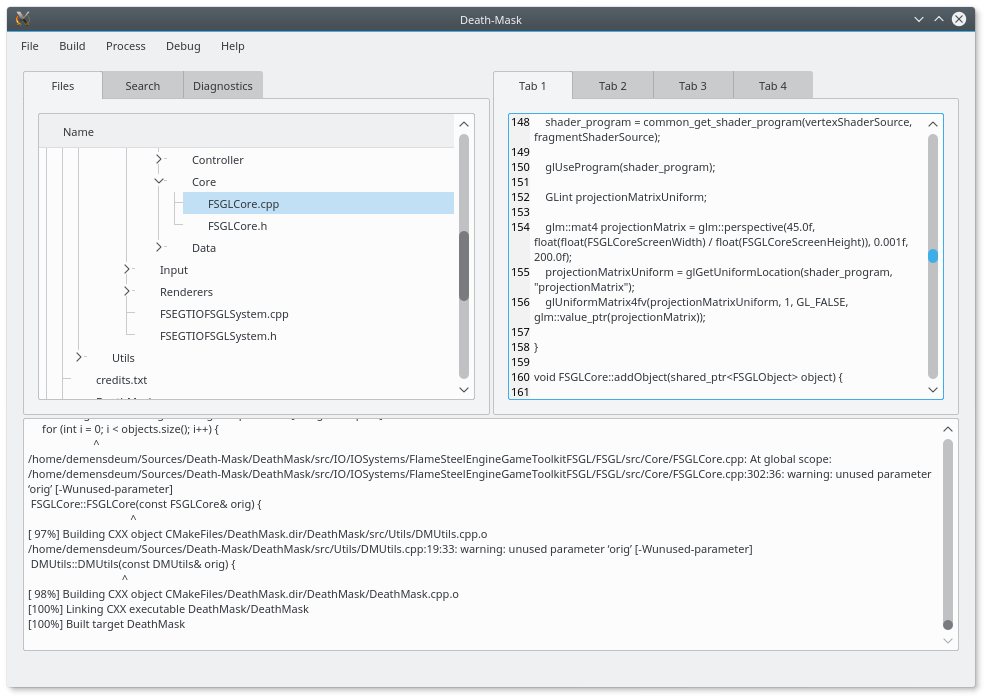
I have an operating system Ubuntu 16.10 with old dependencies SDL2, GLM, Assimp, Glew. In the latest version of Ubuntu 18.04, I get the assembly of the game Death-Mask which does not show anything on the screen (only a black square). When using Chroot and assembly at 16.10 I I get a working assembly of the game with graphics .

It seems something broke in Ubuntu 18.04

LDD showed the linkka to identical libraries SDL2, GL. Driving a non -working build in Renderdoc, I saw garbage at the entrance to the vertex shader, but I needed a more solid confirmation. In order to understand the difference between the binarics, I drove them both through apitrace . Comparison of dumps showed me that the assembly on a fresh Ubunta breaks the program of the prospects in OpenGL, actually sending garbage there:

Matrices gather in the GLM library. After copying GLM from 16.04 – I got the working build of the game again. The problem was the difference in the initialization of a single matrix in GLM 9.9.0, it is necessary to clearly indicate the MAT4 (1.0F) argument in it in the constructor. Having changed the initialization and by writing off the author of the library, I began to do tests for fsgl . In the process of writing which I found flaws in FSGL, I will describe them further.

Determine who is in life

For the correct work with OpenGL, you need to voluntarily forcibly request the context of a certain version. So it looks for SDL2 (you need to put the version strictly before initializing the context):


 sdl_gl_seettrtribute (sdl_gl_context_major_version,  3 );
SDL_GL_SETTRIBUTE (SDL_GL_CONTEXT_MINOR_VERSION, 2 );
SDL_GL_SETTRIBUTE (SDL_GL_CONTEXT_PROFILE_MASK, SDL_GL_CONTEXT_PROFILE_CORE);

For example, Renderdoc does not work with contexts below 3.2. I would like to note that after switching the context there is a high probability of seeing the same black screen . Why?

Because the context of Opengl 3.2 must require the presence of VAO buffer , without which 99% of graphic drivers do not work. Add it easy:


 Glgenvertexarrays ( 1 ,  &  vao);
GLBINDVERTEXARAY (VAO);

Do not sleep, freeze

I also met an interesting problem on Kubuntu, instead of a black square I was displayed transparent, and sometimes everything was rendered correctly. I found the solution to this problem at Stack Overflow:
https://stackoverflow.com/questions/38411515/sdl2-opengl-window-appears-semi-transparent-sometimes

The FSGL test render code was also present Sleep (2S) ; So on the Xubuntu and Ubuntu I received the correct render and sent the application to sleep, but on Kubuntu I received a transparent screen in 80% of the launch of Dolphin and 30% of launches and terminal. To solve this problem, I added rendering in each frame, after a SDlevent survey, as recommended in the documentation.

Test code:
https://gitlab.com/demensdeum/FSGLtests/blob/master/renderModelTest/

Talk to the driver

Opengl supports the communication channel between the application and the driver, to activate it, you need to turn on the flags Gl_debug_outPut, GL_DEBUG_OUTPUT_SYNCHRONUS, affix the warning GLDEBUGMESSAGECONTROL and tie the calback through GLDEBUGMESSAGECALLBACK .

An example of initialization can be taken here:
https://github.com/rock-core/gui-vizkit3d/blob/master/src/EnableGLDebugOperation.cpp

Don’t be afraid, look how it grows

In this note, I will tell you about my misadventures with smart pointers shared_ptr. After implementing the generation of the next level in my game Death-Mask, I noticed a memory leak. Each new level gave an increase of + 1 megabyte to the consumed RAM. Obviously some objects remained in memory and did not release it. To correct this fact, it was necessary to implement the correct implementation of resources when overloading the level, which apparently was not done. Since I used smart pointers, there were several options for solving this problem, the first was to manually review the code (long and boring), the second involved investigating the capabilities of the lldb debugger, the source code of libstdc++ for the possibility of automatically tracking changes to the counter.

On the Internet, all the advice boiled down to manually reviewing the code, fixing it, and beating yourself with whips after finding the problematic line of code. It was also suggested to implement your own system for working with memory, as all large projects developed since the 90s and 00s have done, before smart pointers came to the C++11 standard. I attempted to use breakpoints on the constructor of a copy of all shared_ptr, but after several days nothing useful came of it. There was an idea to add logging to the libstdc++ library, but the labor costs (o)turned out to be monstrous.


Cowboy Bebop (1998)

The solution came to me suddenly in the form of tracking changes to the private variable shared_ptr – use_count. This can be done using watchpoints built into lldb. After creating a shared_ptr via make_shared, changes to the counter in lldb can be tracked using the line:

watch set var camera._M_refcount._M_pi->_M_use_count

Where “camera” is a shared_ptr object whose counter state needs to be tracked. Of course, the insides of shared_ptr will differ depending on the version of libstdc++, but the general principle is clear. After setting the watchpoint, we launch applications and read the stack trace of each counter change, then we look through the code (sic!), find the problem and fix it. In my case, objects were not released from cache tables and game logic tables. I hope this method will help you deal with leaks when working with shared_ptr, and love this memory management tool even more. Happy debugging.

Games Vision #3

The third issue of the non-permanent column about games Games Vision.

Observer (PC and consoles, Bloober Team) – cyberpunk horror from the valiant Poles. A short and very atmospheric horror starring Rutger Hauer. As a cyberpunk fan, I liked absolutely everything about the game. Not very difficult puzzles, charming glitches of the main character, gameplay with calm moments mixed with action, the ability to literally dig into the memories of the dead, a plot in the style of Ghost in the Shell + many references to Sci-Fi pop culture. Of the minuses – too much glitches, sometimes it seems that because of their abundance it is impossible to play, also some players were annoyed by specific horror elements, frightening so much that they could not continue playing.
Rating: 8/10

Paradigm (Windows/OS X, Jacob Janerka) – a quest that manages to parody and laugh at everything at once. It makes fun of the USSR, America, the quest genre, glam rock, old consoles, people, monuments, IT specialists, cones, computers, women, children, parents, artists, love, scientists, the gaming industry, the players themselves – in general, you can’t list everything. An absolutely unpredictable plot, absurd atmosphere and art, not particularly difficult puzzles. The game has rare bugs and crashes, some moments and jokes are slightly predictable and not original.
Rating: 9/10

Late Shift (PC and consoles, CtrlMovie Ltd) – interactive movie. I really regret that a basically good idea received such a bad implementation. Everything is bad – the plot, the lack of star actors, the acting, constant freezes in the PC version, almost zero variability (illusory). It is completely incomprehensible how it was possible to release a game with so many problems in the 2010s, because in fact it is an ordinary video player, the whole game could have been posted on the Internet, for example, on YouTube, but instead they used Unity and managed to break even such a powerful game engine. The official forum on Steam is dedicated to fixes, hotfixes, workarounds, etc. There is a technical disaster, no user support, all testing takes place directly on the players. Bought rave reviews and testimonials.
Rating: 3/10

Rise Programming Language

I present to you my own programming language called – Rise. A transpiler from Rise to JavaScript is currently available.

You can see and use it at the link below – Rise in JavaScript (ECMAScript 5 dialect):
https://gitlab.com/demensdeum/Rise

I also present to your attention a demo application written entirely in Rise:

Rise Demo Application Source Code:
https://gitlab.com/demensdeum/RiseDemoApplication

You can write to me if you have any ideas, suggestions, comments on the new language.

The core of corruption

It was hard to breathe, the helmet display showed the oxygen supply for exactly half an hour. During this time, Revil planned to get to the city center and get the Death Mask. There was a caustic green fog around, there was no air here, half-dead people wandered the streets, creatures captured by the influence of the Mask.
The sound of footsteps spread through the empty rooms of the abandoned building, Revil moved carefully, not knowing what to expect in the most dangerous place of Technolab.

Don’t move !
by M-Delcambre

The city has long been captured by corruption, but not the earthly one that enslaves the minds of politicians and the power-hungry. The corruption of the Death Mask captures the minds of living beings, they lose control over themselves and begin to live for the sake of fulfilling its desires. All who fell under the influence began to believe that they would receive eternal life as a result of their service. To maintain control, the Mask requires a constant influx of new slaves, the capture of new territories with pure beings.

To the northwest, Revil saw the blue glow that Alice had told him about, in the center of which was a huge building created by the Technolab builders. A strange, grotesque pile of protruding frames and mechanical parts, as if created by a madman, it was terrifying in its appearance.

Revil climbed down from the building window to the street to continue his journey, when suddenly he heard a loud slam of metal limbs on the asphalt. Turning around, he saw the Demon in front of him – a biomechanical creature with three human heads, similar to a spider, slowly moving towards him. A circle of a strange mirror-black color appeared in the sky, it was difficult to tear your eyes away. A deafening roar of a city siren was heard, calling the slave creatures to help the Demon. Things were damn bad, but Revil had a surprise prepared for this case…

Saber-Plus C++ IDE

I started developing my own IDE for C++ – Saber-Plus. The main ideas of the new IDE are to be simple, fast and *helpful* in development. At the moment, the source code is available under the MIT license on GitHub, Qt is used to work with the UI. In the future, I plan to transfer all development related to C++ to Saber-Plus – the Death-Mask game will definitely be migrated. More details on the points:

  • Simple – it is planned not to add more than necessary – for example, not to contain source control clients, built-in terminal and similar things. The functionality is focused only on editing the code, analyzing errors. The editor code should be divided into simple classes that correctly perform their part of the work (Unix-way)
  • Fast – refers to both the IDE code base and the editor behavior itself. All actions in the IDE should be as fast as possible, even such often long and complex ones as creating/importing projects.
  • Assistant – analysis of typical errors when writing, compiling code. Correction of errors, warnings at the user’s request. The idea is to add analysis of the application assembly on a specific platform and output of reference information on the installation of the necessary libraries, components.

To build the editor for your operating system, you need to install Qt 5 SDK, download the IDE code from the repository, open the Saber-Plus.pro file in Qt Creator and run the build:

https://github.com/demensdeum/saberplus

Simple TensorFlow Example

I present to your attention the simplest example of working with the framework for working with Deep Learning – TensorFlow. In this example, we will teach the neural network to determine positive, negative numbers and zero. I entrust the installation of TensorFlow and CUDA to you, this task is really not easy)

To solve classification problems, classifiers are used. TensorFlow has several ready-made high-level classifiers that require minimal configuration to work. First, we train the DNNClassifier using a dataset with positive, negative, and zero numbers – with the correct “labels”. At a human level, the dataset is a set of numbers with the classification result (labels):

10 – positive
-22 – negative
0 – zero
42 – positive
… other numbers with classification

Next, training starts, after which you can feed in numbers that weren’t even included in the dataset – the neural network must correctly identify them.
Below is the complete code for the classifier with the training dataset generator and input data:

import tensorflowimport itertoolsimport randomfrom time import timeclass ClassifiedNumber:__number = 0__classifiedAs = 3def __init__(self, number):self.__number =numberif number == 0:self.__classifiedAs = 0 # zeroelif number > 0:self.__classifiedAs = 1 # positiveelif number < 0:self.__classifiedAs = 2 # negativedef number(self):return self.__numberdef classifiedAs(self):return self.__classifiedAsdef classifiedAsString(classifiedAs):if classifiedAs == 0:return "Zero"elif classifiedAs == 1:return "Positive"elif classifiedAs == 2:return "Negative"def trainDatasetFunction():trainNumbers = []trainNumberLabels = []for i in range(-1000, 1001):number = ClassifiedNumber(i)trainNumbers.append(number.number())trainNumberLabels.append(number.classifiedAs())return ( {"number" : trainNumbers } , trainNumberLabels)def inputDatasetFunction():global randomSeedrandom.seed(randomSeed) # to get same resultnumbers = []for i in range(0, 4):numbers.append(random.randint(-9999999, 9999999))return {"number" : numbers }def main():print("TensorFlow Positive-Negative-Zero numbers classifier test by demensdeum 2017 (demensdeum@gmail. com)")maximalClassesCount = len(set< /span>(trainDatasetFunction()[1])) + 1numberFeature = tensorflow.feature_column. numeric_column("number")classifier = tensorflow.estimator. DNNClassifier(feature_columns = [numberFeature], hidden_units = [10, 20, 10], n_classes = maximalClassesCount)generator = classifier.train(input_fn = trainDatasetFunction, steps = 1000).predict(input_fn =  inputDatasetFunction)inputDataset = inputDatasetFunction()results = list(itertools. islice(generator, len(inputDatasetFunction()["number"])))i = 0for result in results:print("number: %d classified as %s" % (inputDataset["number"][i], classifiedAsString(result["class_ids"][0 ])))i += 1randomSeed = time()main()

It all starts in the main() method, we set the numeric column that the classifier will work with – tensorflow.feature_column.numeric_column(“number”) then the classifier parameters are set. It is useless to describe the current initialization arguments, since the API changes every day, and it is imperative to look at the documentation of the installed version of TensorFlow, not rely on outdated manuals.

Next, training is started with an indication of the function that returns a dataset of numbers from -1000 to 1000 (trainDatasetFunction), with the correct classification of these numbers by the sign of positive, negative or zero. Next, we feed in numbers that were not in the training dataset – random numbers from -9999999 to 9999999 (inputDatasetFunction) for their classification.

In the end, we run iterations on the number of input data (itertools.islice), print the result, run it and be surprised:

number: 4063470 classified as Positivenumber: 6006715 classified as Positivenumber: -5367127 classified as Negativenumber: -7834276 classified as Negative

iT’S ALIVE

To be honest, I’m still a little surprised that the classifier *understands* even those numbers that I didn’t teach it. I hope that in the future I’ll understand the topic of machine learning in more detail and there will be more tutorials.

GitLab:
https://gitlab.com/demensdeum/MachineLearning

Links:
https://developers.googleblog.com/2017/09/introducing-tensorflow-datasets.html
https://www.tensorflow.org/versions/master/api_docs/python/tf/estimator/DNNClassifier

Breaking Bitcoin

This note is not a call to action, here I will describe the weaknesses and potentially dangerous aspects of Bitcoin and blockchain technology.

Vulnerable center

The principle of Bitcoin and blockchain is to store and change a common database, a full copy of which is stored by each network participant. The system looks decentralized, since there is no single organization/server on which the database is stored. Also, decentralization is given out as the main advantage of the blockchain, it guarantees that nothing will happen to your bitcoins without your knowledge.


The Block-Plague Principle by Elkin

In order for the blockchain to work, it is necessary to make sure that each user downloads the latest copy of the blockchain database and works with it according to certain rules. These rules include the implementation of the Bitcoin mining principle, receiving a percentage of each transaction upon confirmation (transaction fee) of the transfer of funds from one wallet to another. A user cannot draw 1,000,000 bitcoins for himself and buy something with them, since the amount of money in his account for other users will be unchanged. Also excluded is the option of withdrawing funds from someone else’s wallet only within your database, since this change will not be reflected in other Bitcoin users and will be ignored.
The vulnerability of the current implementation is that the bitcoin wallet is located on the server github, which completely covers the advertising slogans about decentralization. Without downloading the wallet from a single center – the developer’s site, it is impossible to work with bitcoin, that is, at any time, the developers have full control over the network. Thus, the blockchain technology itself is decentralized, but the client for working with the network is downloaded from a single center.
Attack scenario – let’s say a code is added to the wallet to withdraw all funds and cash out to a third party account, after which any user of the latest version of the wallet will lose all bitcoins automatically (without the possibility of recovery). I doubt that many wallet owners check and assemble it from the source code, so the consequences of such an attack will affect most users.

The majority decides

Blockchain is a decentralized p2p network, all transactions are confirmed automatically by the users themselves. Attack scenario – it is necessary to obtain 51% of the network in order to ignore confirmations of the remaining 49%, after which the attacker gains full control over bitcoin/blockchain. This can be achieved by connecting computing power that overlaps the rest. This attack scenario is known as 51% attack.

Guess me if you can

When you first launch the wallet, the computer generates a pair of – private and public keys to ensure its correct operation. The uniqueness of these keys is extremely high, but there is an option to generate keys using the code word – the so-called – brain wallet – . A person stores the keys in his head, he does not need to make a backup of the wallet.dat file, because at any time the keys can be regenerated using this code word. Attack scenario – the attacker selects or learns the code word, generates a private-public key pair and gains control over the wallet.

Just copy

The private-public key pair is contained in the wallet.dat file. Any software that has access to this file has access to the Bitcoin wallet. The defense against such an attack is to add a code word that the user must remember and enter for all operations with the wallet. After adding the code word, the attacker will need to have wallet.dat and the code word to gain full control.
It is also worth adding that when you enter a code word, it goes into the computer’s memory, so any hardware and/or software vulnerabilities that allow you to read *someone else’s* memory will allow this code word to be read by virus software.

System error

Hacking Bitcoin’s encryption algorithms will instantly lead to its death. Let’s say there is an error in the implementation of the algorithms, the attacker who finds it gets either full or partial control over the blockchain. Also, the encryption algorithms used in Bitcoin are not protected from hacking with the help of future quantum computers, their appearance and implementation of quantum algorithms – will put an end to the current implementation of Bitcoin. However, this can be solved by switching to post-quantum encryption algorithms.

Nixenv Linux Console Utilities for Windows

I have assembled my own alternative to MSYS, this set includes utilities coretools + git + cmake + make + adds msvs msbuild to the PATH environment variable. This set of applications is necessary for those developers who are accustomed to developing on the Linux platform, and they need to build an application for Windows from the command line using Microsoft Visual Studio. Download:

https://www.mediafire.com/file/s5yf75blfslkbym/nixenv.exe

https://www.4shared.com/file/QyjJXBaJca/nixenv.html

Install, change paths in nixenv.bat file and run it.

Flame Steel Battle Axe

From today I start developing an editor for the game framework – Flame Steel Battle Axe.

The editor allows you to edit scenes for the Flame Steel Game Toolkit game framework.
I chose the relatively young Java-based Kotlin language to try it out in combat conditions.

You can follow the progress in the repository:
https://github.com/demensdeum/FlameSteelBattleAxe

WebGL + SDL + Emscript

I ended up porting Mika to WebGL using SDL 1 and Emscripten.

Next I will describe what needed to be changed in the code so that the assembly in JavaScript would complete successfully.

  1. Use SDL 1 instead of SDL 2. There is currently a port of SDL 2 for emscripten, but I found it more appropriate to use the built-in emscripten SDL 1. The context is initialized not in the window, but with SDL_SetVideoMode and the SDL_OPENGL flag. The buffer is drawn with the SDL_GL_SwapBuffers() command
  2. Due to the peculiarities of execution of cycles in JavaScript – rendering is moved to a separate function and its periodic call is set using the function emscripten_set_main_loop
  3. Also, the assembly must be carried out with the key “-s FULL_ES2=1
  4. I had to abandon the assimp library, loading the model from the file system, loading the texture from the disk. All the necessary buffers were loaded onto the desktop version, and passed to the c-header file for assembly using emscripten.

Code:
https://github.com/demensdeum/OpenGLES3-Experiments/tree/master/9-sdl-gles-obj-textured-assimp-miku-webgl/mikuWebGL

Articles:
http://blog.scottlogic.com/2014/03/12/native-code-emscripten-webgl-simmer-gently.html
https://kripken.github.io/emscripten-site/docs/porting/multimedia_and_graphics/OpenGL-support.html

Model:
https://sketchfab.com/models/7310aaeb8370428e966bdcff414273e7